Wednesday
Oct262011

Daisychain Sampler D

Just a quiet monochromatic letter today.

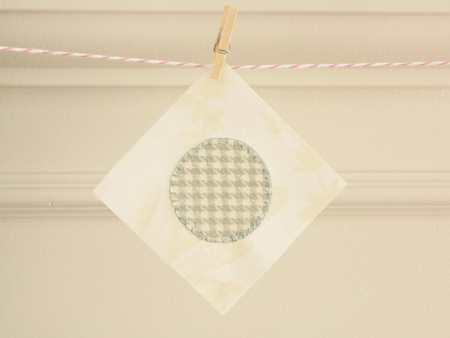
Mostly in stem stitch - my favorite stitch of all time.  I love its twisty, rope texture.  And it doesn't betray uneven stitches like the backstitch.  (That backstitch is SUCH a tattletale ... gets me EVERY time!)  

Another new thing for me - making a lazy daisy stitch curved by tacking it down. 

Very clever, Miss Alicia!  Thanks for teaching me something new.  I'm more smarterer than I was yesterday. ;)

Tuesday
Oct252011

Farmer's Wife Quilt Along Week 22

Gray and White

Oh it feels so good to finally start talking about the incredibly beautiful new Flower Sugar line by Lecien.  'Cause that means I can ALSO start adding all their yumminess to my FW blocks!  :) 

Actually I've been sneaking a few bits in here and there.  Someone even busted me on Flickr a few weeks ago!

I'm dying over this new soft gray color and how nicely it plays with all the blocks I've made so far. 

#11 - Broken Dishes

I picked this adorable - and I mean ADORABLE - print with tiny flower posies because I knew it would make this "Broken Dishes" block look just like shards of a formerly pretty little piece of china that had a tragic accident - probably due to a clumsy husband or child.

# 25 - Cups & Saucers (sort of)

When I was looking for a companion block for this week, I was struck by "Cups & Saucers" and thought it would go nicely with "Broken Dishes" - theme-wise.   And then when I looked at this print with a lovely & delicate doily design, I got it into my head that I wanted my cup and saucer to sit on a doily.   (Am I the only one who thinks like this?)

So I proceeded to fussy cut my BUTT off (correction, it's still there ... too bad) my BRAINS out (more accurate) and came up with this little cutie.

To preserve the edges of the doily, I decided to not add the corner triangles (hence the "sort of").

I dunno.  The jury is out on whether my doily idea was a success.  I still like the concept, but the roses aren't totally symmetrical and they make the block look a little wonky.  What do you think ... keep or toss?

Ok everyone.  I leave for Quilt Market tomorrow (eeep!), but I've written a few posts to keep you company while I'm gone so it'll be like I'm still here at Pretty by Hand, kay?  ;)

And if you happen to overhear a dad saying to his two daughters "Don't tell mom ... " they probably belong to me.  Apparently a lot of fun is had when I'm not around. ;)

Monday
Oct242011

Mini-Series Monday #6

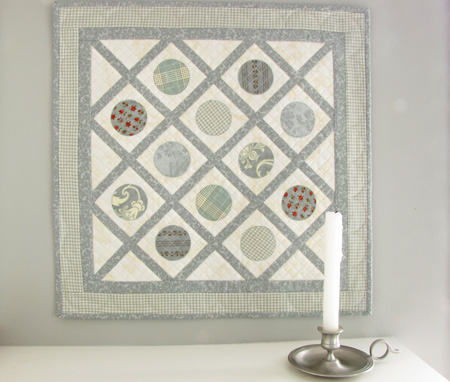
Sugar Rush.  YUM! 

And may I just say what a lovely coincidence it is that this post follows my Sugar Sugar Market Bag post!  One might even accuse me of planning it that way. ;)  (Actually, it really was a coincidence.)

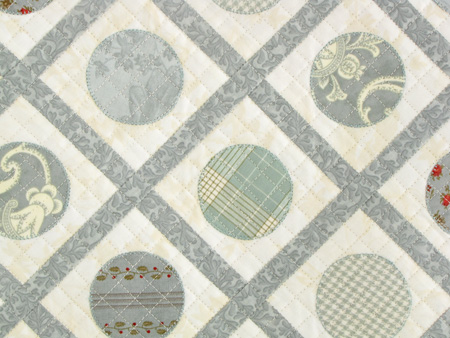
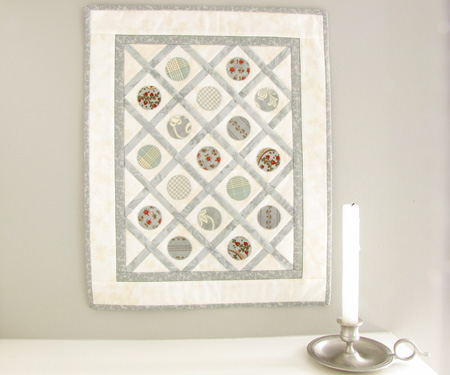
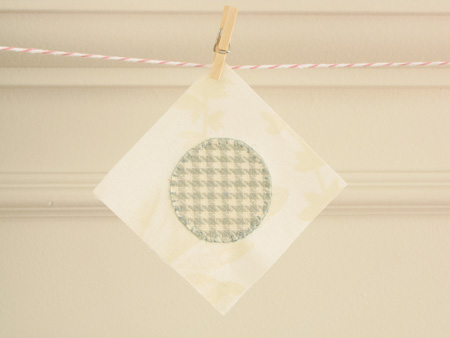
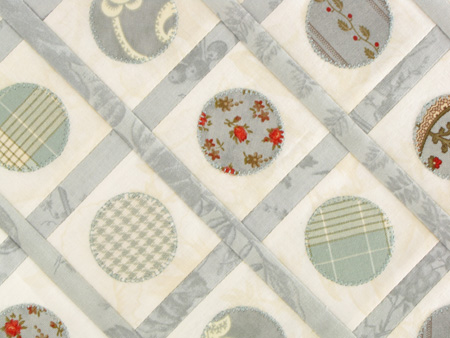
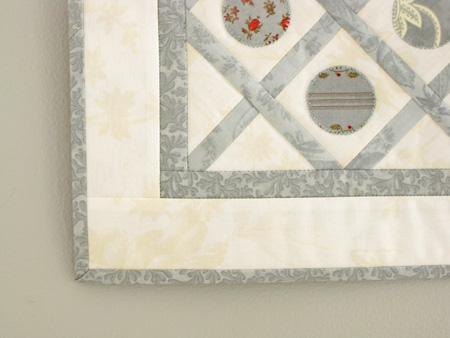
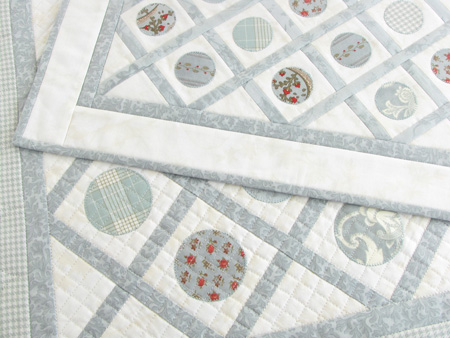
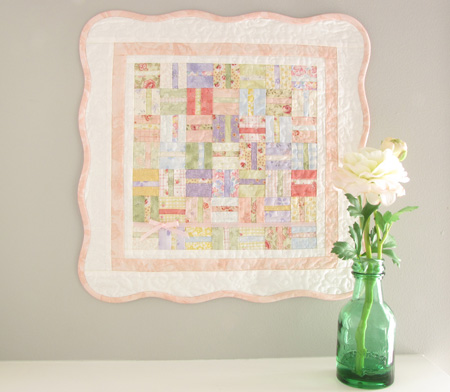
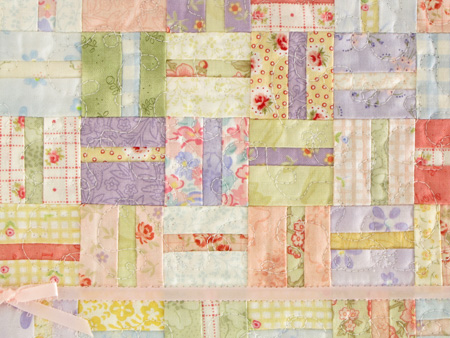
Ok.  Truth?  I pieced this 14" x 19-1/2" quiltlet top together ...

BEFORE I made this bag

In fact, it was the quiltlet that gave me the IDEA for the bag.

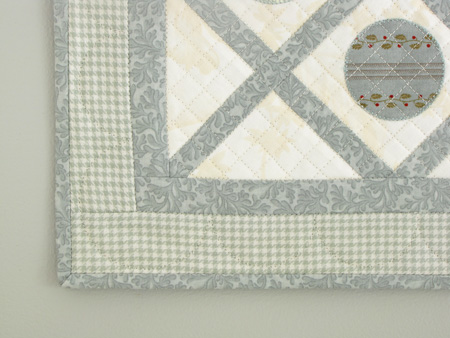
These stripes are 5/8" wide, finished.

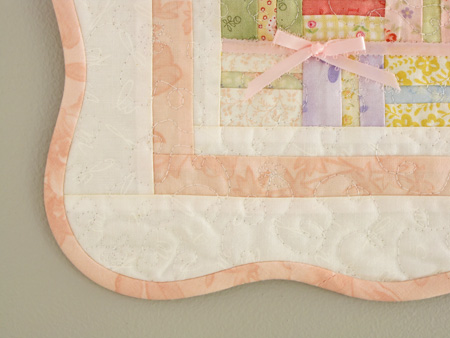
But I waited until I could do some seriously cute flower FMQing to finish it.  I kinda felt like I was making eyelet with those tiny little flower!  Love them.

However, life wasn't all sweet with this quiltlet.  While working on my newly acquired FMQing I decided to use a "washable" - in quotation marks - fabric pen to help me sew a nicely proportioned flower.  Well, that disappearing ink pen did NOT live up to it's end of the bargain.  It left a blue mark right in the middle of the flower.  (It looks worse in real life.)

No worries, though.  I just cut out another flower center and appliqued it right on top!  You can't keep this quilter down for long. ;)

The back was almost as fun as the front - albeit a little bit wonky-doodley.

Next Monday is Halloween so I have a "Holiday Special" of sorts planned for you.

Boo!

Friday
Oct212011

"Sugar Sugar" Market Bag

Once again, I am left feeling totally awed and so deeply grateful for all your lovely comments and overwhelming support yesterday. 

(Where WERE you guys when I was in Grade 3 and Linda would pour sand in my hair at recess?  Or in Grade 5 when Kathy would threaten to beat me up after school?  Or in high school when the "sorority" girls would make fun of my clothes?)

:)

I would have replied to each and every one of you, but on account of the snot factory still working overtime in my head, my husband being out of town all week, a last minute trip to the Doctors yesterday (for my daughter - nothing serious) and helping someone study for a test last night, I just didn't have it in me.  PLEASE accept this one-size-fits-all hug and great big deep-from-the-bottom-of-my-heart thank you from me.  Kay?

Something else unexpected happened yesterday too.  I got a photo (professional and EVERYTHING) of my Sugar Sugar quilt from the lovely Lecien people.  So I get to show it to you after all!  (gulp) 

(I even FMQed it all by myself with my newly acquired fancy schmancy flowers!)

I was surprised by a few comments yesterday suggesting a Sugar Sugar quilt-a-long for the new year.  (Thanks Bonnie & Ina!)  I would absolutely LOVE to host one.  If you would be so kind to let me know via a comment if you'd be interested, I'll look into it and let you know. :)  The pattern is free and will be downloadable from the Lecien website in a few weeks, I think.  I'll keep you posted.

Ok. Now on to today's business. :)

I know, I know.  There are like a bazillion patterns out there called "Market Bag".  And they usually mean SUPER market or FLEA market or FARMER's market.

But not this one.  Nope.  This bag was designed BY me FOR me for QUILT Market!  (5 more sleeps!!!)

I had so much fun making my last Quilt Market bag based on a quilt designed by Camille that ... well, I decided to do the same thing based on my own quilt design this time.

The white background fabric (with PINK polkadots) is from Lecien's basics line.  Same goes for the green dot I used for the handles & bottom and the tiny yellow & green gingham flower centers.

I even fussy cut a little flower and made it into a "designer" tag.  Just because. ;)

And I don't know WHAT it is about this polkadot / floral print, but I LOVE it.  If I were brave - and about 20 years younger - I'd make myself a dress out of this print.  Seriously.  Like a cute little sundress with a sweetheart neckline, cap sleeves, fitted bodice & a big twirly skirt, possibly tiered.  Or maybe more of a pencil skirt with a slit up the back. 

I couldn't use it for the pieced strips or appliqued flowers because the white background would just melt into the white panels.  But I pieced together almost every last bit I had to make this lining.

So I'll be lugging this "Market" bag around Houston like a great big walking, talking "Flower Sugar" advertisement.  Hopefully people will see it, fall in love with Flower Sugar the way I have and ask me where to get it.  I will send them STRAIGHT to Lecien!   :)

Thursday
Oct202011

OK. Did This Really Happen?

Hello friends! 

Today I have some exciting/terrifying news, depending on what frame of mind I'm in at any given moment.  I'm super proud of this news and I've been wanting to share it with you for a while, but I'm also kinda sorta shy & nervous about it too.

Deep breath.  Here goes.

This past summer, Lecien got wind of my deep and abiding love for their Flower Sugar line.  (See evidence of this love affair here, here and here.)  If you've been reading my blog - even for just a little while - this romance is no secret.

Well, Lecien asked me - ME for heaven's sake! - if I would design a quilt using their NEW Floral Collection Flower Sugar fabric line and make it for their Houston Quilt Market booth to promote the line launch. 

Oh and could I also write up a FREE pattern for it to be posted on their website so absolutely ANYONE in the whole entire WORLD could make it if they wanted? 

Would I? 

Oh WOULD I!!!!!!

First, I squealed (be careful what you wish for). 

Then I freaked out 'cause - more often than not - I'm totally silly and forget to act like an adult. 

And then reality hit and I had a small panic attack - omg, I am SO not qualified to do this!

I'm not an artist.  I'm not a designer.  I've never even taken an art class!  (Well I started Art 10 in high school, but only because I heard they were teaching Ukranian Easter Egg making ... so I made an egg - white, pink & purple instead of the traditional black, red & orange - and then I dropped out.) 

Where was I?  Oh yes, spewing my insecurities.  I'm just a stay-at-home mom who's been quilting for ... 25 years? and has made over ... 200 quilts? ...   and has a deeply rooted passion for fabric and color and quilts of all kinds ...   ...   ...  ok, well, maybe I do have enough skills & experience to pull this off. 

Maybe.

But what if no one likes it?  What if everyone hates it?  This quilt isn't just for me and my little home, it's for the world to see and judge.

"Listen you ... (what's my new self-talk name? Oh yeah ...) you Smokin' Hot Quilter Chick, you can do this.  You've made how many quilts?  And you've taught how many classes?  And you have a very strong sense of what YOU love, right?"

So then I took a deep breath, grabbed a pencil and started doing what I have loved doing for decades - playing with beautiful fabric for the pure joy of making something pretty that makes my heart happy.  All I can do is my best, right?  So that's what I did.

Oh, and there's also the thing about the Marketing Director of Lecien.  She is highly regarded and I'm pretty sure she wouldn't have asked if she didn't have confidence in me.  I had to trust that.  (Thank you, Nireko!)

Well, I made the quilt in August and shipped it off early September.  I'd show you pictures of it now, but I was a TOTAL MAJOR DOOFUS NIMROD and forgot to take pix.  I know.  I hang my blogging head in great shame over that boneheaded move. 

But I CAN tell you it's called "Sugar Sugar".   Here are a few of my preliminary sketches (and leftover flowers).  In the end, I ditched the vines - they made the design too busy.

And here are the fabrics I used for the quilt.  At least I can show you these. :)

See, I decided to take a very analytical approach to the design.  The purpose of this quilt is to show off the fabric collection.  For me, that means using all the colors and as many of the 27 prints as possible (I managed 25).

The pattern also had to fit on one page so the design needed to be simple for easy and short instructions. 

Then I got it in my head that I wanted the subject of the quilt to reflect the fabric collection somehow ... you know, so people could associate the quilt design with "Flower Sugar".  Easy.  Appliqued flowers ... dozens of them!!

I also played around with the idea of adding "sugar" as a design element, but I quickly abandoned unsatisfactory attempts to depict sugar cubes and/or heaping teaspoons and settled on the idea of flowers scattered on fields of white ... sugar. ;)

Isn't this collection just delicious?

Oh, and I can also show you the trimmings from all 75 appliqued flowers. :)

When I get the quilt back (that may be a while, I just found out it's going on a little Trans-Pacific tour to Japan and then China for a few more trade shows!) I'll be able to show you pictures of it then ... and I'm sure I'll be subjecting you to a few more photos of it hanging in the Lecien booth with me standing in front of it - you know, for my mom.  ;)

Tomorrow I'll show you something else I made with this fabric.  You can probably already guess what it is if you've been following my blog for a while.  You know ... with all the BAGS I've made?  And the LITTLE things I've made? 

Come on you guys, I simply canNOT put these dots any closer together for you! ;)

Wednesday
Oct192011

Drastic Measures Were Needed

... to get all my FWQAL fabrics under control.  Well, maybe "drastic" is a bit melodramatic, but measures of some kind were needed for sure!

See, I'm using about 50 fabrics for my blocks - each one accumulating scrap bits as the weeks go by - and keeping them all organized without actually organizing them was becoming impossible. 

Whut?

I know, I should know better by now, but sometimes I still think wishing alone will make something happen ...

I had FW fabrics all over my sewing room ...

  • on the cutting/sewing table
  • on the chair(s)
  • on the ironing board
  • on the shelf under the ironing board
  • on the floor under the ironing board

... you get the picture.

I'd organize the fabrics a bit, but as soon as two more blocks were made I had a discombobulated mess on my hands again.  AAAGH!

So.

After a nice hot cup of tea and a generous serving of something very bad for my arteries, I calmed down and got into organizing mode.  This is what I came up with ...

I have some clear plastic shoebox sized containers that are so full of fabric and other crafting stuff the lids won't fit on them.  (Let you whose house ALWAYS looks EXACTLY like a Martha Stewart magazine photo throw the first stone ...)  ;)

So I thought to myself, "Self, why don't you use those lids as trays?"  I answered, "Good idea, Self!" 

Hmmm, it's just occurred to me that I need a better self-talk name, like ... oh, I don't know ... how 'bout "Smokin' Hot Quilter Chick"?  tee hee

If we ever meet in person and you actually call me that, I just might kiss you on the mouth. 

Kidding!

(Probably.) 

Ok, I am kidding.  I won't even share straws with my family.  (I have a germ thing ... )

But I WILL blush and giggle like a school girl!

Now where was I?  This Smokin' Hot Quilter Chick just got all flustered.

Oh yes, lids.  How perfect is THAT to have 3 lids - 2 colors for each? 

Oops.  Right.  I forgot about my beloved stack of white on whites. 

They just sort of float as needed.

So now I can make a few (or several) blocks, quickly tidy up and shove my little stack of lids somewhere ... wherever they will stay put. 

Usually on the floor ... underneath something ... like a chair or table or ironing board ... because the boxes that go with these lids are already hogging all the space in the cupboards.

Sigh.

Tuesday
Oct182011

Farmer's Wife Quilt Along Week 21

Red, Pink, Green & White

#23 - Country Farm

This block should be renamed "Goldilocks" and it nearly did me in.  Here's the first version.

Too wishy-washy.  I didn't like how the yellow points just melted into the background and really all you see is a bright red hourglass.  But it wasn't a total waste of time, I guess.  It helped me decide on red star points for sure.

Here's the second version.

Too bright.  This time I was smart enough to not assemble the entire thing.  Good thing, too.  I just wasn't feelin' the love for the pink/yellow hourglass. 

Third version.

Aah.  Juuuuuuuust right. :)

#28 - Four Winds

I was a little nervous about this one - with 64 pieces (the largest being 3/4" finished) I didn't want to have to remake it because just because I didn't like the colors.  But I knew right away that the pinwheel in the middle needed to be red and the background would be white.  So I just gambled on the pink & green and ... voila!

I'm really happy with this one too. 

Ok, I've had quite a few requests lately to see a "group shot" of my blocks so here you go. :)

What does it all measure up to? 

According to my ruler, 2 and 3/4" of pure Farmer's Wifey, Flower Sugary goodness! ;)

Monday
Oct172011

Mini-Series Monday #5

Gee you guys, thanks so very much for all the tutorial love!   I'm so thrilled you like it and that it may have inspired some of you to give it a try ... dreaded zipper and all! :) 

I'm sorry I didn't get to replying to you all these past few days ... I've been laid up with a nasty head cold.  For the first time in 15 years of marriage, my husband and I have been sick at the same time.  We usually "tag" each other with our germs.  Haha!  Actually, more like hack hack, snork snork, please pass the Kleenex & Tylenol and "Honey, I'll pay you a million dollars to fix dinner for the children" ... he did it for free. ;)

                         *          *          *          *          *          *

Ok.  I'm fairly certain that if you don't already think I'm a special kind of crazy in the quilting department, this post will convince you FOR SURE.

Original "Spot-On" ...

Mini "Spot On" ...

Love it.

I'm particularly proud of the scalloped top-stitching around the border.

But at 19" square - and finished blocks at 3" - I just kept thinking, "Not small enough."

Soooooooo,

I kinda sorta accidentally went and made another one.


Itty-Bitty "Spot On" ...

I know! Even CUTER, right?!  She's only 14" x 17-1/2".

And the blocks are 2" (finished).

I decided to omit top-stitching altogether for this one.  (Except for around the inner border, just to keep everything together.)

Omg I can hardly STAND the cuteness of it all. 

(Is it ok for me to say that about my own stuff?  Does it sound obnoxious?)

Hope you enjoyed today's double-feature. ;)

Up next week?

Gimme some sugar ... lots and lots of sugar!  :)

Friday
Oct142011

Across the Pond Pouch Tutorial


Here is my tutorial on how to make a cute zippered pouch from this free Moda pattern called "Across the Pond Pouch" by Cabbages & Roses.

You will need to download & print the pattern first (for the template).  

SUPPLIES

  • 36 squares, 2-1/2" x 2-1/2"
  • 1 FQ (or 2 rectangles, at least 6" x 11")
  • 1 zipper, 9" (dress weight, nonseparable)

  • **2 squares, 2" x 2" (for zipper tabs)
  • **2 batting scraps, at least 6-1/2" x 12-12"

**These items are not part of the original pattern, but I used them for my pouch and this tutorial shows you how to add them.

36 Squares

Since Christmas is fast approaching, I thought I'd do a little multi-tasking here - write a tutorial AND get some Christmas sewing done.  You don't mind, do you?  So I dug into my "Roman Holiday" (3 Sisters Moda) leftovers and cut my 36 squares.

To make the cutting go faster, I selected 18 prints and cut 2 squares from each print.  But you could just as easily cut all 36 squares from only 2 prints to make a true checkerboard or dive into your scrap bin and go crazy!

Fat Quarter

The pattern calls for a FQ for the lining, but you really only need 2 rectangles that are at least 6" x 11".  They don't even have to match.  I often 'scrap up' the inside of bags and cases.

9" Zipper

I favor dressweight zippers for a few reasons:

  • teeth can be stitched over without breaking a needle
  • easily cut/trimmed with scissors
  • best variety of colors for matching to your fabric

I also suggest a non-separable zipper (doesn't open at the bottom).

**2 Squares, 2" x 2"

Here's a look at a zipper tab on my pouch - the little blue triangle patch of fabric. 

**2 Batting Scraps, 6-1/2" x 12-1/2"

I wanted my pouch to have a more quilted look so I added batting.  This is a great way to use up some of those trimmings from a quilt.

PATCHWORK ASSEMBLY

After you've cut your squares, lay 18 squares into 3 rows of 6 squares each. 

If you have any favorite prints, put them in the middle 4 spots of the top row (will be along the zipper) and the middle 4 spots of the middle the row.  The corner squares will all but disappear when the pouch is assembled.

Once you have the squares arranged, sew them together into 6 columns of 3 squares each.  I chain-pieced mine.

Press these seams in opposite directions to get nice nesting joints.

Now sew the 6 columns together.

Press the seams to one side.

Repeat to make another patchwork panel.  Your panels should measure 6-1/2" x 12-1/2" each.

**QUILTING THE PATCHWORK (Optional)

If you want to quilt your patchwork, now is the time to do it.  Simply lay one patchwork panel on a batting piece, pin in place and quilt as desired.  Repeat for the second panel.

I did a cross-hatch - simple and effective.  But really anything goes.

USING THE TEMPLATE

Trace the template onto a sheet of paper and cut it out.  Lay it on a patchwork panel - centered - and pin in place. 

Cut it out and repeat for the other patchwork panel.  The more accurate you are with centering the template, the easier it will be to line up your seams from one side of the pouch to the other.

And see what I mean about the corner squares almost disappearing?

Cut out 2 lining pieces with the template.  I layered mine and cut them both out at the same time.

I used a rotary cutter, but you can use scissors, if you prefer.

MAKING THE DARTS

If you've never sewn a dart, don't panic - they're super easy.  Trust me. ;)

Here's a dart cutout.

Take one patchwork piece and fold it - right sides together - so the two dart edges line up.  Pin.

Starting at the outside edge, sew a 1/4" seam - keep sewing a straight line past the cut point of the dart until you get to the folded edge. 

Press your dart seams towards the middle of the pouch.

Repeat for the other patchwork piece.

And both lining pieces.

**ADDING ZIPPER TABS - Optional

This next bit here is not in the pattern.  If you want to skip it, just scroll down to the ZIPPER INSTALLATION section.  It's ok.  We can still be friends. ;)

You need the 2 extra 2" squares.

Fold the squares in half and press.  Fold in half again and press.  This second fold is referred to as the "second folded edge".  Brought to you by the Queen of the Obvious. ;)

Lay the second folded edge to the inside of the metal tab on the bottom end of the zipper. (Right-side view)

Open the second folded edge and pin the fabric in place.  (Right-side view)

(Wrong-side view)

Sew along the fold mark.  (Right-side view)

(Wrong-side view) MAKE SURE YOU DON'T HIT THE METAL THINGY ON THE ZIPPER WITH YOUR NEEDLE ... IT WILL BREAK.  (Just sayin'.)

Refold the tab. 

Baste the raw edges.

To position the second tab, measure 7-1/2" from the fold of the first tab and mark that spot with a pin.  This is where the fold of the second tab will be located.

FIRST OPEN THE ZIPPER HALFWAY!  And keep it open.  Kay?

Attach the second tab the same way as the first.

Trim away the excess zipper.


ZIPPER INSTALLATION

All right.  Still with me?  Ok.  :)

First, attach your zipper foot to your sewing machine.

Fold the zipper in half and mark the center point with a pin.  With right sides together, lay the zipper along the top edge of one body piece - matching the center points - and pin in place. 

Pin the rest of the zipper to the body.

Sew the zipper to the body.

With right sides of the body (with the zipper) and lining together, center one lining piece and pin along the top edge. 

The zipper should be sandwiched between the patchwork and the lining.

Do not sew directly on top of your previous seam (red thread shown below).  Rather sew just a tiny bit towards the top edge (blue thread shown below).

You should have something that looks like this ...

Repeat the above to add the second body and lining pieces to the other side of the zipper.

Center the second body piece onto the zipper - right sides together - and pin in place.

Sew the second body to the zipper.

Next, center the second lining piece to the zipper - right sides together, and pin in place.

Sew the second lining to the zipper.

Now you should have something that looks like this ...

and this.

Press the body pieces and the lining pieces away from the zipper.

FORMING THE POUCH

Home stretch. :)

Now you're going to place the patchwork pieces right sides together,

and the lining pieces right sides together. 

Pin all the way around, doing your best to line up the darts and patchwork seams. 

The zipper will be a little weird so try to make the teeth go towards the patchwork side and the seam allowances towards the lining side.

Leaving a 4" opening along the bottom of the lining, sew all the way around the entire pouch, lining and patchwork.

When you get to the zipper teeth, stop with your needle down and do a little pivot to make a "V". 

Trim the "V" point seam allowances.

Turn the entire pouch right side out through the 4" opening.

Stitch the opening closed, either by hand or machine.  (I'm lazy.)

Turn the lining into the pouch.

Add a little scrap of fabric or a ribbon to the zipper pull.

Tada!!!

Now go make a few dozen.

You will be fully stocked with lovely hostess/teacher/friend/neighbor/mother/daughter gifts for the entire Christmas season!

Thursday
Oct132011

Half-Moon Case

Ok.  I switched things up again for the third mini-charm pack. :)

I love half-moon shaped cases.  This is another design I've been turning around in my head and I loved putting it together with the prettiest little fabrics - "Northcote Range" by Cabbages & Roses for Moda.  It's so new the yardage just arrived here a few days ago!

It reminds me so much of vintage 80's Laura Ashley.  (I miss Laura Ashley!)

Layout - I added a little "Paris Flea Market" (older Moda) for the zipper binding and a few "Simplicity" (more Moda) scraps for the finger tabs.

What can I say, I'm a creature of habit - more cross-hatch.  I did it 'cause I WANTED to, not 'cause I HAD to ... ;)  C'mon, it's a classic! 

Zipper pull (again ... I just LOVE adding these!)

Pretty in pink ...

Not just for pencils.  I think this case looks quite "cosmetic-ey" with the romantic-style fabrics ... which I LOVE!

But big sister really wanted this one and she's not old enough for makeup.

So I'm pretty sure it's going to school to hold scissors & glue sticks ... in very sophisticated style! ;)

From these little 2 1/2" squares ...

to these pretty, useful & versatile pouches.

Who says size matters?  ;)

It feels so good to make something out of (almost) nothing. 

Projects like these really make me wonder why on earth I'm afraid to use my fabric. 

Geez Louise!  I can make super cute things that don't use up much fabric at all!

Wednesday
Oct122011

Daisychain Sampler "C"

Ok.  I LOVE this letter.  I've never done this weaving through a backstitch before and it is SO COOL!  It reminds me of ricrac.

And I can't even TELL you how much I love this color blue.  I know, I know, it's not pink.  But aside from that, I get such a strong emotional response when I see this color. 

I can't explain it.  I just love it so much.

Omg, I just noticed how this letter matches my blog banner!  Haha!

Tuesday
Oct112011

Farmer's Wife Quilt Along Week 20

(Pink), Green, Blue & White

#20 - Churn Dash

I really needed to use this blue again. 

This is just a nice, quiet, happy little block.  I need to remember to make more quiet ones to balance out all the ...

#26 - Cut Glass Dish

... SUPER LOUD ONES like this!

Actually this version was a reject.  I didn't like how the large blue squares looked so blotchy with the large flowers.  Plus one of my seams was all wonky :( .

So I switched the fabric and straightened the seam.

MUCH better!

I love how all the tiny triangles in this block are so reminiscent of the name, "Cut Glass Dish".  I was a little disappointed with this one at first.  I thought it would have looked sharper with a solid white instead of the white/blue print for the triangles.  But then I got to thinkin' ... you know how when you look at cut glass and you can sorta see through it, but not really?  I think this lacy blue/white print makes the "cuts" look semi-transparent. 

I like thinking of things that way - assigning meaning in relatable ways.  Like with the Chrysler Building last week.  Don't know why.  Just the way I roll, I guess. :)

Monday
Oct102011

Mini-Series Monday #4

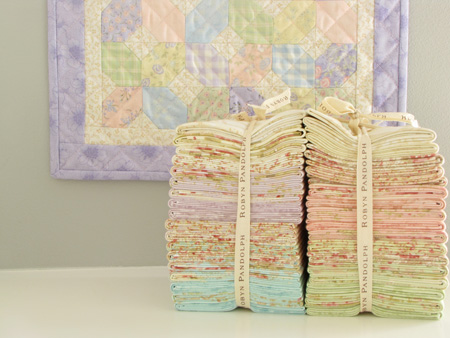
I had to make this week's mini-quilt (or rather "quiltlet") in fabrics OTHER than the original 'cause I didn't have enough leftover charm squares and I didn't want to cut into my big FQ bundle of Scarborough Fair by Robyn Pandolph.  (You know you wouldn't do it either ... !)

So I scrounged around in my stash and found a little stack of leftovers from Moda's Sandy Gervais' "Whispers in the Wind" line (from a few years back).

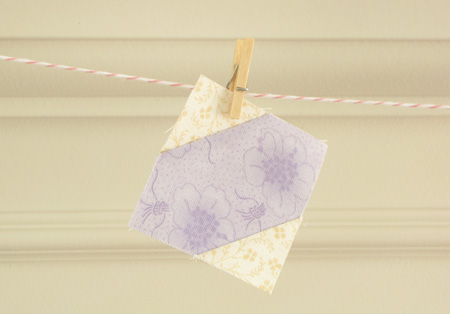
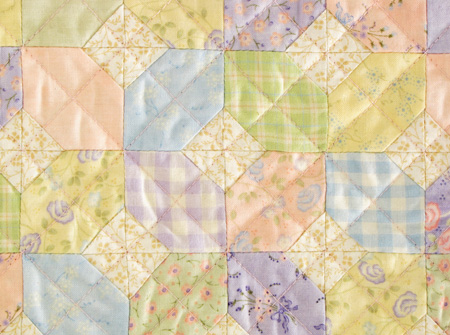
This block is 2" square unfinished.

You know, I like purple well enough ...  

'Cept for here.  LOVE it here!

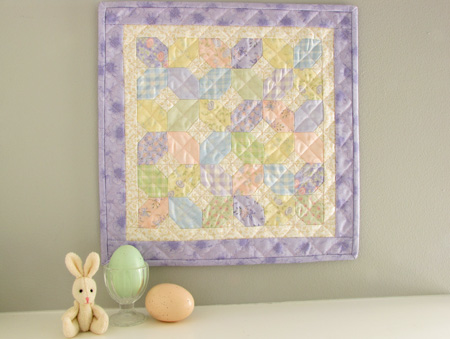
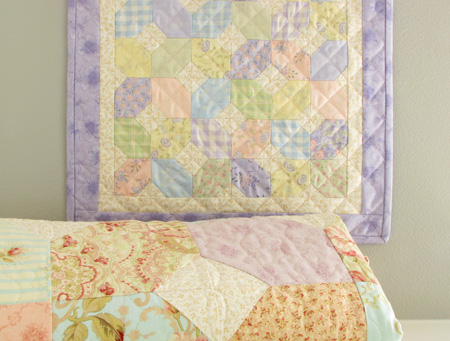
This quiltlet (12-1/4" square) was too small for me to comfortably copy the same FMQing as on the big one. 

So I ... you know ...

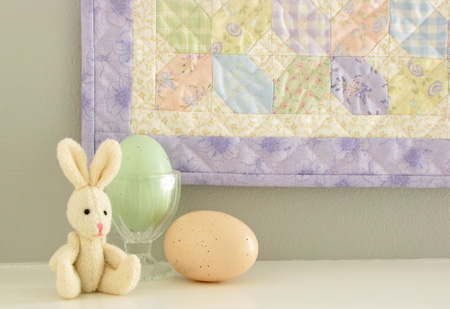
And if this quilt doesn't make you think of Easter, you are dead inside. 

Just sayin'.
Tune in next time for "Spot On". 

Rumor has it there's a double feature next week ... wink wink, nudge, nudge!

Saturday
Oct082011

The Unforgiven

Remember this back in April?

Yeah, I totally take back the "almost forgive" part and change it to "definitely do NOT forgive".

She killed our 3 year old Elm Tree. 

Well, just the top half.  But the arborist says it will only grow sideways now and really should come out.

Sorry.

Friday
Oct072011

Mystery Block of the Month

Here's my Block #4 from the Fat Quarter Shop's Designer Mystery BOM - (my first BOM EVER).  So far, so good. 

Now I'm all caught up.  Yay!  Hurry up Block #5 and please show up in my mailbox soon ... I need to make you!

Today's confessional:  thanks to this block, I've decided to change the border fabric that came with the finishing kit from a taupe/red floral to this delicious pink strawberry print.  What?  Me change a pattern?  In favor of pink?  I know.   I should warn you to sit down before springing something like that on you ... ;)

This block was designed by the super talented Anne Sutton of Bunny Hill Designs.  Of all the quilts I've made in my lifetime (over 200 so far) one of my favorites is this ...

"All Things Christmas" is a beautiful quilt made with a fun combination of piecing, applique and a little bit of embroidery & sweet embellishments like ribbons & buttons ... all framed with an elegantly scalloped border.  Home run, in my opinion. :)

In fact, this very quilt is responsible for all this fabric winding up in my stash!

Happy Thanksgiving weekend to all my fellow Canadians!

Thursday
Oct062011

Puzzles - Quilting Style

As a mom, I think doing puzzles is very good exercise for growing brains.  When I was a kid, I loved doing puzzles.  It was one of a VERY few things I was better at than my big sister.  Which is probably why I liked doing them ...  ;)

So naturally, I encourage my girls to do things that are good for them but that I also like to do. 

Now, I'm trying not to force quilting on them.  I don't want them to hate it because I made them do it.  But if I can figure out how to trick them into doing something educational while wrapping it up in a pretty package full of fun, I will.

That's right, I'm sneaky.  I'll admit it. 

Here's my latest triumph.

Math puzzles.

Cleverly disguised as last week's FW blocks.

Can't believe I didn't think of this earlier!

Oh, and did I mention they both had so much fun they're BEGGING me to cut more blocks?!  Mwah ah ah ah ... some things about parenting you just can't put a price tag on!

The only downside to this whole exercise?  Watching them man-handle the triangles.

Bias cut edges should be respected.

And feared.

Wednesday
Oct052011

Daisychain Sampler "B"

At the risk of being rude, I didn't like this letter ... at first.  Lemme 'splain.

Compared to all the other letters in this alphabet sampler - which I would describe as romantic, feminine, antique, etc. - B just sorta looked out of place to me. 

I didn't get it - which is not altogether unusual.  I often arrive late to the party.

I just kept thinking about this movie from 1980.

Now don't get me wrong.  I have a VERY strong sentimental attachment to Xanadu - or more specifically the soundtrack.  LOVE ELO!  You can go ahead and make fun of me.  I don't mind.  It will just make me feel sorry for you that you can't appreciate the total awesomeness of this song.


But back to the letter ... it just didn't say Daisychain Sampler to me.  I even contemplated coming up with a different design.

Then suddenly the heavens opened and I had a moment of clarity.  It's not electric disco, you doofus who still spends WAY too much time in the 80s, it's CLASSIC ART DECO ... as in the Chrysler Building!

Just gotta spin it for myself sometimes and then I'm all good. :)

How do you like me now?  Darlin' I like you just fine.  ;)

Again, pattern available here and COSMO floss available here ... just sayin'.

And now I'm going to hit replay on that video like 10 more times and sing & dance in ways that make my husband so embarrassed to admit he knows me, let alone married me.

Tuesday
Oct042011

Farmer's Wife Quilt Along Week #19

Pink, Yellow, Green, Blue & White

#7 Birds in the Air

I think I want to marry this block.  Seriously.  If I didn't hate triangles so much I'd make a giant king-sized quilt with this exact block repeated over & over & over ...


# 18 Century of Progress

Ok.  The fabric placement in the book for this block TOTALLY drove me banana-nuts-crazy. 

I mean, I get random, deliberate mistakes and even symbolism (I think I read on the Flickr Group that this block has something to do with a Ferris Wheel), but I usually crave symmetry.  And this block just looked like ... like ... well, like someone should stop messing around and fix it already!  So that's what I did for mine. 

And I'm not the only one with this problem 'cause I've seen LOTS of FWQALers alter this block too.  I consider myself to be in good company here. :)

So with all due respect to the very lovely person who designed this block, here's my "century" that progressed to "symmetry".

Monday
Oct032011

Mini-Series Monday #3

Tee hee!  Isn't this just the cutest little block EVER?

She's 1-3/4".  Unfinished.

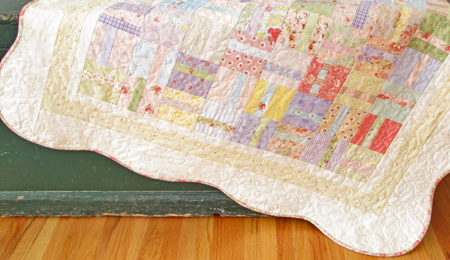
I love this "quiltlet" version if Sweet Pea - 15" square.  It just might be my favorite ...

... scalloped edge and all!

Here's the big version.  Both were made with scraps from my unruly scrap bin.

I did have a little oopsies with this one, though.

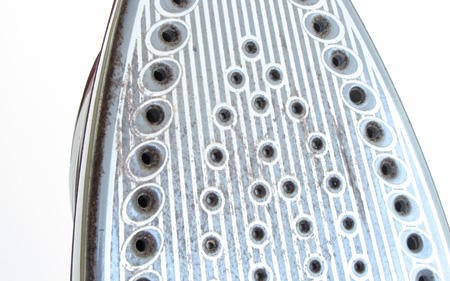
Kay.  You know how you need to clean your iron sometimes?  (I use a lot of fusible batting & fusible interfacing so my iron gets gummed up regularly.) 

But you never remember it's dirty until AFTER you've turned it on and it's hot.  So you tell yourself you'll clean it when it cools down and you go ahead and use it ... 'cause, you know ... you hate waiting.  And then forget to clean it later.  Vicious cycle ensues and the iron gets dirtier and dirtier.

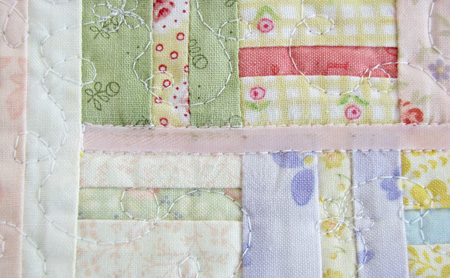
Yeah.  That's what happened here.  And I paid for it ... dearly.  See the ugly black marks on the ribbon?  They look worse in real life.

Ugh.

But I'm also a scrapbooker.  And scrapbookers know "there are no mistakes, only opportunities for embellishing."  Ladies, am I right? 

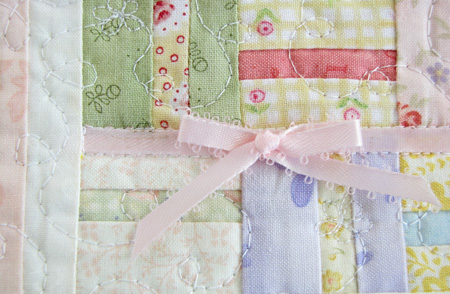
Lucky me, this quilt includes a sweet little bow detail.  And it just so happens to hide (most of) the stain.

Yay!  (But if you're familiar with this pattern, just you never mind that the bow is supposed to be on the OTHER side.  It took me a while to come to terms with this ... necessary modification.)

And check out the itty-bitty FMQ flowers!

Eeeep! :)  AND I have a clean iron now too ... for a few days.

Teaser ...

Friday
Sep302011

Repentant Quilter

Forgive me Father for I have sinned. 

I've never participated in a Block of the Month Club.  Ever.  In 25 years of quilting.  Can you believe that?

I've watched many a BOM Club project unfold - from a safe distance.  Some even start out promising.  Really promising.  But just when I think I'll jump onboard, a super ugly block and/or fabric shows up and I turn and run for the hills, thanking my lucky stars that I escaped unharmed.  I chalk it up to an (un)healthy dose of "perfectionism" (or control-freak-ism ... whichever you prefer.  I'll admit to both). 

I started one once - about 15 years ago.  The first block had a white background.  But then the next one had a cream background.  Couldn't do it.  So I quit.

If I'm gonna spend that much time on a quilt, I want to like it when it's done.  I don't want to make (yet another) quilt I can't stand and then end up giving it to my brother who lives in a cabin in the woods ... where no one who knows me will see it.  Ever.  Because it's so ugly. 

(No, he's not the unabomber.  He owns a ski lodge/touring company for extreme skiiers.  And his "cabin" is a pretty nice lodge ... )

See, I've long referred to myself as a "Line Whore" - meaning I'm most comfortable making quilts with fabrics that are all from the same designer/collection.

I know, I know.  Some quilters think that's a lazy/boring way to sew.  I understand.  And I deeply respect those who can throw fabrics from here and there and everywhere into a quilt and have it be the most stunning thing EVER.  I envy that skill.  But I can't help it.  I've just made too many costly mistakes and I'm very gun shy about experimenting.

Told ya ... perfectionism at its worst.  :(

Well, I finally found a BOM - "Mystery" no less - that I'm excited to do.  It uses a TO-DIE-FOR fabric line ...

I mean, come ON.  HOW can you NOT love Strawberry Fields by Fig Tree

And with blocks designed by super awesomely nice & talented ladies like these?

Can't go wrong. :)

This Club started in June but I'm a little behind because I entered my address wrong when I signed up online (graying hair strikes again!) with the Fat Quarter Shop and ... long story short, I got my first block & finishing kit 3 months late. 

TOTALLY MY FAULT! 

And the ladies at Fat Quarter Shop were so nice about it too.  (Thank you, Cheryl!)  :)

The best thing about this BOM for me?  I joined with a friend of mine.  We got together a few days ago to play catch up.  She was nice and waited for my stuff to arrive in the mail. 

I have good friends. ;)

Oh, and the OTHER best thing about this project?  We split a fat quarter bundle ... in case we screw up. 

Any excuse to buy more fabric, right?!  (Although it's possible I threatened her into the joint purchase). 

But I'm finding that the fabric provided in the monthly kits seem to be VERY generous so we probably didn't really NEED the extra fabric.  (Since when did I ever worry about NEED?) tee hee

Block #1 - by Bonnie of Cotton Way & Camille of Thimbleblossoms

Block #2 by Pam of Heartspun Quilts

Block #3 by Carrie of Miss Rosie's Quilt Co.

These blocks were fun to make ... but at 12" they are positively GINORMOUS next to all my little 4.5" FWQAL blocks!