Entries in Project Simplify (69)

Monday
Nov142011

Mini-Series Monday #9

Ok, first things first.

The random number generator found my winners for Anne Sutton's patterns and the adorable Miss Henrietta Squirrel.  (I've already notified the winners so if you see your name, check your email ...)

#1. Allie the Scottie Dog - Andrea

#2. Baby Bear - Karen H

#3. Henrietta the Squirrel - Louise

#4. Lollipop the Lamb - Richla

#5. Scooter Pie the Cat - Chris

#6. Snickerdoodles the Bunny - Katie

#7. Finished Henrietta - Becky

Congratulations Ladies!  And thank you everyone so much for entering!  I know it sounds cliche to say I wish you could all win, but I really do feel that way. 

This giveaway was so much fun, I just might have another one coming up soon ... stay tuned, kay? ;)

               *          *          *          *          *          *          *

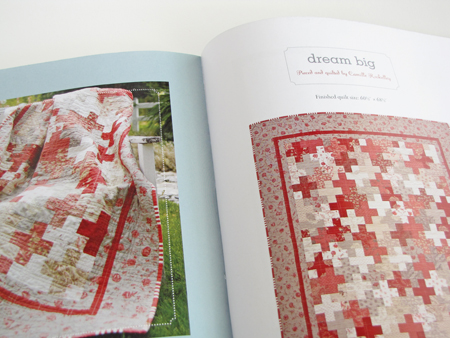
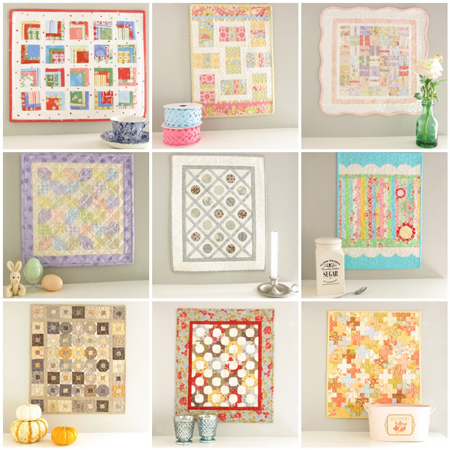
And now for the last episode of Project Simplify, the Mini-Series.

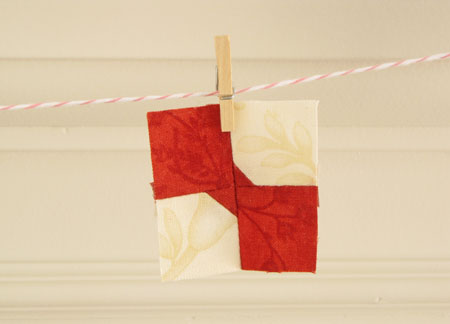
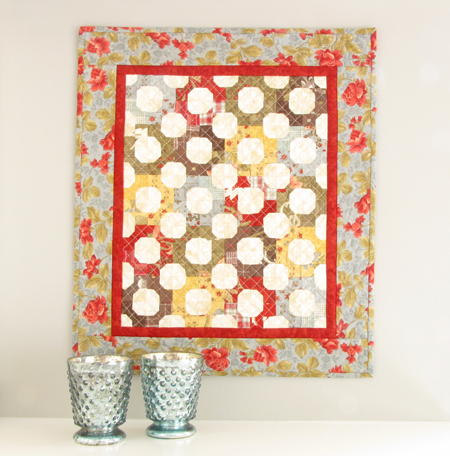
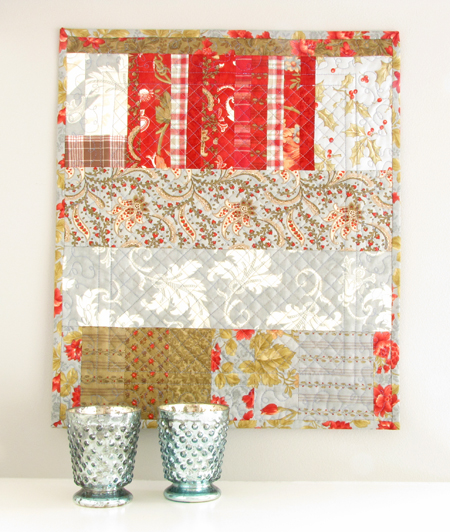
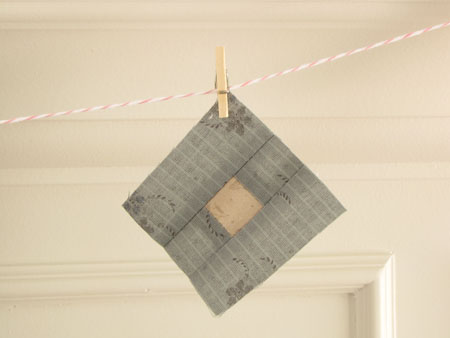
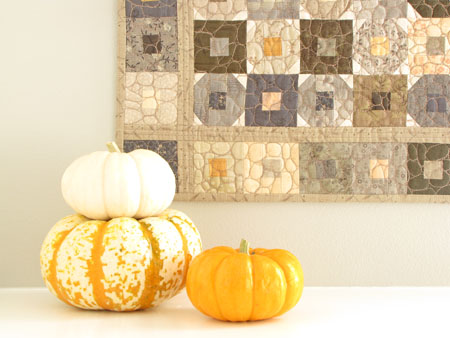
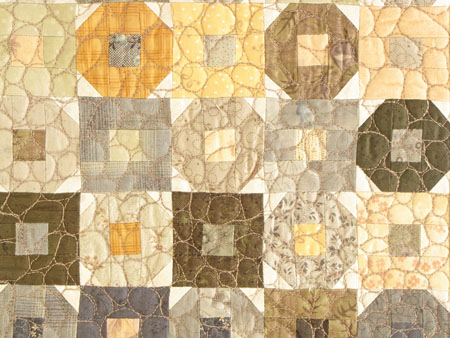
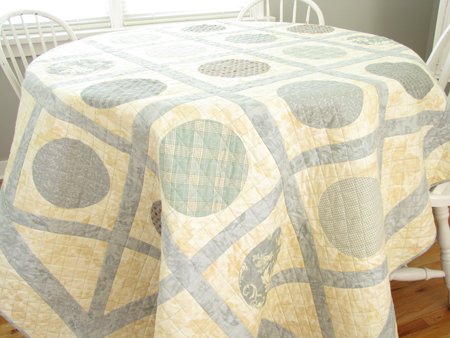
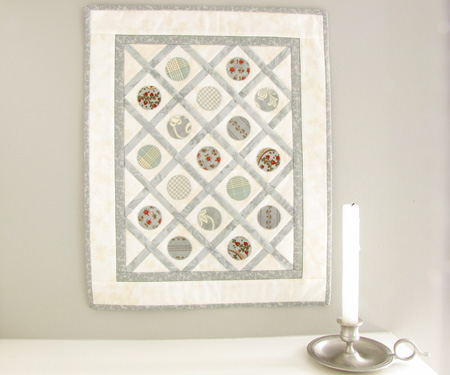
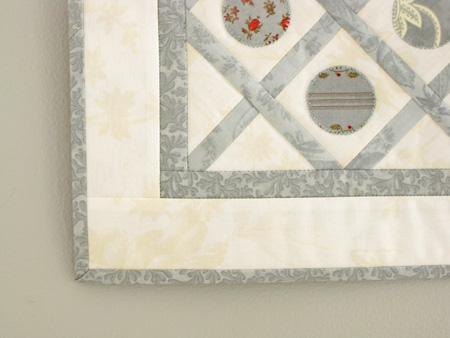
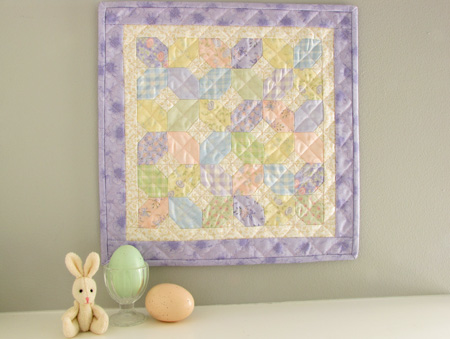
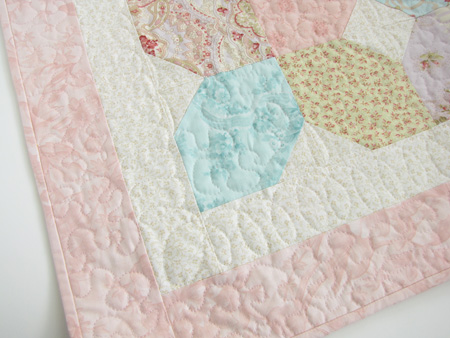
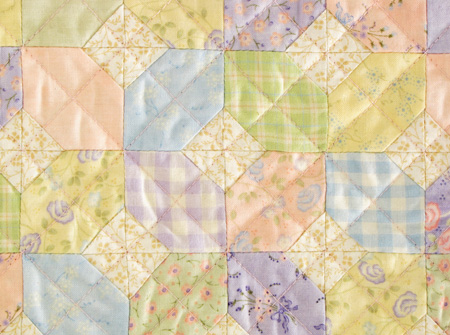
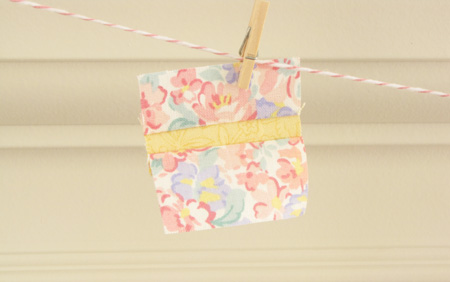
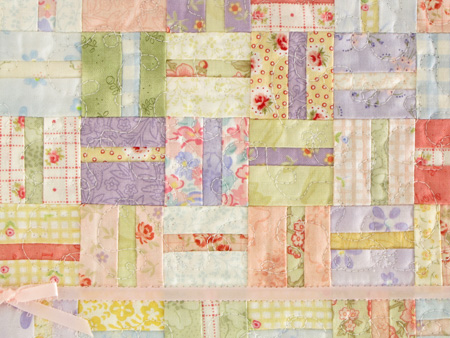
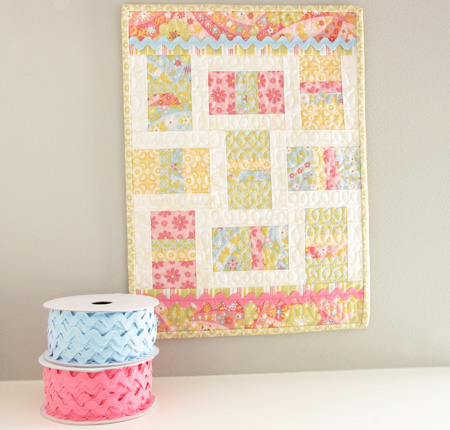
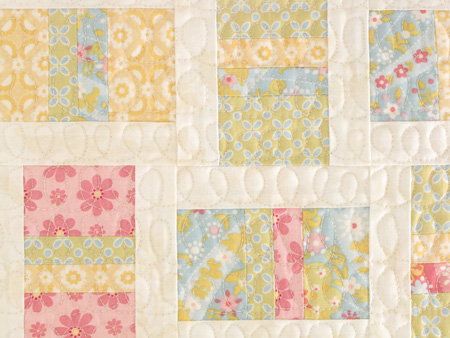
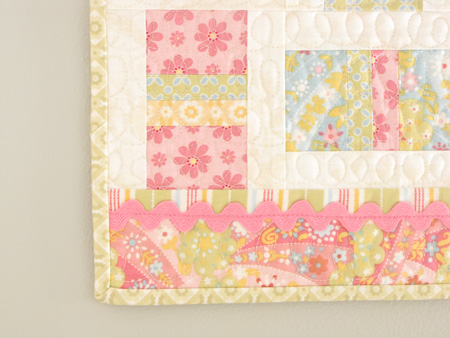
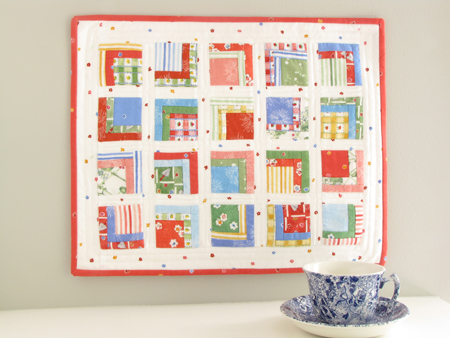
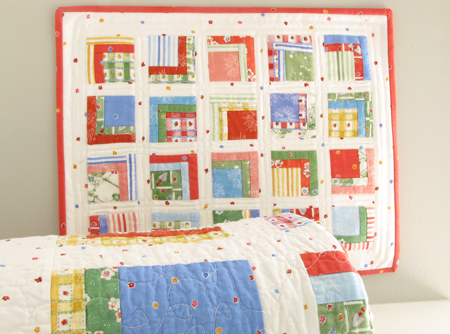
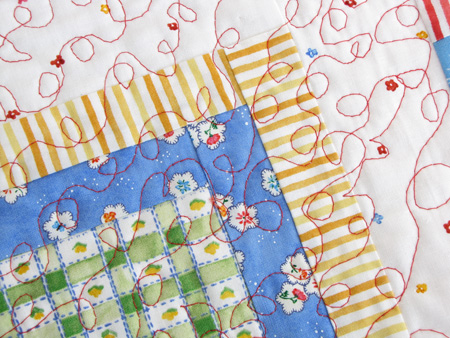
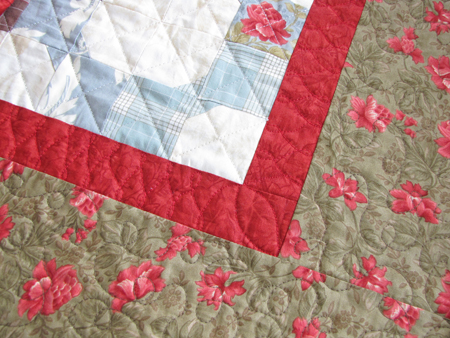
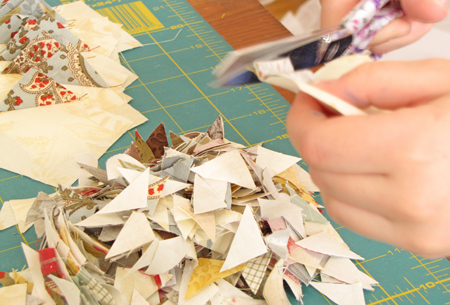
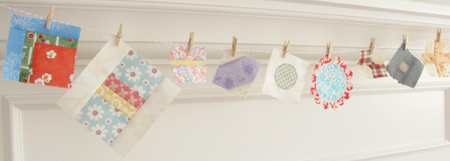
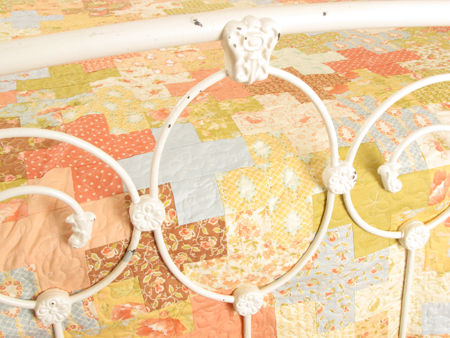
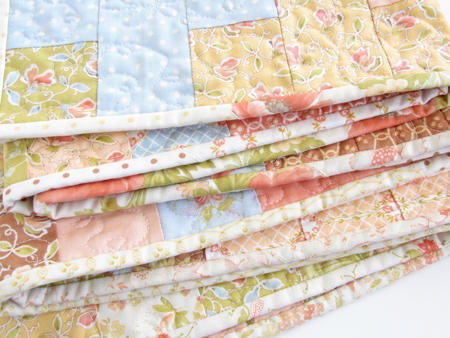
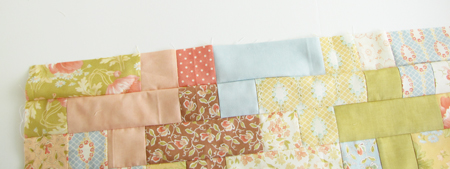
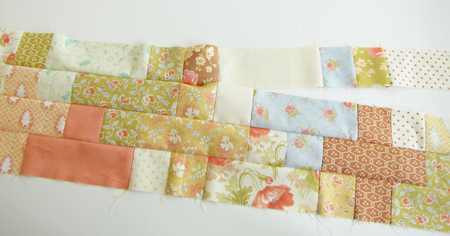
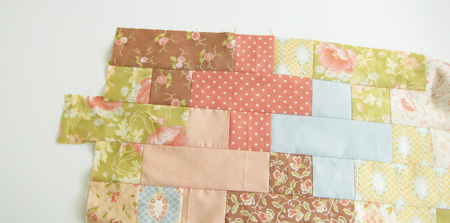
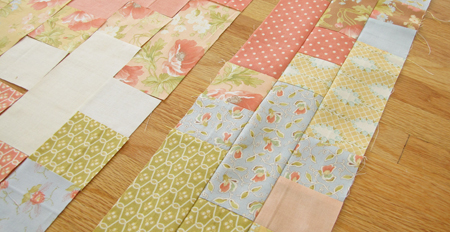
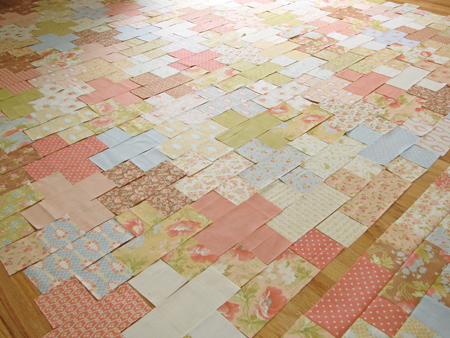
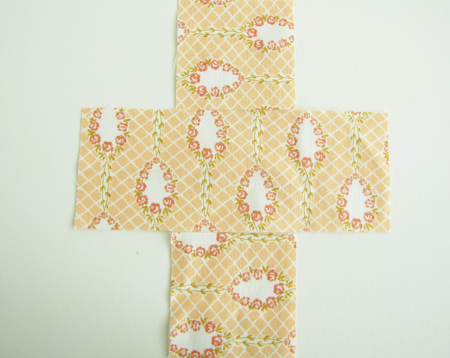
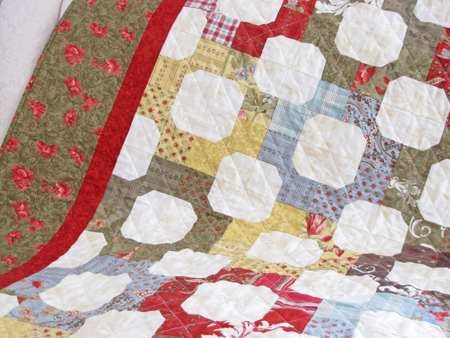
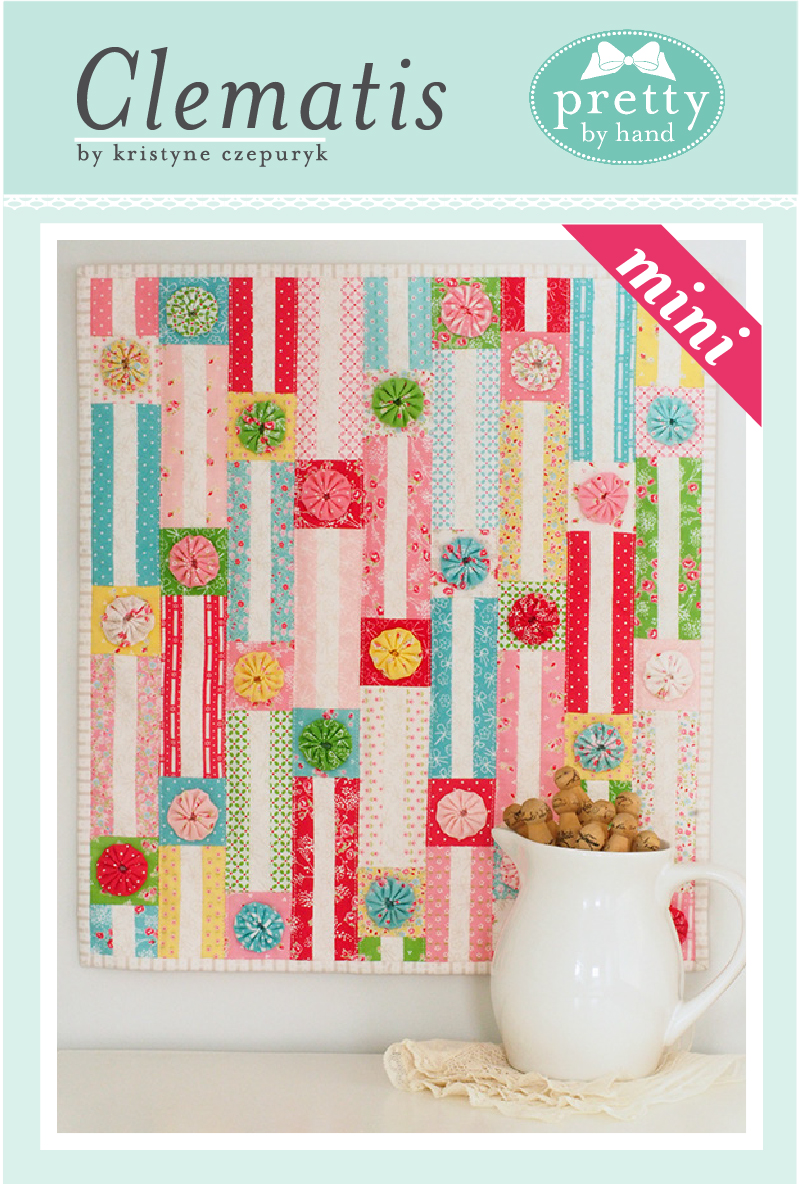
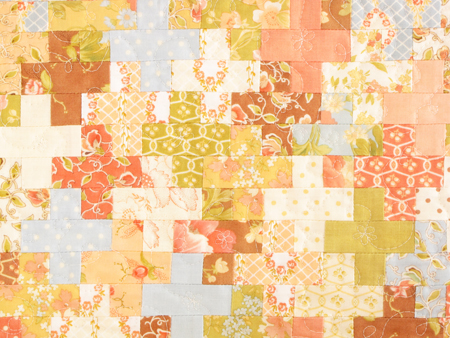
Dream Big - or Little (15.5" x 17.5"), as the case may be.

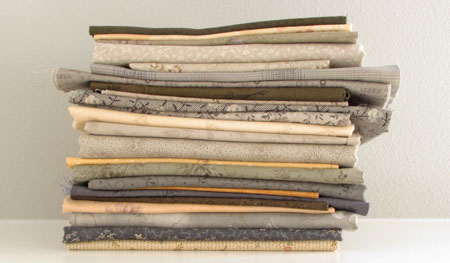
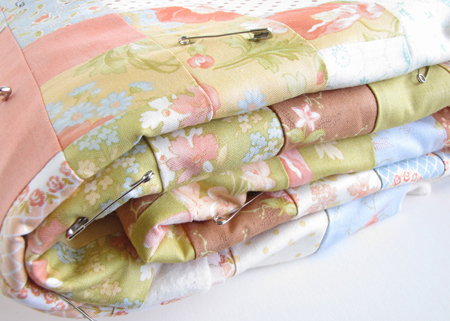
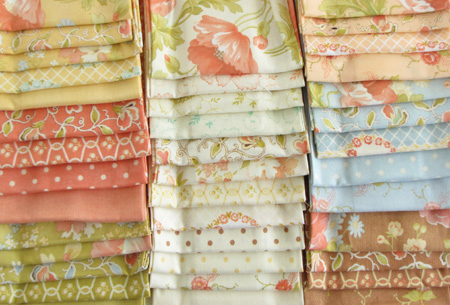
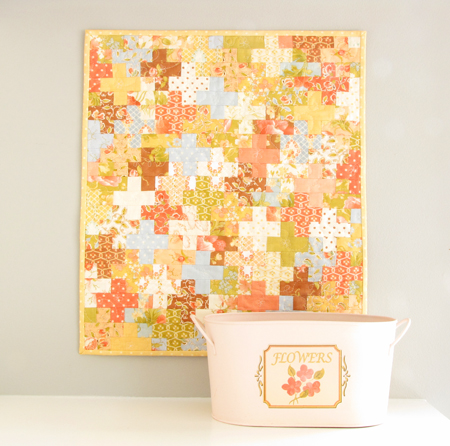
As with the big one, this quiltlet (love that name!) is borderless.  I had just enough scraps to eke out this little one.

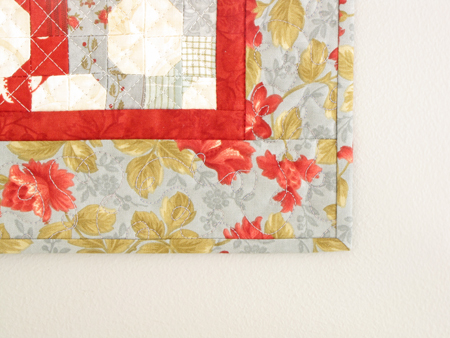
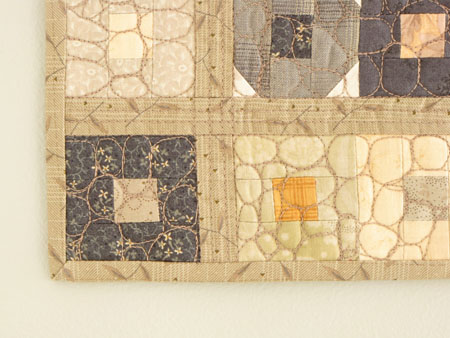
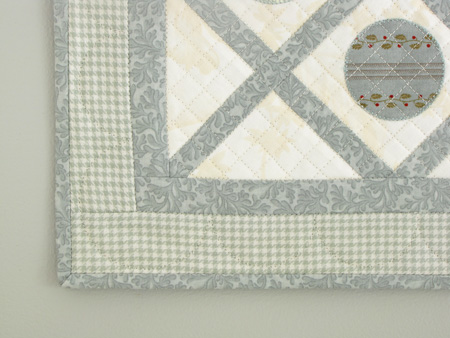
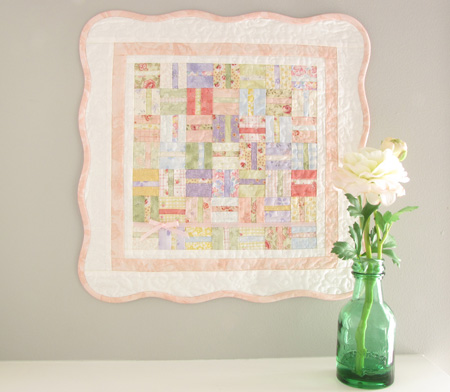
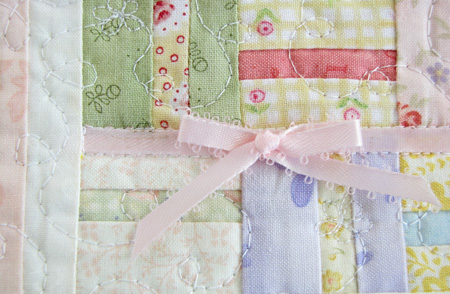
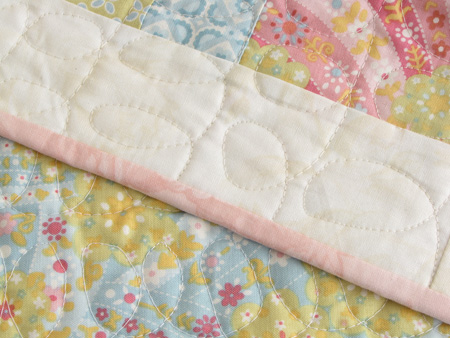
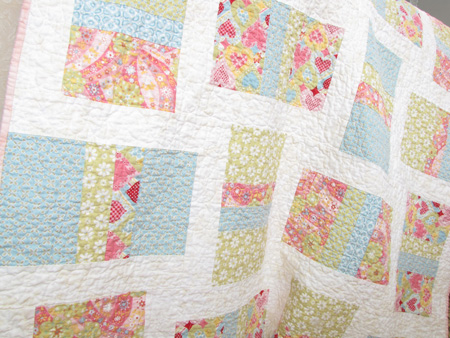
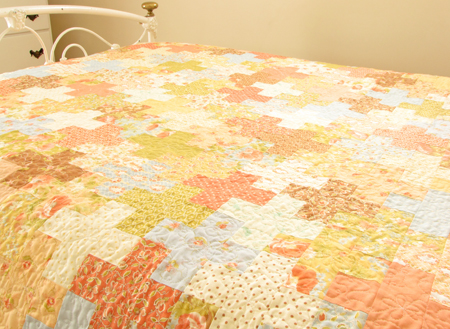
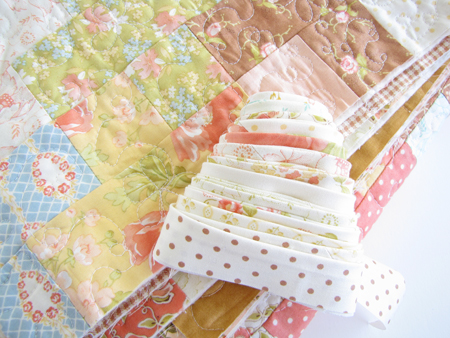
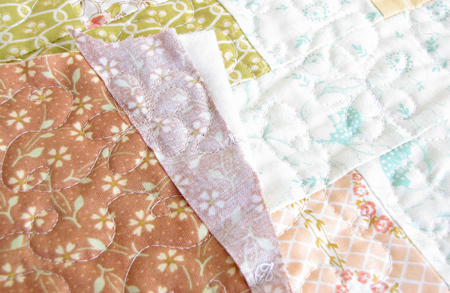
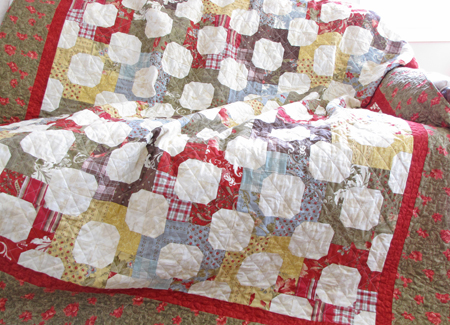
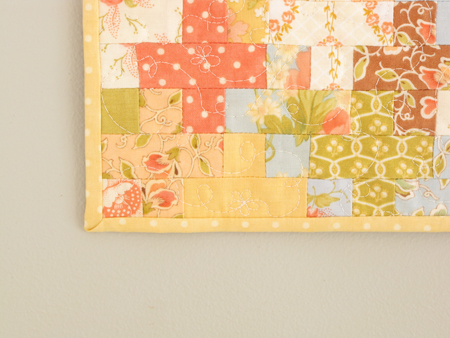
Because it's so small, I didn't scrap the binding like I did on the big one.  But my stash didn't let me down and I found a perfectly cute polka dot cream from another Fig Tree line - Mill House Inn - that was perfect for the job.

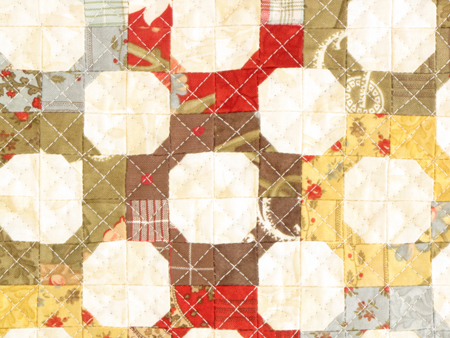
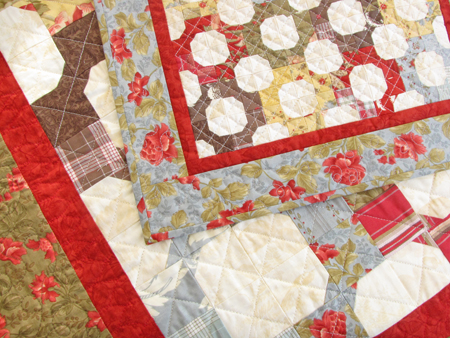
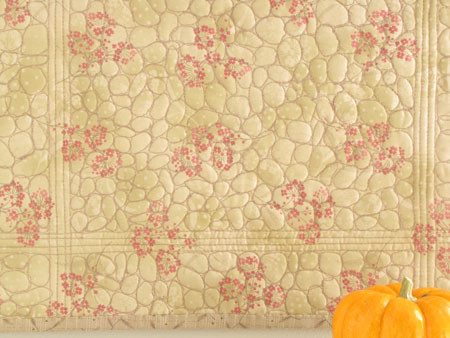
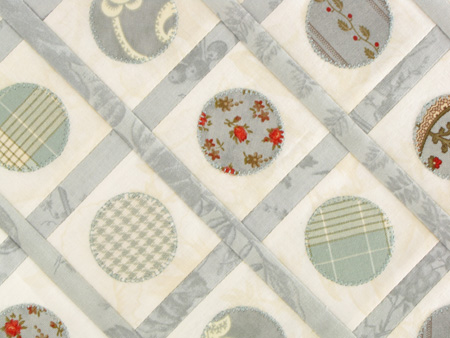
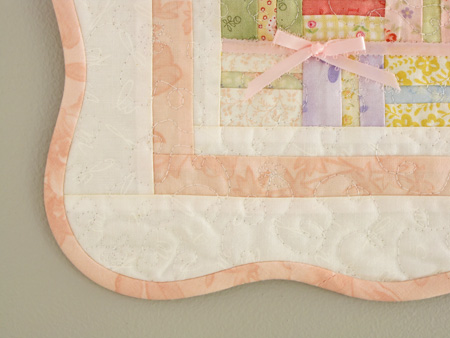
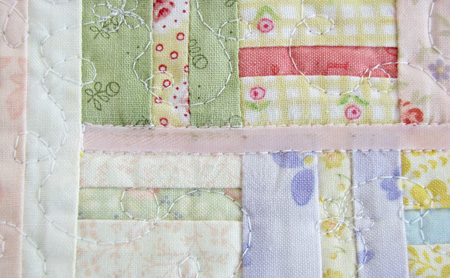
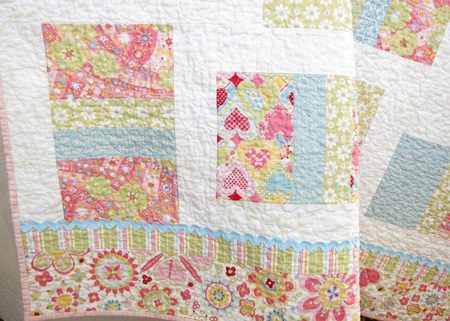
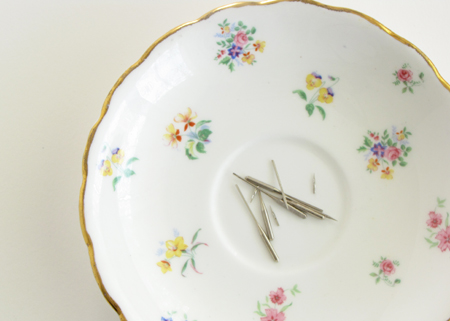
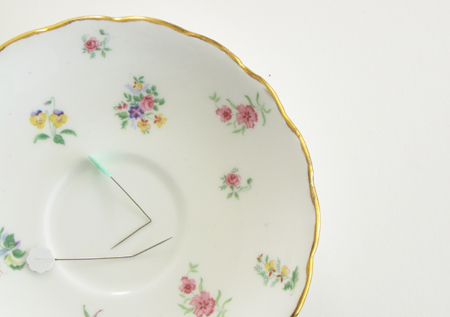
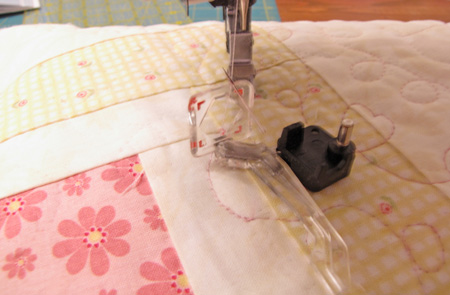
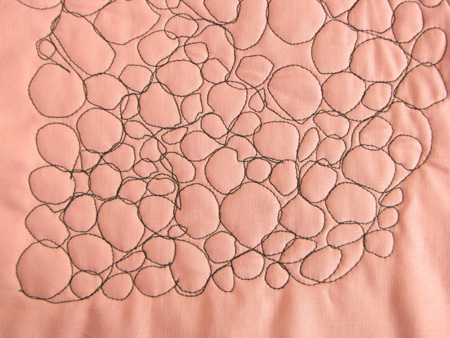
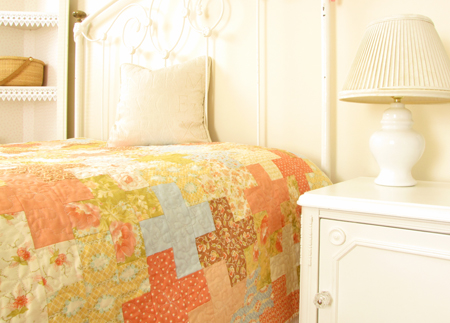
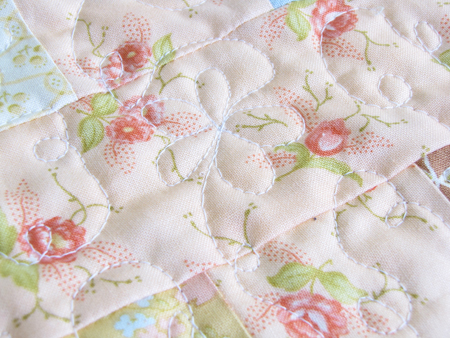
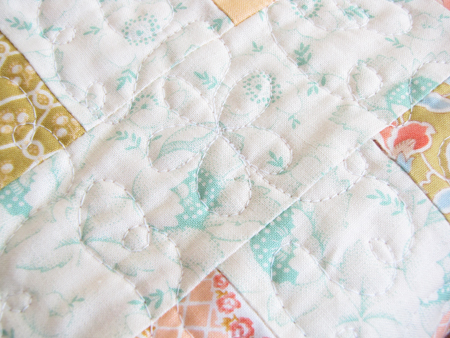
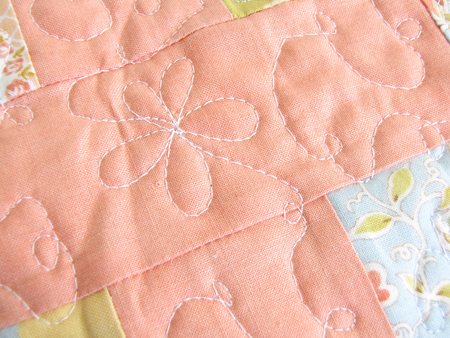
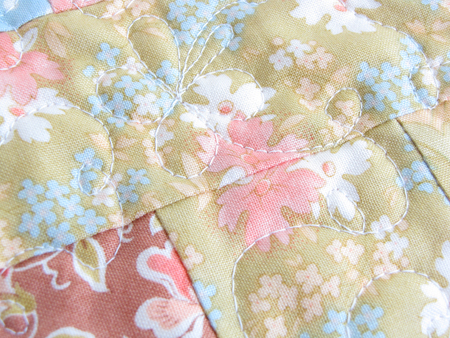
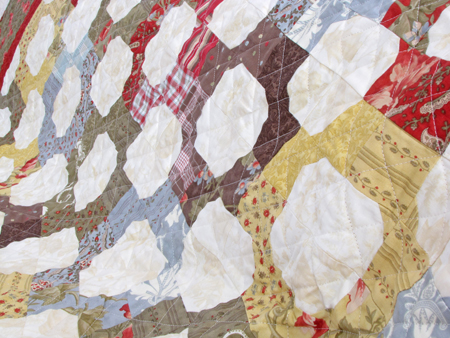
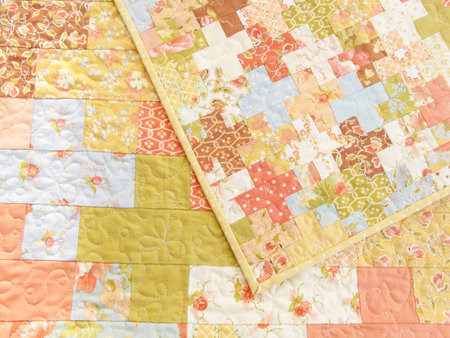
And I'm totally digging this teeny tiny flower / swirly twirly FMQing that I've done on 2 other quiltlets here and here.  I think it's my favorite FMQ design.
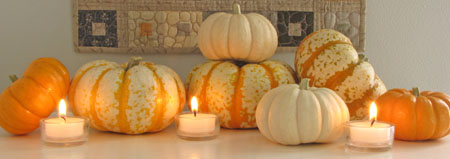
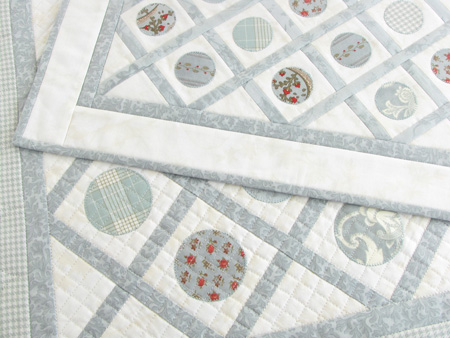
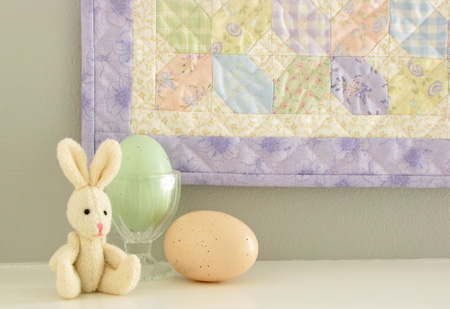
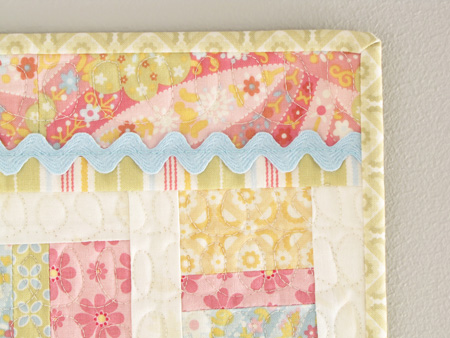
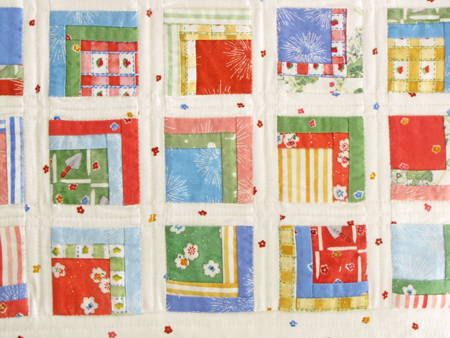
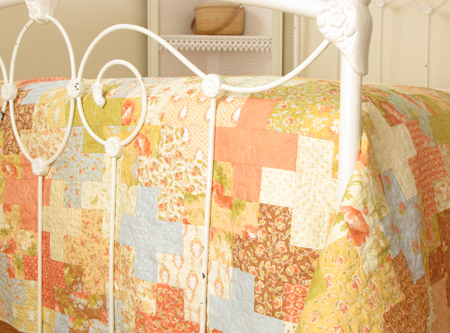
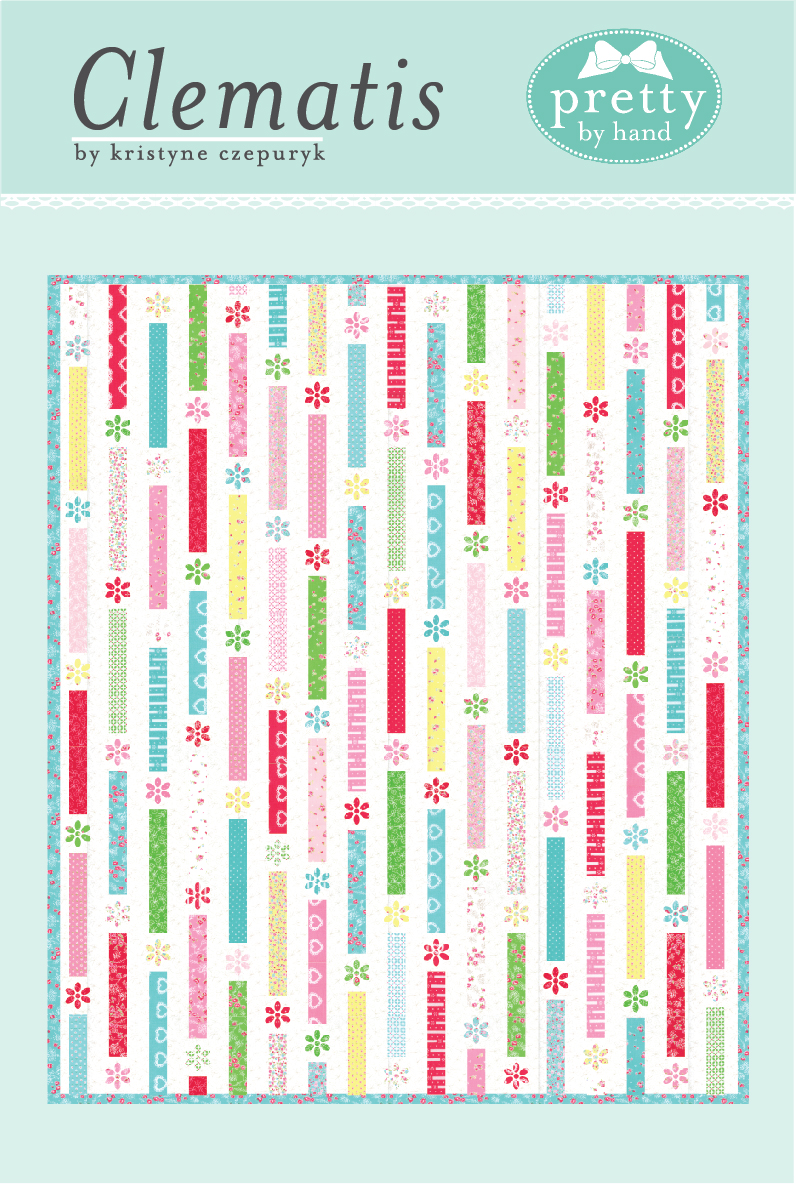
Big and little.

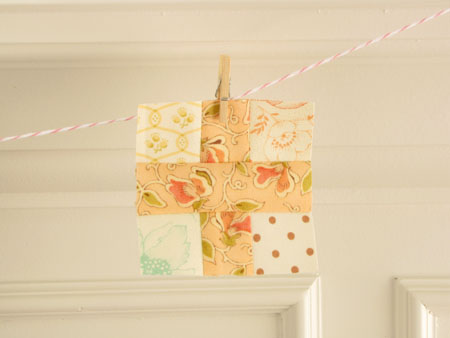
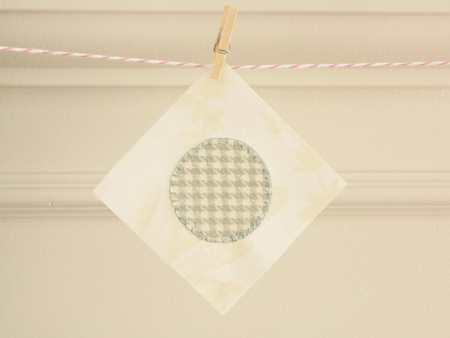
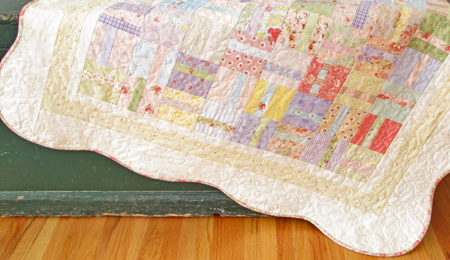
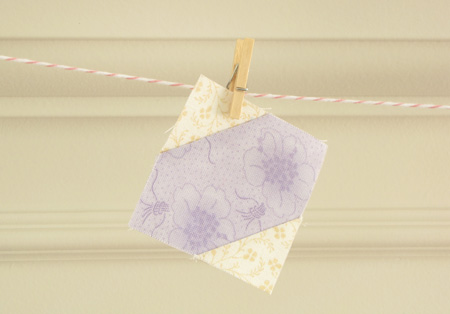
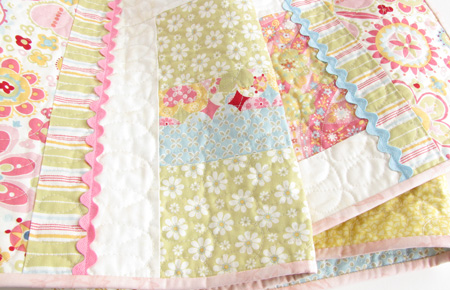
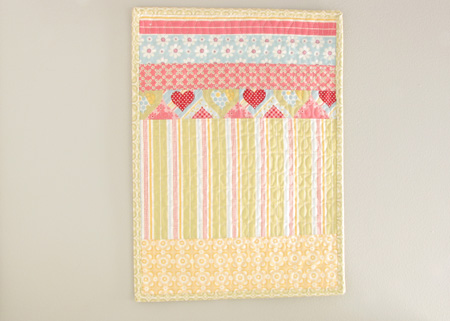
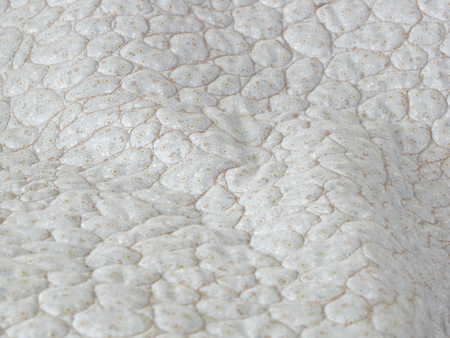
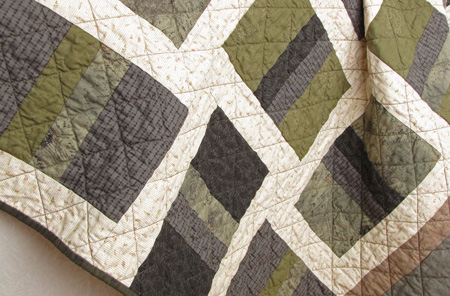
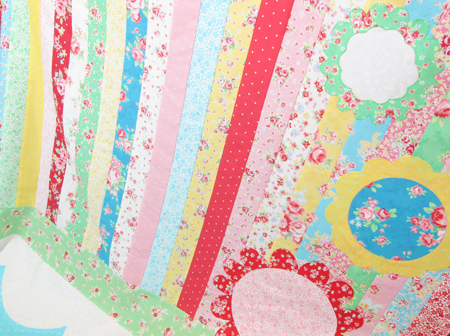
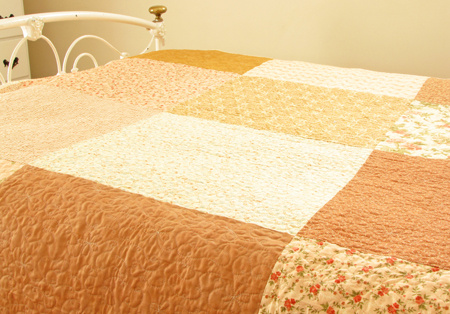
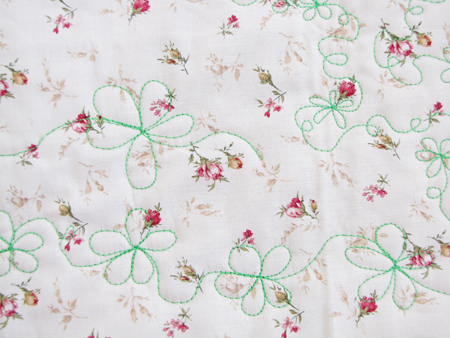
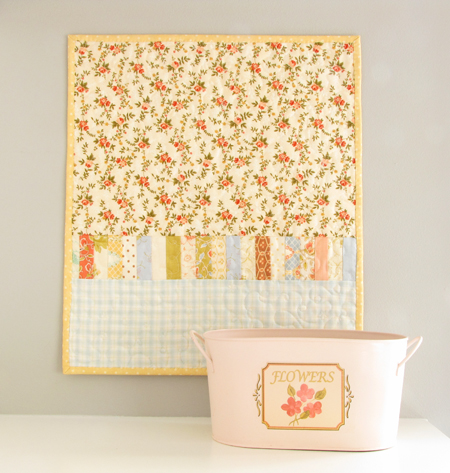
And once again a little back fun. :)

Ok people, stick a fork in me I'm done.  I'm pretty sure this is it for Project Simplify.  It's time to draw the curtains and turn off the lights for this ... wonderful thing that has been so much fun for me and hopefully for you.

Thanks again to all of you who commented throught the process of me sewing my way through Camille's book - twice.  You've inspired me, encouraged me, taught me and best of all, made me laugh.  Seriously, you guys are hilarious. :)

Ok wait.  This sorta sounds like I'm quitting my blog ... I'M NOT!  Wild horses couldn't drag me away from my sewing machine & computer.  I'm just saying good bye to Project Simplify.  Kay?  I'll be back tomorrow with more FW blocks.  Promise.  As long as at least one person out there in Inter-Web-Landia has a decidedly inexplicable taste for my silliness, I'll be here.

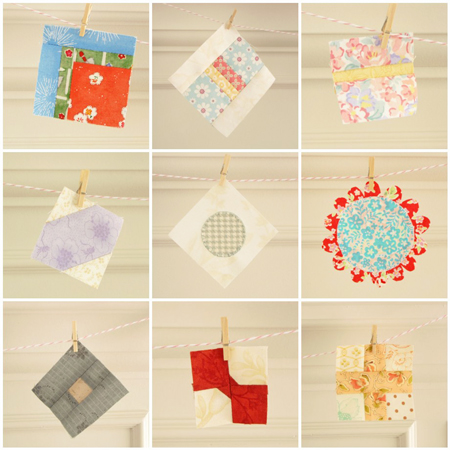
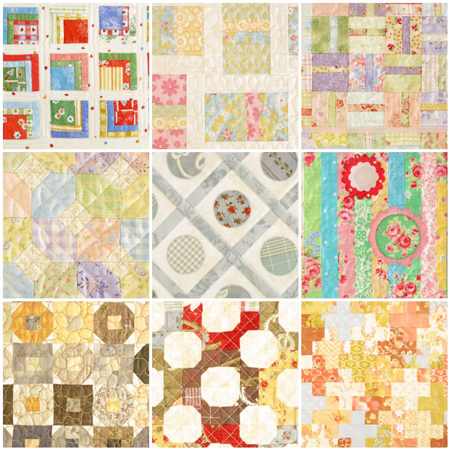
Besides, since one of my best bloggy friends (who has an amazingly beautiful blog) just taught me how to make these very cool photo mosaics, I need an excuse to make more. ;)

Monday
Nov072011

Mini-Series Monday #8

All In The Family

Omg this was fun to make.  (Oh who am I kidding, these are ALL fun!)

This one seemed to have particularly little pieces.

Of all the quiltlets, this one really felt like a doll quilt to me.  I did one pass of the cross-hatch and it wasn't enough.  So I did a second round and it is fabulously tiny.  It really accentuates the diminutive size of this quilt - 16" x 18.5".  The grid lines are just under 1/2" apart.  (I love little!)

It's going to be the perfect Christmas decoration this year.  My traditional Christmas colors are silver and white with bits of blue. 

I think that's why I went with the blue print for the border.  It's the same print as on the big one, just a different color.

I had a bit of wonky fun with the back again too.  I even included a block leftover from the big quilt. (Top left corner - it got chopped off a bit.)

Next week is the finale episode of Project Simplify - the Mini-Series. 

I know.  Me too.  :(

Monday
Oct312011

Mini-Series Monday #7

Happy Halloween everyone!

My original plan for today's quiltlet - Happy-Go-Lucky - was to copy the same fabrics as the big one.

But when I realized this episode was going to "air" on Halloween, of course I had to make it in Halloween colors, right?  I mean, what self-respecting quilt blogger would pass up the opportunity to have some holiday fun with a color palette?  Not me!

Now I'm not an over-the-top-crazy-in-love-with-Halloween type of person.  Prob'ly 'cause there's no pink in traditional Fall colors.  Too bad.  ;)  (Unless you've just been to Quilt Market and saw Verna Mosquera's breathtakingly beautiful new pattern made with her new line called "October Skies"!)  But, not to worry.  I have a perfectly fantastic selection of earth tone Japanese fabrics.  So I put together what I think is a nice little grouping of greens, grays & creams with a little smattering of yellows & a kiss of orange.

But then how do I put all these together for this quilt design?  I've made enough mistakes to know that an ounce of prevention ...  And my type of prevention simply involves a little fun with a few sheets of graph paper and a handful of pencil crayons.  :)

Here's my first idea, with all the darks as the main blocks and the yellows & oranges as the block middles.

Hmm, not sure.  Not exactly what I had in mind.  I was going for a "twinkly" effect but this looks surprisingly modern to me.  Let's try something different - more scrappy.

I didn't have to finish coloring this one to know it made my heart happy.

And here's how it turned out.

Perfect.  Halloweeny?  For sure.  But not I'M-ALL-UP-IN-YOUR-FACE-WITH-VAMPIRES-AND-COBWEBS-AND-WITCHES Halloweeny.  (Not that there's anything WRONG with that ... I've made some absolutely gorgeous Halloween quilts that are just that!)  But I can see me enjoying this quiltlet as a nice home decor accent on a wall in my house for a month or so, even though I have an undiagnosed allergy to burnt orange and dark green. ;)

The inner border gave me pause.  At first I thought it would be very dark - maybe even black.  But as I played around with my darks, it just seemed too ... AAAGH, you know?  So I did a 180 and went so quiet and neutral that the fabric all but disappears.  As soon as I laid out the quilt with this print, I knew it was perfect.

And then there was the whole FMQing business.  Sigh.  I really should do rocks.  I'm awesome at rocks.  And rocks are sorta Halloweeny, aren't they?  But I don't FEEL like doing rocks!  It's gonna take forEVER.  "Oh, stop your whining, you Smokin' Hot Quilter Chick and just get on with it."  ;)

So I did. 

And I'm so very happy I took the 2-1/2 hours to do it.

I omitted the outer border AGAIN, like I did on the big one

This quiltlet had already grown to 15" x 17" and I just didn't want it to be any bigger.

All right, the second last episode is up for next week.

We're going straight from Halloween to Christmas!

Monday
Oct242011

Mini-Series Monday #6

Sugar Rush.  YUM! 

And may I just say what a lovely coincidence it is that this post follows my Sugar Sugar Market Bag post!  One might even accuse me of planning it that way. ;)  (Actually, it really was a coincidence.)

Ok.  Truth?  I pieced this 14" x 19-1/2" quiltlet top together ...

BEFORE I made this bag

In fact, it was the quiltlet that gave me the IDEA for the bag.

These stripes are 5/8" wide, finished.

But I waited until I could do some seriously cute flower FMQing to finish it.  I kinda felt like I was making eyelet with those tiny little flower!  Love them.

However, life wasn't all sweet with this quiltlet.  While working on my newly acquired FMQing I decided to use a "washable" - in quotation marks - fabric pen to help me sew a nicely proportioned flower.  Well, that disappearing ink pen did NOT live up to it's end of the bargain.  It left a blue mark right in the middle of the flower.  (It looks worse in real life.)

No worries, though.  I just cut out another flower center and appliqued it right on top!  You can't keep this quilter down for long. ;)

The back was almost as fun as the front - albeit a little bit wonky-doodley.

Next Monday is Halloween so I have a "Holiday Special" of sorts planned for you.

Boo!

Monday
Oct172011

Mini-Series Monday #5

Gee you guys, thanks so very much for all the tutorial love!   I'm so thrilled you like it and that it may have inspired some of you to give it a try ... dreaded zipper and all! :) 

I'm sorry I didn't get to replying to you all these past few days ... I've been laid up with a nasty head cold.  For the first time in 15 years of marriage, my husband and I have been sick at the same time.  We usually "tag" each other with our germs.  Haha!  Actually, more like hack hack, snork snork, please pass the Kleenex & Tylenol and "Honey, I'll pay you a million dollars to fix dinner for the children" ... he did it for free. ;)

                         *          *          *          *          *          *

Ok.  I'm fairly certain that if you don't already think I'm a special kind of crazy in the quilting department, this post will convince you FOR SURE.

Original "Spot-On" ...

Mini "Spot On" ...

Love it.

I'm particularly proud of the scalloped top-stitching around the border.

But at 19" square - and finished blocks at 3" - I just kept thinking, "Not small enough."

Soooooooo,

I kinda sorta accidentally went and made another one.


Itty-Bitty "Spot On" ...

I know! Even CUTER, right?!  She's only 14" x 17-1/2".

And the blocks are 2" (finished).

I decided to omit top-stitching altogether for this one.  (Except for around the inner border, just to keep everything together.)

Omg I can hardly STAND the cuteness of it all. 

(Is it ok for me to say that about my own stuff?  Does it sound obnoxious?)

Hope you enjoyed today's double-feature. ;)

Up next week?

Gimme some sugar ... lots and lots of sugar!  :)

Monday
Oct102011

Mini-Series Monday #4

I had to make this week's mini-quilt (or rather "quiltlet") in fabrics OTHER than the original 'cause I didn't have enough leftover charm squares and I didn't want to cut into my big FQ bundle of Scarborough Fair by Robyn Pandolph.  (You know you wouldn't do it either ... !)

So I scrounged around in my stash and found a little stack of leftovers from Moda's Sandy Gervais' "Whispers in the Wind" line (from a few years back).

This block is 2" square unfinished.

You know, I like purple well enough ...  

'Cept for here.  LOVE it here!

This quiltlet (12-1/4" square) was too small for me to comfortably copy the same FMQing as on the big one. 

So I ... you know ...

And if this quilt doesn't make you think of Easter, you are dead inside. 

Just sayin'.
Tune in next time for "Spot On". 

Rumor has it there's a double feature next week ... wink wink, nudge, nudge!

Monday
Oct032011

Mini-Series Monday #3

Tee hee!  Isn't this just the cutest little block EVER?

She's 1-3/4".  Unfinished.

I love this "quiltlet" version if Sweet Pea - 15" square.  It just might be my favorite ...

... scalloped edge and all!

Here's the big version.  Both were made with scraps from my unruly scrap bin.

I did have a little oopsies with this one, though.

Kay.  You know how you need to clean your iron sometimes?  (I use a lot of fusible batting & fusible interfacing so my iron gets gummed up regularly.) 

But you never remember it's dirty until AFTER you've turned it on and it's hot.  So you tell yourself you'll clean it when it cools down and you go ahead and use it ... 'cause, you know ... you hate waiting.  And then forget to clean it later.  Vicious cycle ensues and the iron gets dirtier and dirtier.

Yeah.  That's what happened here.  And I paid for it ... dearly.  See the ugly black marks on the ribbon?  They look worse in real life.

Ugh.

But I'm also a scrapbooker.  And scrapbookers know "there are no mistakes, only opportunities for embellishing."  Ladies, am I right? 

Lucky me, this quilt includes a sweet little bow detail.  And it just so happens to hide (most of) the stain.

Yay!  (But if you're familiar with this pattern, just you never mind that the bow is supposed to be on the OTHER side.  It took me a while to come to terms with this ... necessary modification.)

And check out the itty-bitty FMQ flowers!

Eeeep! :)  AND I have a clean iron now too ... for a few days.

Teaser ...

Monday
Sep262011

Mini-Series Monday #2

Happy Mini-Monday everyone!

Remember Little Lady? 

Well, here she is all LITTLE little ... 11" x 15".

A block measures 4" x 4".

I repeated the same FMQ design from the big version seen here...

Cute, huh?

And I even added the ric rac.

This detail wasn't part of the original pattern in the book.

But I got the idea from other quilts designed by Camille like this one and this one. :)

Used up more scraps on the back ...

Again ... this is NOT a placemat, people.  (Could you even IMAGINE letting someone spill spaghetti sauce on this?!)

Next week ...

Monday
Sep192011

Project Simplify - THE MINI SERIES!

Howdy y'all!

I'm very excited because today is the first of nine "Mini-Series Mondays" here at Pretty by Hand!

That's right, you heard me.  But not the same kind of mini-series I watched on tv during my babysitting days in the 80s like "Shogun" & "Thorn Birds".  This mini-series doesn't include forbidden love with a priest or anything like that.

My love of little things inspired me to come up with this Project Simplify encore ... a series of mini quilts!  (Get it?  Mini Quilts = Mini Series?  I know, I'm witty beyond belief.)

This lil' cutie is 2-3/4".

Back in April when I was making the first quilt, I had some scraps that were just BEGGING to be made into something.  And when I wasn't allowed to do any work on the quilt while my helper was in school, I HAD to find SOMETHING to do with my time ... because, you know, housework is over-rated.

And plus I started thinking that since I didn't know which quilts I'd be donating, it would be nice to have a little souvenier of each project. 

Ok, that sounds TOTALLY lame right now as I'm typing this - souvenier quilt of a quilt?  For real??  That's just taking fabric hoarding to a whole other level.  But it seemed like a good idea at the time ...

I wasn't confident enough with my FMQing back then so I chickened out and did simple straight lines.

This miniature version of Square One measures 13 1/2" x 16 1/2".   (Don't even THINK about calling it a placemat!  You can ask my husband what will happen if you do ... )

So for the next 8 weeks, I'll be bringing you Mini-Series Mondays - all the quilts from Camille's book  Simplify miniaturzed.  Nothing like milking a good idea 'til it's dead, right?

FWQAL is temporarily rescheduled for Tuesdays because let's face it ... we all love a good alliteration, don't we?  Mini-Series Mondays just sounds way better than Mini-Series Tuesdays.  :)

And what would a Mini-Series be without a teaser for the next episode?

Sorry ladies, no Richard Chamberlain ... I asked ... he doesn't do quilt blogs ;)

Wednesday
Sep142011

Project Simplify - Finish Line!

Ok.  Deep breath.  Got a lot to cover today so I'll just start.  (If you're new here, you may enjoy reading the "Starting Line" post here.)

My main objectives for this Project were:

  • reduce my fabric stash
  • learn how to free-motion quilt
  • make every quilt/pillow in Simplify with my daughters
  • donate quilts & pillows to help raise money for non-profit organizations

Let's see how I did.

1) Stash Redux - CHECK!

My "before" stash ...

In terms of yardage & weight my stash lost:

75yds / 69m (holy crap!) and 27lbs / 12kg (wish I'D lost 27 lbs ...)

Here's what that looks like ...

empty shelf space!!!

I know I wasn't supposed to buy any fabric (who was I trying to kid?).  I should have qualified that with "to use for the quilts & pillows in the book".  I was successful by that standard.  However,  ...

Now this TOTALLY surprises me.  I had no idea there was this much space left!  That should give you an idea of how messy my sewing room is most of the time ... told ya I had to clean up to take these pictures! ;)

I really thought I'd bought at least as much as I'd used up and maybe even more.  I'm very happy to still have some space.  It would be really nice to hang on to that "breathing room" and fill it with things like pictures and other pretty dust collecters.  But knowing me, that empty space will be filled with junk in about 30 seconds ... ;)   (Girl's gotta have SOME secrets!)

I also finished 14 full or partial spools so my thread drawer is a little tidier.

I went through 85 bobbins (yes, I kept track).

I broke 5 needles.

Mostly from doing this ...

'cause I'm a career refuse-to-pull-pins-out-before-I-sew-over-them kinda quilter and am not likely to ever change (despite an emergency trip to the sewing repair guy a few years ago). 

But a few from doing this ...

2) Learn FMQing - CHECK!

From this,

and this,

and this,

to this,

this,

and this!  It still freaks me out that I can actually DO this now!  :)

A word about FMQing.  I'm not going to be obnoxious here and tell you that if I can do it, ANYONE can do it.  I'm just going to say that I started this project with a strong desire to learn, and I practiced until I got it.  Sounds hokey, I know.  But I forced myself to work at it - and shamed myself into sticking with it by blogging about it!

3) Make every quilt & pillow in the book with my daughters - CHECK!

I made 9 quilts and 4 pillows and my girls helped me with 8 quilts (fairsies math ...)  We had so much fun and I'm super proud of them for humoring their mama ;).

4) Donate quilts & pillows to help raise money for non-profit organizations - CHECK!

I donated these two quilts to my friend's literacy fundraiser.  Together they raised $125.

Next I donated this quilt top to "Quilts for Quake Survivors".

I missed the deadline by like a day and didn't really know what happened to it until "Happy Zombie" Monica surprised the heck out of me with this post!  How weird is THAT.  I was blown away by that coincidence. :) 

Still don't know what's going to happen with the quilt.  But it will be used to make money for someone ... somehow ... I'll keep you posted.

Finally, I gave this quilt & pillow set to a fundraiser for Orchestra Iowa

The silent auction event is in a few months.  I'll let you know about that one too.

Well.  I guess that's it ...

... or is it?  Awh, come on.  I wouldn't just end it like that, would I?  ;)

I've actually been keeping a "little" surprise for you.  I had a "little" flash of inspiration waaay back when I was making the very first quilt for Project Simplify so I have a "little" encore of sorts for you. 

I'll fill you in on Monday. 

But it just might have something to do with these ...

Need a size reference?

tee hee!

Thursday
Sep082011

Project Simplify - Day 58

Sorry I made you wait for this reveal, but I'm really not wanting to let go of Project Simplify.  Guess I'm dragging it out as long as possible.  I hate good byes.  :(

Here she is ... "Crossroads", as christened by my helper.

Wow.  I absolutely love this quilt.  (Have I said that before?)

You know, I don't usually go for peachy, coraly, browny, mossy colors.  But there is just something about "Buttercup" that tugs at my heartstrings.  I think the attraction might be sentimental because my Grandma Irma was a redhead and these were DEFINITELY her colors.

So remember I used a Fat Eighth bundle instead of the required pre-cut strips for this quilt?  And I was going to just cut as many blocks as I could with the fabric I had and build the quilt as big as I could - without a border?  Well, it ended up being square - the same width as the one in the book, but about 8" shorter.  Not bad!

It's perfect for a dash of color on a sofa, cuddling or a little extra warmth folded at the foot of a bed.  Cozy, anyway you slice it.

And about going borderless (again) here - I think it makes this quilt look more "old-fashioned" for some reason.

When my helper and I were laying out the quilt, I organized all the "blocks" on the floor and then we'd slide them into place.  She came up with the idea of us taking turns like you would playing a game.  She placed a block, then I did. 

I loved watching her because she's dyslexic and some things are a little tricky for her.  I will say, however, that the layout of this quilt required some mental gymnastics for me too!  It's not difficult, but it does take a little concentration.  I think the exercise of laying out this quilt was a good activity for her.  (Ugh, that totally makes me sound like a mom, doesn't it?!!!)

I'm really happy about the backing, too.  I had a small stack of leftover Fig Tree "Allspice Tapestry" fat quarters from a few years ago so I pieced them together for the back.  The colors work great with "Buttercup".

I'm surprised when I realize I've never made a back entirely out of FQs before.  And if it weren't for my mission of using what I have instead of buying more fabric, I prob'ly wouldn't have used them up here. 

See, I have this thing ... (here she goes again with a thing!)  I've made backings using up "leftovers" in the past, thinking I was being all smart & frugal.  But a few times I've regretted it soooo much because later I'd be making something else and I'd NEED THAT SCRAP RIGHT THERE IN THE MIDDLE OF THAT BACKING for this new quilt.  I've even seriously contemplated UNcross-hatching a quilt to get to a scrap!  (Am I the only one with this thing?)

So whenever I piece a backing now - which I almost always do - a little part of me is nervous that I'll regret using that last scrap of fabric.  And using up 12 perfectly good FQs is really going out on a limb for me.

But in the end, this FQ backing was super easy.  And they make the quilt reversible, too ... 'specially with all my fancy schmancy fmqed flowers!  tee hee ;)

Stash Redux:

  • Yardage - 5.8 yds / 5.3 m
  • Weight - 2.8 lbs / 1.2 kg

Alright folks.  Give me the weekend to put together a "Project Simplify - Stick a Fork In Me I'm Done" post ... my fabric stash is in desperate need of tidying up (ugh, I could hyperventilate just thinking about it) so I can determine how well I did with my "simplifying". 

(I gotta bad feeling I didn't do so good ... )

Wednesday
Aug242011

Project Simplify - Day 57

Thank you SO MUCH for all the FMQ love yesterday!  Still on cloud nine over here. :)

          *          *          *          *          *          *          *

Oh how I love scrappy binding. 

I had the forethought to reserve one strip from each cream print in the bundle.

Graying hair doesn't ALWAYS win ... ;)

Tuesday
Aug232011

Project Simplify - Day 56

I DID IT!!!!!!!  I really did!  I officially declare myself an FMQer.  For real!  Oh I'm SO HAPPY ABOUT THIS!!!!!   My cross-hatch handcuffs are gone forever.

Let me show you my flowers.

Here are some of my hits,

and my personal favorite,


And some misses, of course.  Must show the misses ...

How cruel is it that the high contrast fabrics make a slightly bad flower looks colossally hideous?  Chalk it up to Murphy's Law, I guess!

(Oh, and I don't even want to KNOW what you gutter-minded peeps from yesterday see in this picture below ... )  tee hee

But by the end there were hardly any misses at all!  Oh, except for this ... grrr ...

Never mind.  Nothing is going to spoil my mood. 

I think all that practice with Stones really helped me improve my control.  Although I think Stones is actually harder than Flowers!  Go figure. :)

I sure have come a long way from this back in March (geez, five months ago!).  I remember how embarrassed I was to show you this ...

And how hilarious I thought this was in June ...

When I remember all the fear, practicing, trials & errors and a few (ok, maybe several) bad words that went into reaching my goal of learning FMQing, I'm kinda sorta proud of myself.  Oh, who am I kidding.  False modesty can be so unattractive.  I'M AWESOME!!!!!!!!!!!!!!!! Hahaha!

I'm starting to wonder why I took a few decades to get here.  But I made it!  And it feels SOOOOOO GOOOOOOOD!!

Eeeeeeeeeeeeeeeeeeeeeeeeep!

I'm so hap, hap, happy!!!  I just want to hug everyone.   So if you're reading this, consider yourself virtually hugged! :)

Seriously.  I think forcing myself to do this in front of an "audience" made all the difference.  I shamed myself into not quitting - which I'm SURE I would have done ... again ... if I hadn't commited to this publicly.

So thanks.

Really.


Yay me! :)

Thursday
Aug182011

Project Simplify - Day 55

Okay.

Do you ever avoid doing something because you'd prefer to live with the fantasy that you COULD do it, rather than ruin that possibility by trying and failing? 

I do. 

A lot. 

In my mind I'm super awesome at a lot of things I've never tried.

So I'm a little nervous here.  This is my last chance to FMQ with Project Simplify and I so badly want to conquer Flowers like I conquered Stones

My last attempt wasn't very good.

But I've been practicing a bit more and got some advice from Camille on technique.

A little funny, my daughter's friend was wearing this dress the other day. 

Here goes ... !

Tuesday
Aug162011

Project Simplify - Day 5

What would a Project Simplify quilt be without a little ooopsies, hmmm?  I feel I have a reputation to uphold now.  ;)

The top row here isn't lined up properly.  (Does this picture make anyone else think of Tetris?)

Please note, this will NOT happen to you if you follow the directions in the book.   This happened to me because I only cut full blocks (no partials) 'cause I didn't know how many I'd need. 

No biggie.  It usually only takes one screw up to remind me to be more careful.  USUALLY, just one ... but not ALWAYS ... my graying hair isn't just for show ... it's Mother Nature's way of warning all innocent by-standers that my faculties just aren't what they used to be!  (Guess I should apologize for messin' with all you unsuspecting victims by using hair color, eh?)

At least I caught this one before I finished the entire seam.

I could have avoided this problem by cutting off all the long bits along the quilt sides AFTER I laid out the quilt but BEFORE I sewed the rows together ... 

... but I didn't have that stroke of genius until just now.  (Sigh)  Might as well blame my hair for that too.

Friday
Aug122011

Project Simplify - Day 53

Three rows down,

uh,

lots more to go ...  (sigh).

Sometimes it's just better to focus on what you've got done ... not what you have left to do ...  ;)

Thursday
Aug112011

Project Simplify - Day 52

Has this ever happened to you where you lay out all the blocks for the quilt, think you're done and then find a few more blocks that you accidentally laid down nearby - and promptly forgot about - and then you have spend like another 20 minutes re-jigging your layout?  You know, because you have all these weird rules about the same color and the same print not being allowed to touch each other?

No?  That doesn't happen to you?

Yeah, me either ... I was just wondering ... ;)

Wednesday
Aug102011

Project Simplify - Day 51

I have this thing (yes, another quilting foible) where I like directional prints to be going the same way (usually, not always ... I'm getting better about this).

See what I mean?  This kinda drives me a little nuts.  It just looks ... wrong.

Ahhh, this is soooo much better!

Mixed up directions used to ALWAYS bother me (please note that they only seem to bother me on MY OWN quilts.  For some reason, they don't have the same effect on me if I didn't make the quilt - go figure).  

But when my love affair with Japanese quilt books & magazines started, I noticed that Japanese quilters didn't seem to pay attention at all to that sort if thing.  They are interested letting direction just happen naturally (randomly) to create movement & tension and visual interest.  They don't seem to get all uptight about the "matchy matchy poo poo" stuff!

So now I try to not let it bother me as much.  There were a few stripes in the last quilt and I deliberately ignored them and let the laws of randomness rule.

But for this quilt, I kinda want everything to line up.  So I'm gonna make them.  Because I can. ;)

Do you care about print direction in your quilts? 

Wednesday
Aug032011

Project Simplify - Day 50

Ok everyone.  Are you ready for the last Project Simplify quilt?  I'm not.  I mean, I've been looking forward to making this quilt since I got the book and I'm excited to make it.  But I'm totally sad that it's the last one.  (Sigh.)

This quilt is called Dream Big.  I admit that when I started this blog on Valentine's Day of this year, I had no idea I'd be here right now with you.  And I had NO CLUE I'd have quilted my way through Camille's book and found so many of you to keep me company, encourage me, give me helpful bits of advice and just make me feel like I bring something worthwhile to this every-growing and fabulous on-line community. 

I'd been dreaming of having a quilt/craft blog for a full year before I finally turned it into a reality and just did it already!  I'm so happy I did.  This creative outlet has been satisfying for me in many ways.  The most important for me I think is that I've found a way to share my passion with others who "get it". 

See, when I talk to my non-crafty friends or the moms at my girls' school about my passion for sewing and how I spend my time, they look at me like I'm off my bleepin' rocker.  They don't understand why on earth I'd rather cut up fabric than shop for shoes.  Or how much fun it is for me to sew a bajillion little pieces of fabric together for hours on end instead of going out for coffee.  The polite ones pretend that it sounds cool.  Some are even genuinely impessed when they see something I've made.  But others just look at me wide-eyed as I describe my latest project, shake their heads and say, "You're crazy!" 

Yes, to each her own, I suppose.

But here, I feel at home with you.  I know I'm really just sitting in front of my computer, typing away.  But when I see you visiting me and leaving comments, I feel appreciated and welcomed.  I know time is valuable, and that you choose to visit ME and spend some of YOUR time HERE means the world to me.  So thank you.  Thank you very much. 

Ok, whoa!  Where did all that come from?  I wasn't expecting to say all that, but when I started thinking about my dreams ... 

Now, where was I?  Oh yes.  When I first came up with the idea for Project Simplify, I was so excited, but at the same time totally nervous that Camille might not like my idea.  I mean, she didn't know me from a hole in the wall.  I hadn't been blogging for very long at all and she didn't know what kind of quilter I was and how I would talk about her book.  It was a generous leap of faith on her part to give me her approval (and I wouldn't have done this project without it!)  It was a very big dream for me.  And, well, I guess you know how it turned out.   Thanks, C!

Fabric.  Hmmm, what to use, what to use.  Well, I've had this little Fat Eighth bundle in my stash since Quilt Market in Houston 2010. 

What's a Fat Eighth?  Good question.  It's half of a Fat Quarter!  These ones are 9" x 22". 

(Oh, please note, the pattern in the book does NOT call for Fat Eights.  I'm gonna have to do some fancy cutting and stuff here.)

This bundle has a great mix of pretty colors.  My favorite is the blue (I know!  I didn't say pink!)  The pink is my second favorite.  But that sky blue is just so clear and fresh and ... pretty!

Now in the interest of full disclosure, I am letting you know now that I'm not putting a border on this quilt.  I don't have any Buttercup yardage at all - just these precuts - and I'm not supposed to be buying any fabric for this project, remember? ;)   So I'm going to try a bit of an experiment.  I'm pretty sure this bundle has more yardage than what the pattern requires for the pieced part of the quilt.  So I'm just going to cut my Fat Eighths into as many blocks as I can and then build the quilt as big as possible.  Let's see what happens!

Tuesday
Aug022011

Project Simplify - Day 49

Another one done.  And she is a beauty, for sure.  I think the most "traditional" looking quilt of Project Simplify to date.

A name didn't come very easily though, so we "brainstormed" a bit.  I was trying to get my little helper to go for "Christmas Bows" (because the fabric is Christmasy and the basic block in this quilt is called "Bowtie") but she didn't like it. 

To her, the strongest visual elements in the quilt are the cream circles.  In fact, she was very excited as we were laying out the quilt when she discovered that as the blocks were placed together, secondary circles were formed.  She just got such a kick out of that!

So we ended up calling it "Christmas Shortbread".  'Cause the color of the circles kinda remind us of the color of shortbread cookies.  Love it. 

Shortbread is the only Christmas baking I can do that's a tradition from my mom because my little one was diagnosed with Celiac Disease when she was just two years old and must follow a very strict gluten-free diet.  Shortbread cookies - it just so happens - are wicked awesome melt-in-your-mouth when made with rice flour.

Next week ... the very last chapter!