Entries in Project Simplify (69)

Friday
Jun102011

Project Simplify - Day 28

I'm a cheater.  And I'm not afraid to admit it.

Yes, sometimes I look for the easy way out and bend the rules a bit.  In this case, I'm talking about the circle template for Spot On.  It requires enlarging.  I don't mind.  I'm lucky to have a printer/fax/copier thingy here at home. 

But I was thinking more about my little helper and making tracing easy for her.  So instead of making a template as per the pattern, I rooted around my kitchen for something round.  The best I could do was a plate that's about 1/4" smaller than the actual template.

It was so easy for her to use.  (Yes, that's a Laura Ashley saucer!)

I don't think the quilting police will come and arrest me because the circles are a smidgen smaller than the pattern said.  

But in case they do - and you'd like to make my prison stay more comfortable - I like Ghirardelli brownies (with chopped walnut, if you don't mind), Irish Breakfast tea and Japanese craft books & magazines

Thanks in advance.

Wednesday
Jun082011

Project Simplify - Day 27

Well, after MUCH fabric play & yardage consideration (I kept running into the "crap, I don't have enough of that fabric" problem) I surprised myself by going with this two-color grouping which is mostly Roman Holiday, and the blue and cream tonals from Glace - another 3 Sisters Christmas line (the same line Camille used for this quilt in the book) that came in a kit I've had for a while.

I mean, I love two-tone quilts and I really love this smokey blue-gray & cream combo (with little hits of red!).  But for some reason I was trying really hard to use the entire Roman Holiday line. 

For years I'd walk into a store, see a quilt and want those.exact.fabrics to make it for myself.  I had trouble imagining quilts in different colors.  I know lots of other quilters struggle with the same issue.  Let's face it, fabric ain't cheap and making quilts - especially big ones - is an investment in both time & money.  And believe me, I've made my fair share of costly "experimenting with fabric" mistakes.

I'm still not the world's best fabric picker for quilts.  I really admire people who can walk through a quilt store, "cherry pick" bolts from all over the place and put together a fabulous fabric collection for a quilt. More often than not, I rely on a fabric line when I make a quilt.  But time and experience has made me a little more comfortable & confident with my personal fabric likes & dislikes.

Plus - just a personal goal - I'd like most of the quilts I make for Project Simplify to look at least a little - and preferably a lot - different from the ones in the book, if only for those of you who are still learning to visualize quilts in different fabrics.  Maybe you'll be inspired to give future quilt designs a second look if they're made up in colors & prints that don't appeal to you.  You just might find an unexpected treasure!

Monday
Jun062011

Project Simplify - Day 26

Chapter Five - The halfway mark!

I really like this quilt - Spot On. 

Remember Donnie & Marie Osmond's hit "A Little Bit Country, A Little Bit Rock & Roll?"  This quilt - to me - is a little bit traditional, a little bit modern.  The large graphic circles strike me as contemporary, but the sashing & on-point set of the blocks reads traditional.  I think you could tip the balance either way with the fabric selection.

I'm going traditional with this fabric collection from a few years ago by 3 Sisters for Moda called Roman Holiday.  I'm a sucker for a good Christmas fabric line and 3 Sisters - more often than not - has me at "Hello". ;)

I made this quilt by Bunny Hill a few years ago for the shop and most of the fabric was from this collection.  It was so pretty I had to buy the FQ bundle (plus yardage, of course) for myself.

I also made this little wall hanging (my own design) a few years ago.  I hang it over my kitchen sink at Christmas time.  Kinda cute, no?

Hmmm, what a surprise ... it's cross-hatched.

Thursday
Jun022011

Project Simplify - Day 25

I'm pleased to introduce you to "Flower Garden".

Sooooo pretty, isn't she?  Wish I'd had her for Easter.

The pain of top-stitching this quilt is but a distant (ok, not that distant) memory.  I really am glad, (and maybe kinda sorta a little bit proud) that I stuck with it.

We did have a little boo-boo.  Remember that thing I have about not letting the same print "touch"?  My helper & I have absolutely NO idea how this happened!

Oh well ;).

For the back, I still had some of the Robyn Pandolph I used for the last quilt back.  If I'd planned things out a little better, I'd have saved it all for this one - because the quilt top is mostly Robyn and I just like doing little things like that - but never mind.  I took a bit more yardage from my shelf (yay!) to complete the back.

Stash Redux:

  • Yardage - 3.7 yds / 3.3 m
  • Weight - 1 lb / 0.5 kg

For a grand total of:

  • Yardage - 39.6 yds / 36.1 m
  • Weight - 13.6 lbs / 7.4 kg

Wow, can you believe it?  I'm halfway through the book!  Five quilts done - four more quilts & four pillow covers to go!

Monday
May302011

Project Simplify - Day 24

Kay.  You'd think I'd be used to making a fool of myself.  I admit it's getting easier, but still ...

See, when it comes to all things quilting I usually can pick up a new skill relatively quickly.  I think that must be why I love quilting so much - it's one of a VERY few things I can do well with little or no practice.  And I really thought that with the amount of time & effort I've invested already on this particularly elusive element of quilting, I'd be a lot further along by now.

Here's the latest damage ... (wimper).

This is supposed to be a neat, symmetrical design.  Not this wonky, amoeba-shaped ... mess!

It LOOKS so easy to do ... why can't I GET this?

I had a little (ok, an embarrassingly huge for someone my age) tantrum - which I kept on the inside, but let me tell you I was craaaaabby!  I thought, "Keep trying, you'll get better."  I didn't. 

I once heard that the definition of insanity was repeating the same action but expecting different results.  Well, it's official.  I'd gone banana-nuts-crazy.

But after, like, an hour of unpicking all 12 of these very badly stitched designs (seems my helper has lost interest in the job for the moment - I think I burnt her out), possibly a few bad words and an imaginary blog post in which I shamefully admit defeat, a light bulb came on.  I thought of trying a new tactic - s.l.o.w.i.n.g d.o.w.n.

And suddenly ... voila!

Still not as good as I'd like, but waaaaay better than when I started. 

But here's the thing ...

You know that saying "Can't see the forest for the trees"?  In this case, I think it means that if you look too closely at the details, the occasional imperfections that exist on a tiny scale can ruin your ability to appreciate a perfectly decent quilt.

This happens to me a lot - when I'm making something, I notice every.little.mistake.  But more often than not when it's all bound, washed and in situ, the little "blemishes" disappear into the overall loveliness of what I made with pretty fabrics and a pretty design and then, well ... just never mind the trees, I love the forest!

Here's a look at all three FMQ designs together in the quilt.

So if it's not too arrogant, I think I'll give myself a C+ or B- for execution ... ok, maybe a B ;) ... but a big fat A for effort! 

I can pretty much guarantee that I TOTALLY would have given up on FMQing by now if it wasn't for Project Simplify.  Thank you Camille for graciously giving me permission to blog my way through your book.  I know it was a big leap of faith on your part to let me - a virtual stranger with a fledging blog - use your book this way. 

And thanks to all you quiet and vocal visitors for hanging out here with me.   Your advise, encouragement & support mean so much to me.

I'm feeling much better now. :)

Thursday
May262011

Project Simplify - Day 23

Sometimes I can think outside the box and come up with good ideas on my own.  But for now, I still need a crutch for deciding on a FMQing design.  So why not copy (again) what is shown in the book?

Camille's used three different FMQ designs on this cute little quilt:  stippling, that loop-dee-loop from "Little Man" and a sort of scalloped flower thing.  At first glance, I thought that was a bit ambitious for me to attempt, but it is a small quilt and if I want to improve my skills, I might as well go for it.  (You know, broadening ones horizons and all ...)

Here's my practice run.  Not bad, eh? 

The results:  not perfect - still a little jerky here and there.

And a little accidental loop ...

Is it just me, or is it easier to get out of a tight spot with swirly twirly?  Stippling just seems a bit less forgiving.

And then there's my old nemesis - tension.  Hmmph.

One of these days I'll remember that if you practice your FMQ stitching with fabric/batting/thread that's not exactly the same as your quilt, you must double check your tension when you start sewing on the actual quilt!  At least this stuff was easy to pull out.  I gave the fun to you-know-who ... little Miss Loves-A-Ripper.

I'll show you the embarrassing part next time.  That's right, dear friends, I'm not through humiliating myself for your entertainment!

Wednesday
May252011

Project Simplify - Day 22

Whoever invented these bent basting pins should be awarded the Nobel Prize for Quilting. 

Seriously.

I held out for a loooong time thinking my regular safety pins still worked so why should I buy new ones?  Yeah, smack me upside the head!  Best $5 I ever spent. 

Monday
May232011

Project Simplify - Day 21

Chapter Four is a sweet little table topper called Coming Home.

At Quilt Market in Houston last fall I met Robyn Pandolph and got a charm pack of her new line "Scarborough Fair". 

I love it. 

I also bought the FQ bundle. 

I know, you're shocked ... ;)

Except for a few squares that I used in Last Chapter's quilt I haven't made anything with this fabric yet and I'm excited that I finally get to play with it.

Since the taupe/cream background fabric I'd planned for the last quilt didn't turn out, I'm going to give it another try for this quilt. 

And FOR SURE this time I'm going to use pink for the border.

Promise! :)

Thursday
May192011

Project Simplify - Day 20

Woohoo!  Look who's getting all fancy with her swirly twirly FMQing by throwing in the occasional heart ...

and

This was fun (after I got over the trauma of my really lousy daisies and breaking thread and all).

When I was putting the binding on I did that silly thing of twisting the two joining ends ...

I love this gently scalloped edge.  It's so much easier than severe scallops with all the inside corners to manouver.

The jury is still out as to whether the variegated thread was a good idea or not.  What do you think?

Do you ever play that game with yourself where you try to pick your favorite block in a quilt you made?  I thought it would be fun to ask my helper which was her favorite .  She had a hard time deciding, but she chose this one ...

and this one ...

and this one ...

and this one ...

and this one ... :)

Mine is this one ...  In fact, it was the inspiration for the name my helper gave this quilt.

She was telling me how she didn't like this one block because it was the only one with a dress on it.  All the others had flowers.  I told her I liked that one little block because it was daring to be different from the rest and that it looked like it was going to a party.  Then my helper said, "Hey!  I'm going to call this quilt Garden Party!" 

Love it.  Hope you do too. :)

I'm regretting a little bit that I went with the yellow border instead of the pink (I already got an "I told you so, Mom!").  I think it turned out a bit too quiet.  Oh well.  It still looks nice.

Now, I usually try to use up leftovers for the back, but since the fabrics came from my scrap bin, I luckily found some older Robyn Pandolph yardage that did the trick.

Stash Redux:

  • Yardage - 4.4 yds / 4.1 m
  • Weight - 1.2 lbs / 0.5 kg

For a grand total of:

  • Yardage - 35.9 yds / 32.8 m
  • Weight - 12.6 lbs / 6.9 kg

Feeling good!

Wednesday
May182011

Project Simplify - Day 19

And now back to our regularly scheduled blogging. :)


Remember this sweet, innocent-looking spool of lilac variegated RAYON thread?

Yeah.  It's evil.  But I'll get back to that in a minute.

I decided that after my poor "daisy flower" FMQ results I should stick to what I know for now - which is the "swirly twirly".  Fine.

But things were not going well.  I'd only done about 5 minutes worth of stitching and the thread broke, like, at least 20 times!  I rethreaded, checked the tension, everything I could think of to fix the problem.  I was having a serious hate-on for the thread.  But when I started testing out different thread I discovered that the lilac rayon was only half the problem.  The other half?  Well, turns out you really do need A DARNING FOOT on your machine to do FMQing.  The open-toed applique foot won't work.  (Oops!)

When I finally clued in to THAT little oversight, my darning foot decided to punish me for ignoring it by falling off and breaking (another) needle.

Sigh.  So by this time there were so many stops & starts in my top-stitching I figured I should prob'ly take it all out.  I hate unpicking almost as much as I hate practicing.

But ...

Guess who discovered that the little helper girl L.O.V.E.S using a stitch ripper?  (This photo was her idea.)

She was all over that job!  Especially after I showed her how to cut every third or fourth thread and then after a few minutes do that oh-so-satisfying long thread pull.  :)  drrrdrrrdrrrdrrrdrrr!

I sent her off to her Grandmas with the quilt and the ripper and she happily undid my mess.

Then I showed her my secret weapon for removing all those annoying little bits of thread ... masking tape.

If you've ever had body hair waxed ... you get the picture ;)

I love this girl.  Who knew 24 hours of labour followed by a C-section would pay off this way?

Wednesday
May112011

Project Simplify - Day 18

I changed my mind (again) and picked a different background fabric.  Both my helper and I agreed that the small taupe print was too "busy" with all the scrappy piecing action going on.  But I just so happened ... ;) ... to have a tonal from the same fabric line (Simplicity by 3 Sisters) and it works much better.

For a border I was going back & forth between these two delicate checkered Susan Branch prints.  I thought I'd like the pink better, but again the piecing in the middle is just so ... noisy ... that I chose the yellow (much to my helper's disappointment - she's a pink girl like her mama).

So I've been back practicing FMQing.  I was so happy with the results of "Little Lady" (I'm inserting this picture now as a defense for the next picture) ...

... that I thought I'd be a little adventurous.  If you look closely at the picture of this quilt in the book you'll see that Camille incorporated the sweetest daisy-like flowers with her "swirly-twirly" top-stitching.  Here's how mine are turning out.  (In a word - laughable.)

I admit that I'm biting off a bit more than I can chew right now.  I need to match my execution with my skill level - not my lofty ambition - and clearly I ain't there ... yet.

In keeping with the premise of this project - simplifying my stash - it occurred to me that I should be including thread.  I bought this lilac variagated thread ... oh, maybe 5 years ago ... and have never used it.  I think it might look really pretty for the top-stitching. 

I admit it's a bit risky, but what the heck, I'm feeling brave ...

Thursday
May052011

Project Simplify - Day 17

You know that saying "misery likes company"?  Well, apparently crazy like company too.  I don't feel any less crazy about my fabric issues, but I sure do feel like I'm in very good company.  Thanks y'all who chimed in.  You guys are funny!

So, from that barfing scrap bin, here are the prints my helper & I picked from my scraps for this quilt.  And I chose this light taupe on white print for the large border from my main stash. 

I haven't committed to a fabric for the colored inner border yet.  (Scroll down a bit to see the first picture of yesterday's post).  I usually wait until the main part of a quilt top is pieced before picking one - especially when I'm using scraps.  I just never know which color I'm going to want to accentuate ... although pink is usually a pretty good bet! ;).

There aren't enough years left in me to list & describe all the things I've made from these fabrics.  I couldn't possibly give you each piece's history.  There's everything from brand new Robyn Pandolph charm squares to 5 year old 3 Sisters by Moda prints to more Susan Branch to 20+ year old Laura Ashley scraps.  But you're looking at a fairly good representation of what sorts of colors & prints make me happy.

Ooooh, this is gonna be a pretty quilt (if I do say so myself)!

Wednesday
May042011

Project Simplify - Day 16

Chapter Three.  A scrap quilt.  I adore scrap quilts.  I think of them as a collage of the quilt maker's history. 

But I've been dreading this chapter for one reason.  You see, I sorta feel like a fraud because you might have the misconception that I'm a really neat & tidy person from seeing this picture of my stash that I shared with you a little while ago.  (It took 5 hours to make it look this nice.)

Yeah.  Here's what I didn't show you ...

My shameful scrap bin.  Doesn't it look like it's barfing?  I keep it under my sewing table, which is probably very bad Feng Shui.  And every time I try to get it under control I turn into someone who should be on a reality show about hoarding. 

  • "But I could use that for ____!"
  • "But this piece is way too big to throw out!"
  • "But I really love that _____!"
  • "But this would be great for _____!"
  • "But that's my very last piece!"

See, I have a weird love/hate relationship with my scraps. 

I love them because I can make something pretty without spending money.  It makes me feel ... frugal.  And I love the challenge of making things from scraps - no pattern, no guidelines.  It forces me to exercise a different sort of creativity.  Plus they're very handy when you just need a little bit of something.

At the same time, I hate using up my scraps.  The only reason they are still scraps and not garbage is because I love them too much to throw out.  Using up and throwing out a scrap is the same to me - either way, it's gone.

I don't quite understand why I can get so emotionally attached to fabric.  I almost always buy it because I fall in love with it, not because I need it.  I rarely find a pattern first and then look for fabric.  I'm always drawn to fabric first.  Then I buy it.  Then I wait to find something to make out of it.  This pattern of behaviour (pardon the pun) goes a very long way to explaining my stash.

So for me, my "scrap bin" is a sort of "scrap book".  It's like going on an archaeological dig every time I search through it.  Memories of past projects come flooding back.  Feelings about the objects made and the people I made them for bubble up to the surface ...  much like I experience when looking through a photo album or scrapbooks.  Some are old and dear friends, some are just aquaintances and some have grown old, tired & out-of-date but I still feel great fondness for them.

Anyone else feel the same?  (Please don't leave me out here all alone in crazy fabric addict land.  I could use some company right about now!)

Monday
May022011

Project Simplify - Day 15

I l.o.v.e scallops.  Love them!  Not so crazy about binding them, but I've never regretted the extra time required to make a beautifully scalloped edge on a quilt.

The awesome thing about the scallops on this quilt is that they aren't on the edge!  They are cleverly appliqued on so you get the same scallopy sweetness without messing about with all the things that come with a scalloped edge.  (Anybody else suddenly have a craving for piping hot cheezy potatos ... mmmmmmmm!)

Remember I talked about shadowing in my last post?  Yeah.  Same problem here.  Maybe not as severe as the stripes & flowers because it's just little uniform polka dots.  But I guess I just felt like making things more difficult for myself ... again ... and I reverse appliqued the scallops too.

If you follow the instructions in Camille's book, this scalloped border is fairly simple to make.  And it just looks soooooooo sweet!

So here's the quilt top.  I think it looks so bright and happy & fresh.  I can't imagine how any quilt made with Flower Sugar can look anything but!

Oh, and I'm calling this one "A New Day".  I just realized I forgot to tell you that I made this quilt solo - no assistant this time.  You see, there are 9 quilts in the book and I only have 2 girls.  If you've ever had the fun of doing "fairsies math" you'll know why I had to do one by myself ;).

Quilts for Quake Survivors was accepting quilt tops so I didn't worry about top-stitching it.  (But I did make a back for it.  Sorry, forgot to take a picture.) 

I have mixed feelings about not top-stitching this quilt.  On the one hand, I am anxious to "practice" some more free-motion quilting so I'm sad to miss the opportunity.  On the other hand, I have absolutely no idea what design I'd use!  The quilt in the book is beautifully, professionally long-armed and there is no way I could replicate that design myself.

Do you have any suggestions for a nice FMQ design for this quilt? 

Stash Redux:

  • Yardage - 9.8 yds / 8.9 m
  • Weight - 1.8 lbs / 0.9 kg

For a grand total of:

  • Yardage - 31.5 yds / 28.7 m
  • Weight - 11.4 lbs / 6.4 kg

                              *          *          *          *          *

Well, I didn't quite make the deadline for the quilt to be shipped to Japan (I got a confirmation email saying they received it just a few days late).  But they are setting up an Etsy store to sell all the post-deadline quilts they receive.  The money raised is going to Mercy Corp.

I'm very excited about being part of this initiative and hope the quilt makes at least a few dollars for them.  I'll keep you posted on what happens ...

Friday
Apr292011

Project Simplify - Day 14

Shadowing - at least that's what I call it.

It's an evil thing that happens when you applique a lighter fabric onto a darker one and the dark fabric shows through.  This is a pillow I made for my daughter 4 or 5 years ago.  (Notice the cross-hatching?  Told ya I need to learn FMQing!)

See how the dark hearts show through the pink?

What does this have to do with the green flower?  Right.  I'll get there. 

I had chosen a rather busy paisley print for the flower's center and it worked great with the light green polka dot. 

However, I thought the paisley was too busy to go with the busy-ness of the new green print and I wanted more contrast between the petals & the center of each flower.

So I went with a solid white which I'm also using for the scallops on the border. 

And here's where the problem lies - shadowing.

Ugh.  Now, one could always just cut away as much of the green from underneath as possible.  But you'd still see a shadow line just inside the seam.

My solution?  Reverse applique!  That means instead of positioning the flower's center on top of the petals, I cut out the middle of the green petal piece and put the white fabric underneath.

See?

And then just trimmed away the excess.

In the clear?  Not quite.  See how the stripes of the background are now shadowing through the white? 

It's a little hard to see in the picture, but trust me, it's there.  And the shadows will only get worse after top-stitching.  (I've made the mistake of hoping that top-stitching over shadows wouldn't make a difference ... )  So I just cut them out too.

It might seem like a lot of trouble for one little flower.  But every time I look at my daughter's heart pillow, I cringe.  And I just couldn't - in good conscience - make a quilt with shadows.  To me, it was so worth the effort.

Thursday
Apr282011

Project Simplify - Day 13

Okay.

You know how you find yourself with a few spare hours and you're in a good mood, looking forward to a nice romantic date with your sewing machine? 

Then, all of a sudden you need a few yards of a weird thread color for some machine applique because you want to color match for invisible stitches?  So you pop into the nearest quilt store and they don't have a thread that really works but the saleslady talks you into something that's "close enough"?  And you don't really believe her but you're praying she's right so you buy it 'cause you just want to get back to your machine?

But when you get home and start sewing you realize to your dismay, "Not even for a giveaway is this good enough!"  (It looks worse in person.)

You know what I mean?  Totally annoying.

But you can't keep this quilter down for long.  Even though my options were limited based on the colors of the background strips - there just so happened to be another shade of green fabric in this line that was a somewhat better match to the new thread - kinda sorta.  So I cut out a new flower.  Problem solved?  Well, yes ... but then I had another issue ...

(Cue the "oh no" music.) 

Tune in tomorrow for the conclusion of the green flower conundrum.  (I used to be a Soap Opera junkie ...)

Wednesday
Apr272011

Project Simplify - Day 12

Figuring out how to make "Sugar Rush" with these fabrics presented an interesting challenge.  I had fat quarters aplenty, but not enough full-width pieces to meet the pattern requirements.   I didn't want a crooked line of pieced "cheater" seams across the middle of the quilt AND I didn't want to repeat any prints - that would just be just way too easy.

However, during one of many drooling sessions through the book, I noticed that one of the appliqued flowers is strategically positioned to hide a handful of seams made from piecing FQ strips.

I was able to hide all but 2 seams - one seen below in the yellow and another one on the opposite edge of the quilt.

The other bit of planning was to figure out which fabrics to use for the flowers - based on the prints I'd chosen to be pieced.  I didn't want a flower to sit on the same print/color because to my eye, the flower would lose some definition and just look a little weird.

I've done tons of machine applique and I'm always looking for ways to make the job easier.  If I can stitch smaller pieces together before joining them to a larger piece, I will.  So here I appliqued the centers to the flowers before attaching them to the quilt.

A word if you're planning to make this quilt.  There's a small error with the template for the large flower (page 106).  It has an extra petal and will result in an oval-shaped flower.  I think the quilt would still look pretty with an oblong flower and the integrity of the quilt is not compromised in any way should you use the template as is.  But here's what I did ...

The original template:

I drew a pencil line across:

And then cut along the line, removing the extra petal:

Easy bow-breezy!

Tuesday
Apr262011

Project Simplify - Day 11

Just shy of a few weeks ago I was visiting Posie Gets Cozy - the very first blog I ever read cover to cover - and noticed a button for "Quilts for Quake Survivors".  When I clicked on it, I found a wonderful group of women collecting quilt blocks & tops to make into quilts that were being sent to Japan.  Without hesitation, I knew I wanted to contribute.

I already mailed this quilt top to them - to try to make their April 22 deadline - but I'll spend the next week or so sharing the story behind the making of it.

                              *          *          *          *          *

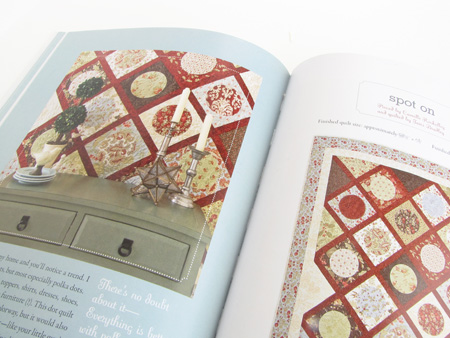
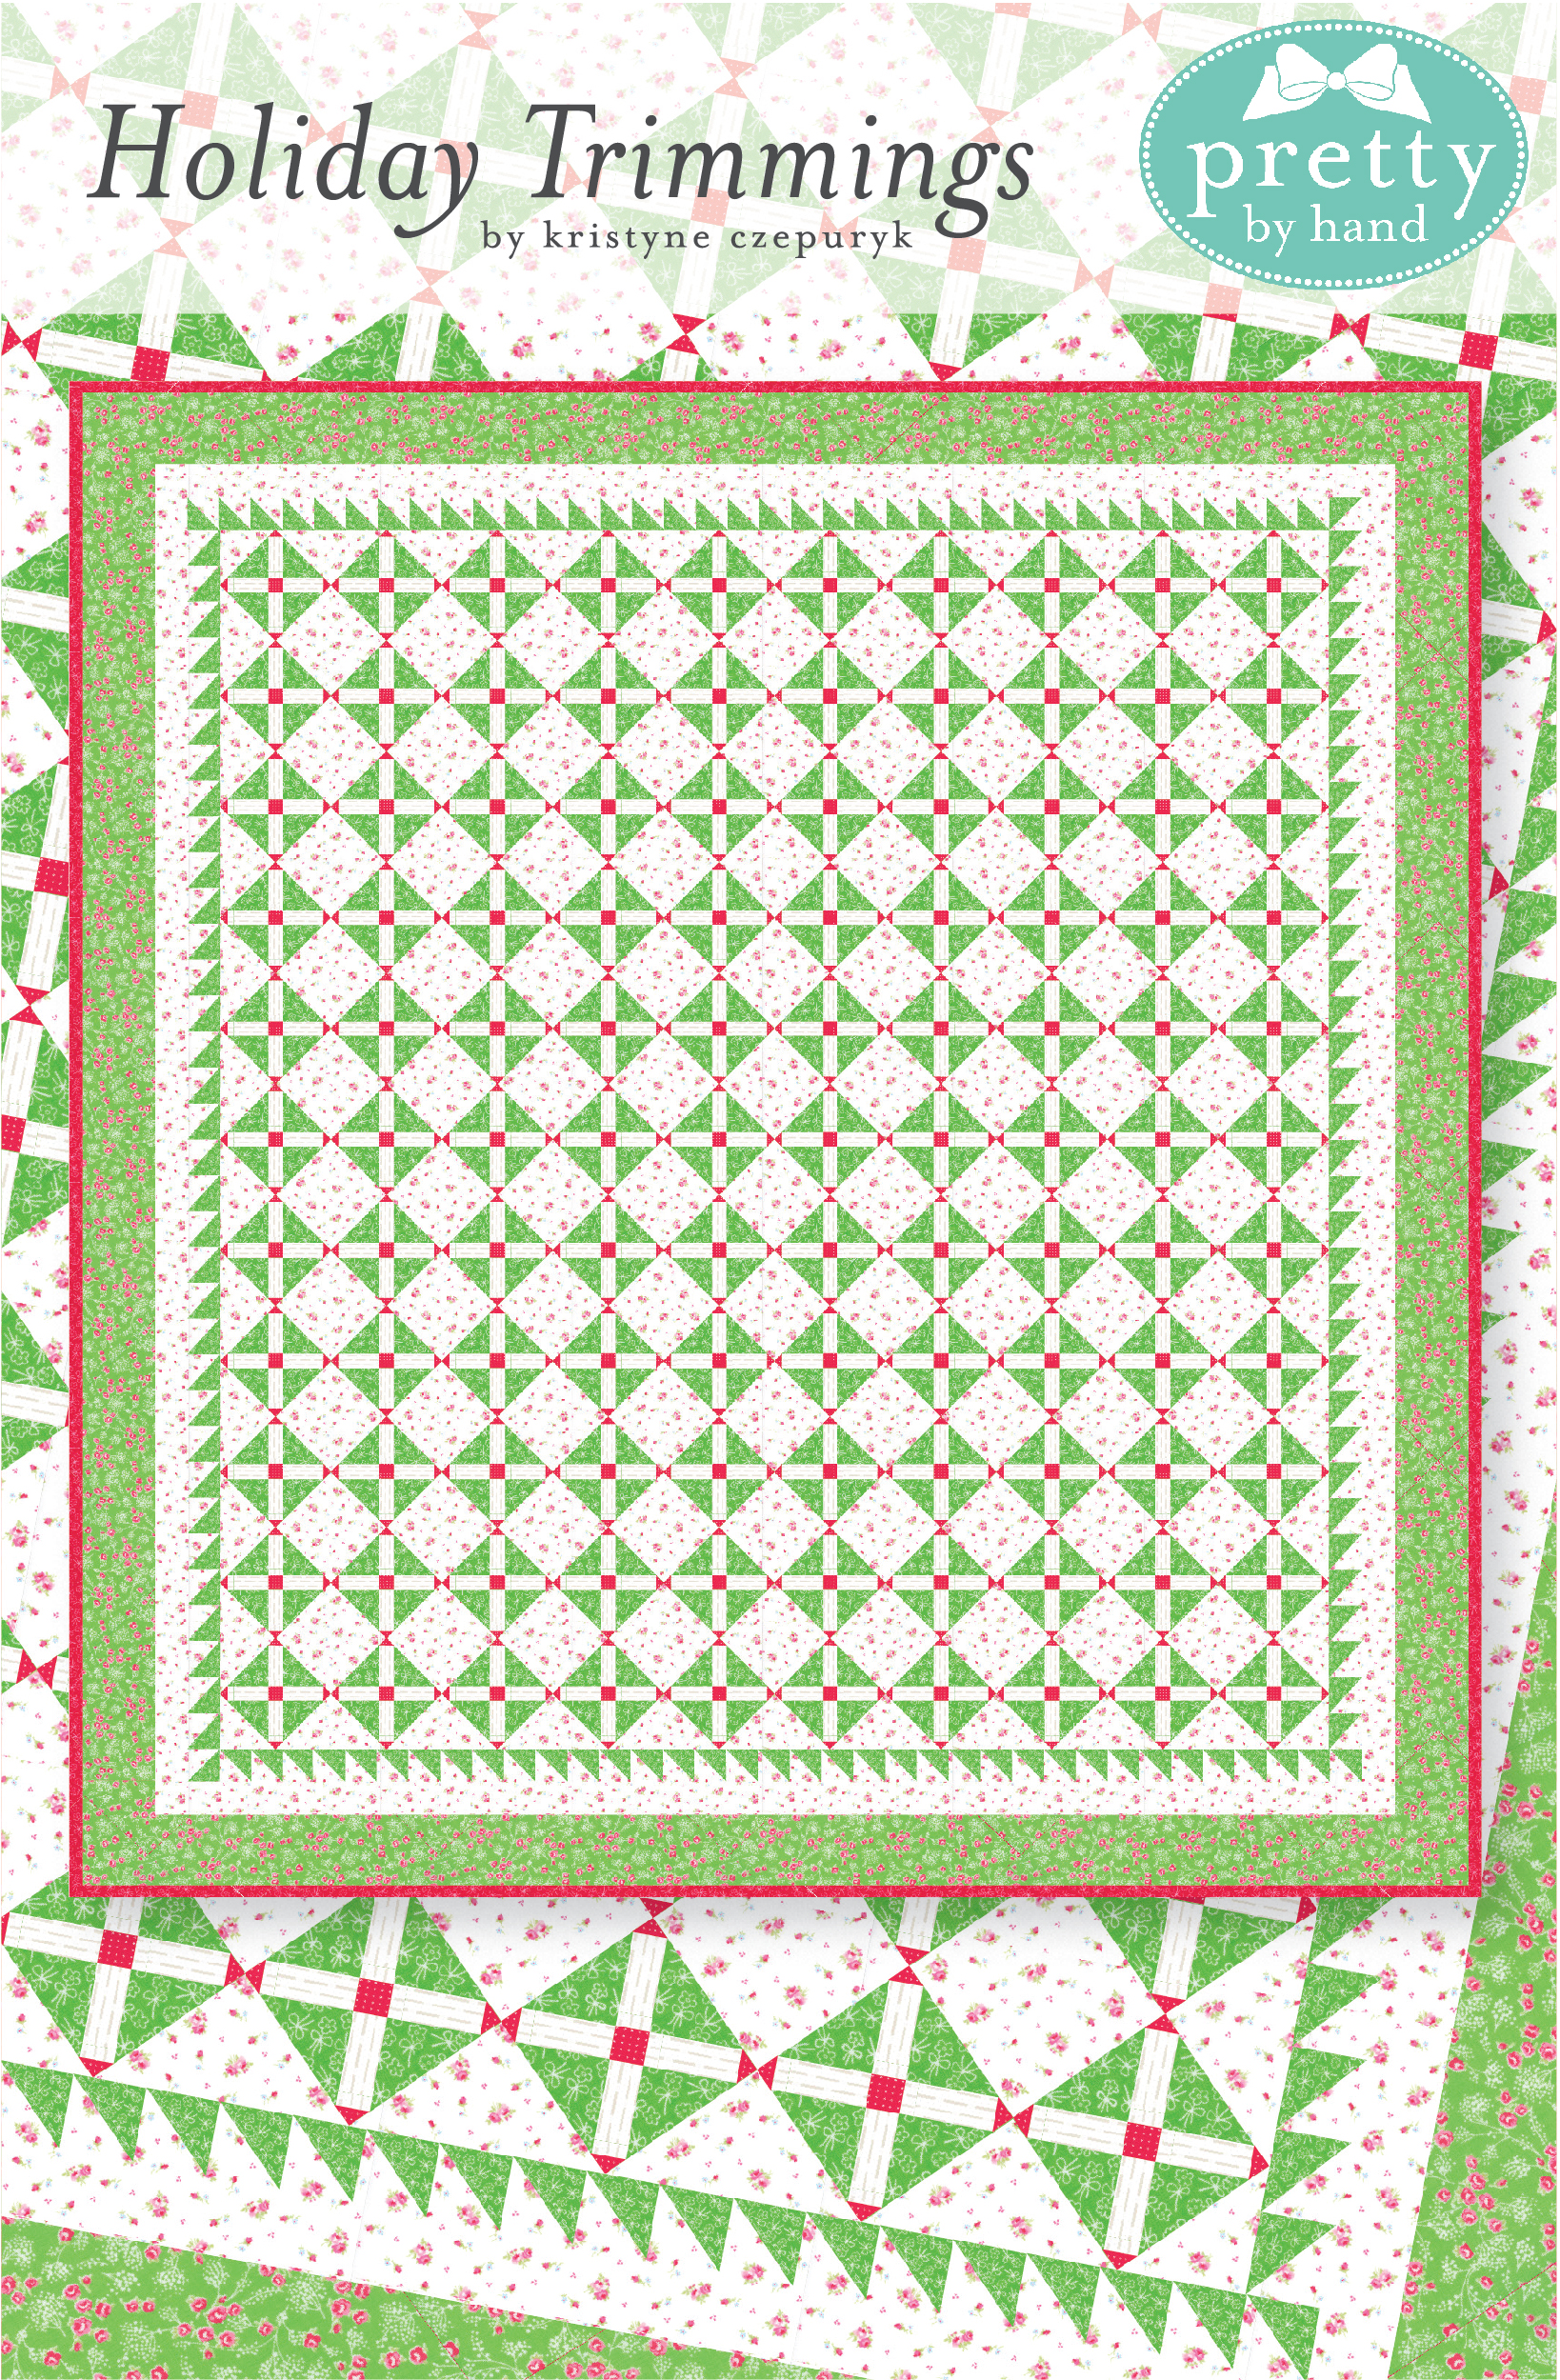
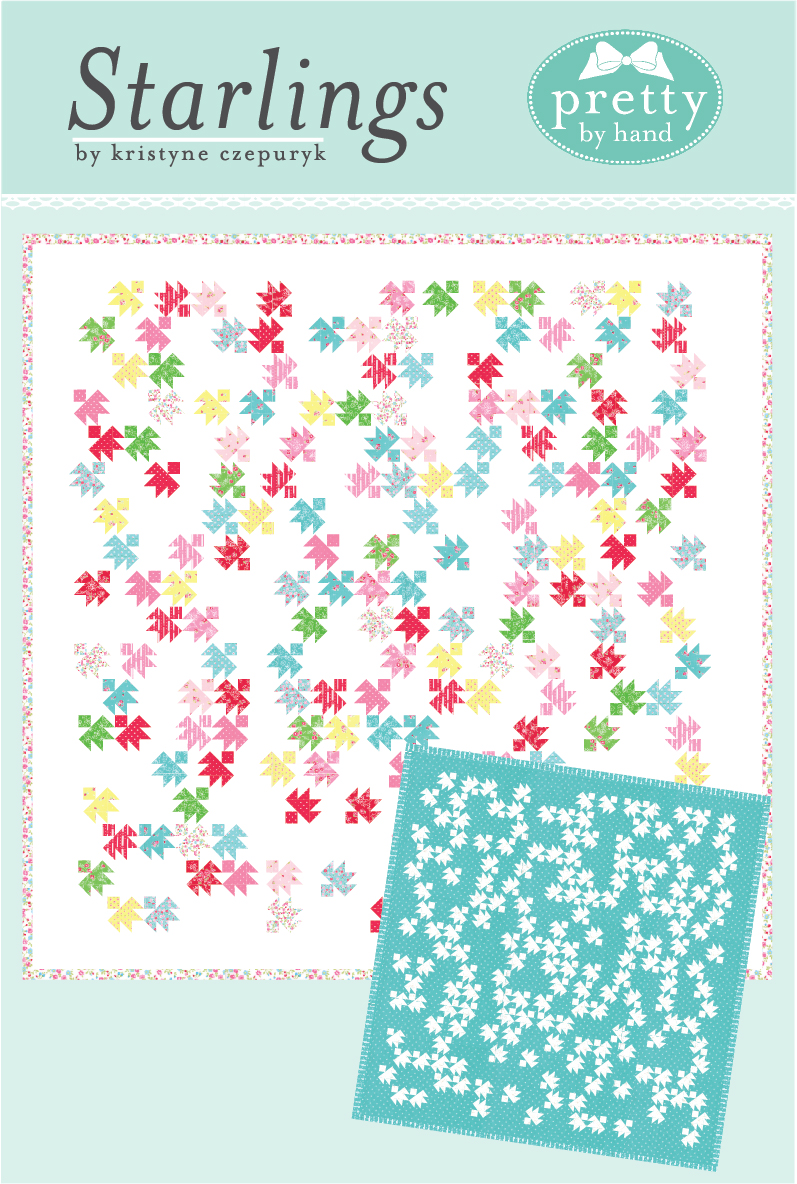
My original plan for Project Simplify was to go thru the book in order by Chapter.  But my absolute favorite quilt is Sugar Rush ... in Chapter 6 ... way, way off in the distant future ... weeks & weeks away ...  .  So when I discovered this cause I thought not only was it ok for me to change my plan, it was necessary.

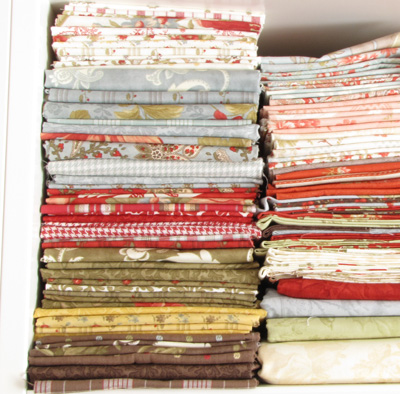
And I had the perfect fabric for it too - "Flower Sugar" by Lecien, a Japanese fabric manufacturer. 

This fabric found its way into my stash from three separate shopping trips over eight months.  That's one of the many wonderful things about Flower Sugar - every new collection works with the previous one.

The first batch of fabric - from the 2009 collection - I found last summer when we were on vacation.  We drove to California and on our way home I did a random search with my GPS for a quilt store and luckily found this little gem of a quilt shop just south of Salt Lake City.  I could have spent hours in there.  If you're ever in the area I highly recommend checking it out. 

Next, I bought a FQ bundle (ok, ok,  - 2 bundles) at Quilt Market in Houston 2010 on impulse (remember the agreement we have that Quilt Market purchases are always classified as impulse buys and are, therefore, exempt from any justification?). 

Then my local quilt shop had a lovely roll of 10" x 40" strips ... just the thing to satisfy my need for width-yardage.  I must have been subconciously planning to make this quilt for myself because I also got a few metres (yds) of the blue with white dots which are perfect for the border. 

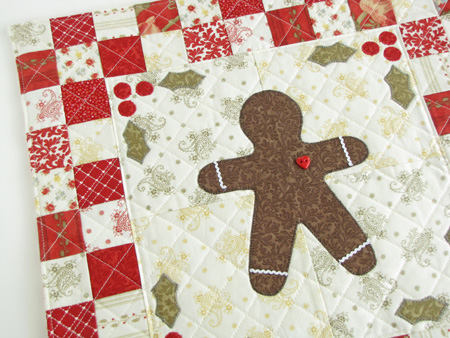
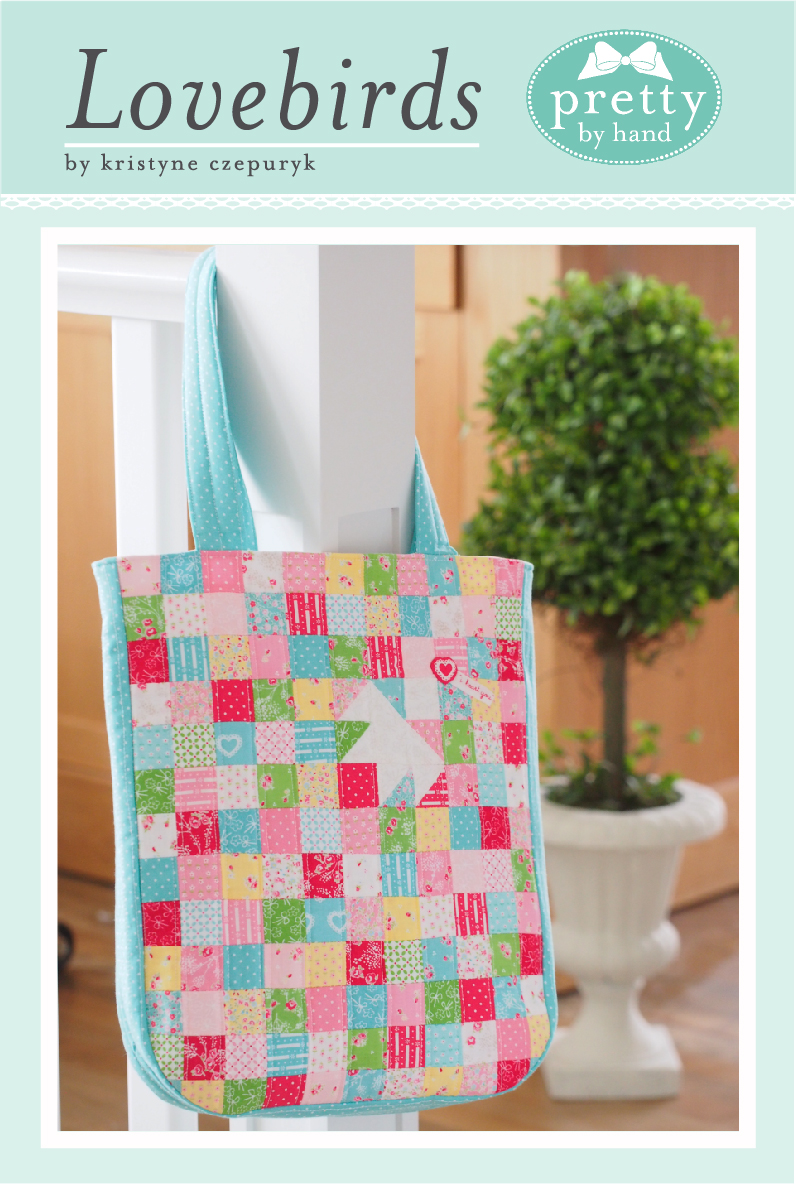
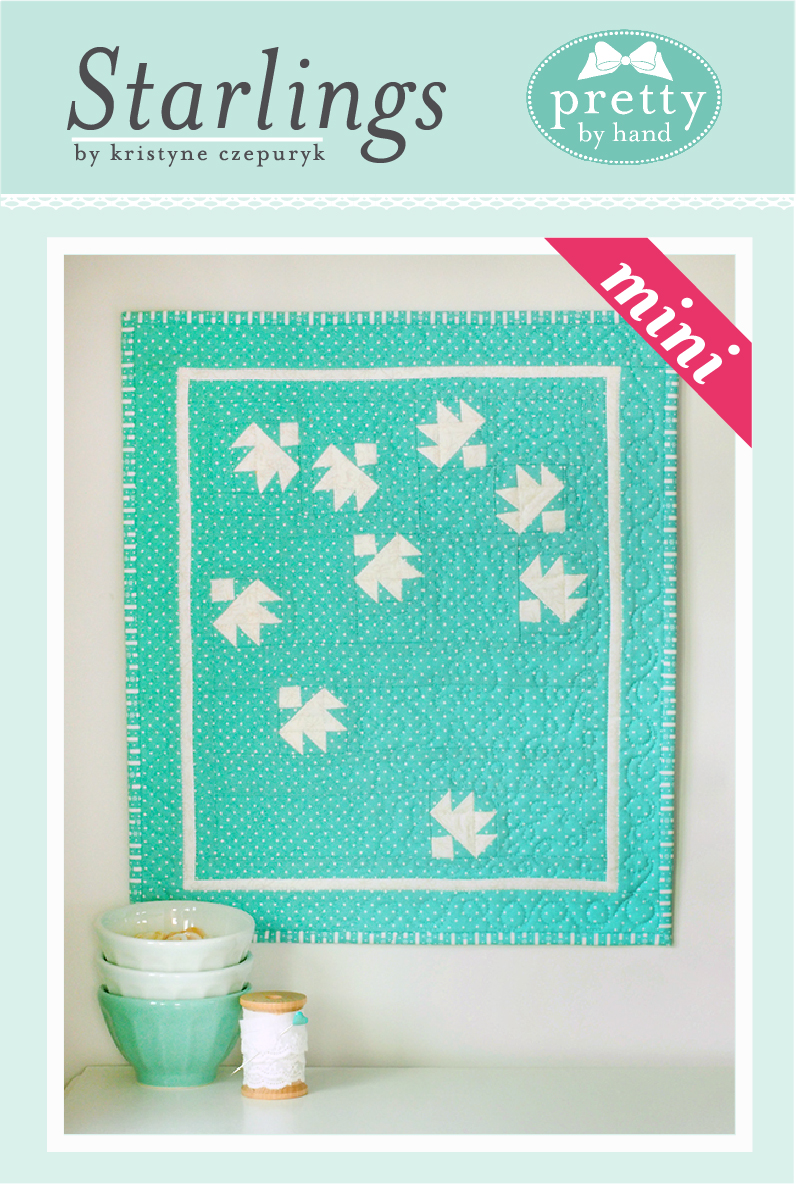
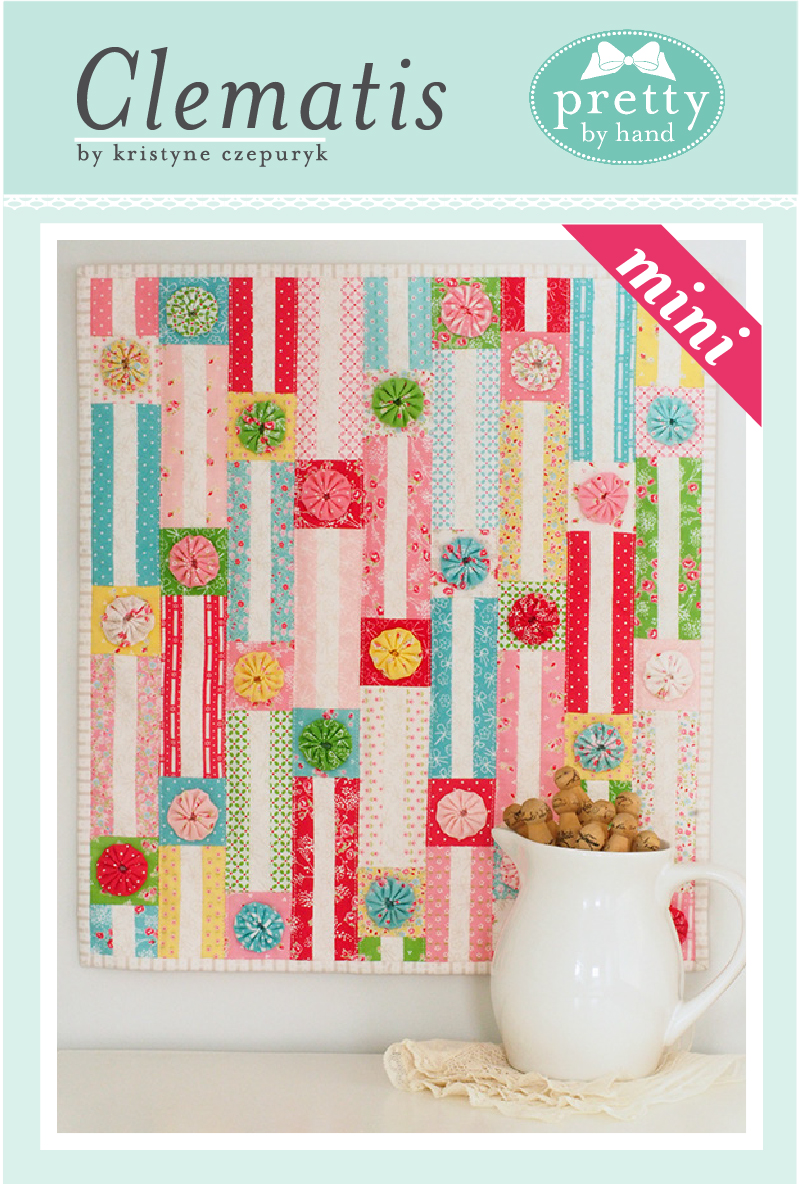
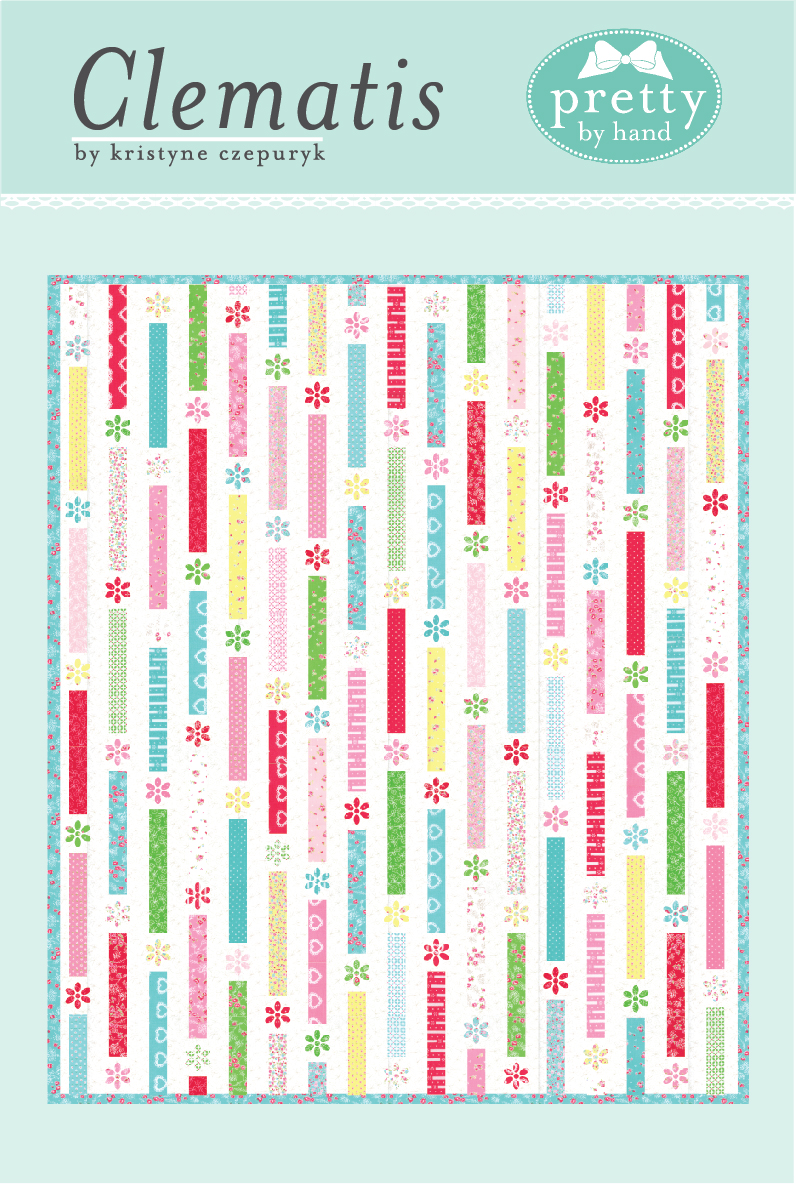
So, what have I used this fabric for already?  Well, again before Project Simplify was born I made this quilt from Chapter 3.

I'd never made an aqua/red quilt before (Camille's signature colors) so I gave it a try combining both "Flower Sugar" and "Sweet Divinity" by The Quilted Fish (another Market 2010 impulse buy ...). 

I love how the quilt turned out.  (Notice my standard cross-hatch ... now a thing of the past?!)  But looking around my house I just couldn't find the right place for it.  So now it lives at the quilt store on display.

I've made a few other little things from this fabric, but they were birthday gifts for my daughters' friends so I don't have photos.  

Because that was before I became 'crazy blogger lady' who photographs everything ... (here comes a tangent).

"What's that sweetheart?  You hurt yourself at school?  Tell me what happened.  Maybe there's a blog post in there somewhere for me.  Yep, there it is!   Just give me 5 minutes while I take a picture of some books with a bandaid." 

Or how about,  "Yes Honey, I know I'm still in my pjs, but the snow on the trees isn't going to last long!  Don't worry, the neighbors won't see me." 

Uh, yeah they will. 

Note to Self:  If you're gonna wear pjs outside in broad daylight, at least put on the black bottoms that could sorta pass for active wear, not the bubblegum pink flowery capris ... with black snow boots, still unzipped ... and a chocolate brown corduroy jacket.  There's just no way to look 'not crazy' in that ensemble - especially while holding a camera & ruler - when Mr. Jones from down the street is looking for someone to talk to and happens to catch you on the sidewalk.   Just exactly how DOES one explain blogging to an 86 yr old, hard-of-hearing, retired construction worker who's never used a computer? 

Go ahead.  Give it a try.  I dare you.  No, I DOUBLE-dare you!  ;)
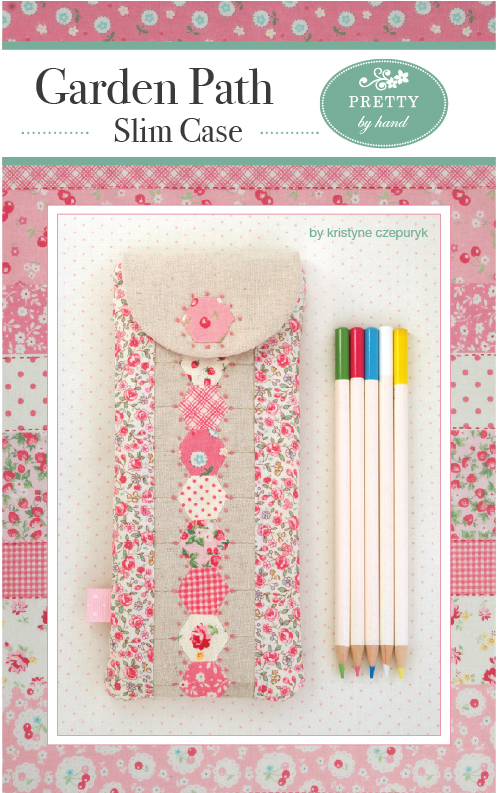
Wednesday
Apr202011

Project Simplify - Day 9

Check it out!  (Except please ignore the uneven stitch length - I'm still working on that.)

As a perfectionist (who's trying to surrender herself to the more productive philosophy of acceptance), sometimes it's hard for me to embrace the "special" qualities of something I've made by hand - those little imperfections and idiosyncrasies that are unique to me.

At first, I was unhappy with my inconsist loop size and it was making me crabby.  But as I found myself really enjoying the physical activity of stitching loop after loop after loop, I somehow managed to convince myself that if I were able to create the "perfection" I was seeking, this quilt would somehow feel ... I dunno ... less special? 

So now I'm really liking the irregularity.  I think it has ... personality. :)

I'm not secure enough - yet - with my free-motion skills to just pick any top-stitch design and I felt most comfortable using the same one shown in the book for this quilt.  I would have never in a million years come up with this idea on my own, and I lllllllllllllove it!  It's a little modern-ish-y, and I think it works really well with all the "funkiness". 

I don't want to go tooting my own horn or anything (well may just a little), but I'm wondering why it took me ... a few decades to take the free-motion bull by the horns.  It's turning out to be way easier to handle than I thought!

Monday
Apr182011

Project Simplify - Day 8

I was in such a hurry to get to the top-stitching that I totally forgot to take pictures of the quilt before I free-motioned it.  So just pretend that you don't notice it for now ... kay?  Thanks ;)  I promise I'll talk about that bit in my next post.

First, I want to show you what we did with the ric-rac.  Ta da! 

My assistant chose the colors and here's how it turned out - pink along one border and blue on the other.  I was a little worried that the trim would shrink in the wash, but it didn't!  Yay!

Now you're probably wondering "Uh, excuse me, but what happened to the pink background?  Why is it cream?"  You're right, you're right.  But it's not what you think.  I didn't get cold feet about using up my pink.  Honest!  I went cream because the light pink in Pink Funky Roads sorta melted away.  See?

It bugged me.  So I used the pink for the binding instead. 

A few other things I want to mention about this top.  I didn't realize that Pink Funky Roads & Funky Hearts aren't exactly BFFs.  They play nicely together in the quilt, they just don't want to hold hands.  So I improvised a bit and threw in a few other prints - Green Kisses & Square Flowers - to keep the Funky girls separated. 

Remember I mentioned that I'd need to be creative about the borders?  They require full fabric widths but because I only had fat quarters I simply pieced them.  Not rocket science.

And now let's have a moment of silence to commemmorate this absolutely in-CRED-ible match up job. 

" ... and the heavens parted and the angels wept, for it was a thing of beauty."

Just kidding.  I made that up.  It's not really a quote.  At least, not that I know.  But it should be in "The Bible of All Things Quilty",  along side this photo.  Don't you think?