Thursday
Sep052013

not a mistake, but an opportunity

I miscounted the number of blocks I was making (again) and ended up being short by two.  So I made one more pieced block ...

and then decided to do my embroidered signature block trick for the last one.

Glass half full and all. ;)

Tuesday
Sep032013

farewell hollyhocks

I love hollyhocks.

Really, I do.  They're about the closest thing I can get to my fantasy English Cottage garden.

When we bought this house 16 years ago, there were a few hollyhocks scattered around the property.  But it was Fall and I didn't know a thing about gardening.  Much to my delight, they all came up again the next year.

Aha! Perennials. :)

I learned that hollyhocks are extremely hardy in my neighbourhood.  They grow the most amazingly deep tap roots and self-seed like you wouldn't believe.  AND I don't have to water them.  They are quite happy with what they get from Mother Nature.

However, if there was ever an issue that would land me in divorce court, it would be my love affair with hollyhocks.

They grow so tall (8 feet!) that they require staking.  Otherwise, they eventually fall over ... across the sidewalks ... obstructing paths where people are supposed to be able to walk.

Somehow, I never quite get around to that staking part.  And my poor husband?  That drives him 'round-the-bend-banana-nuts-crazy.  I still don't know what the big deal is ... you just walk around them on the grass.  Grass can be walked on, you know. 

But he has a thing about that. 

And then when they do finally lay down and make a serious mess, it is quite the clear-cutting operation to clean them up.  The stalks are very thick & tough and the leaves are large & plentiful.  I wasn't too happy in the years when they got all gross with bugs either.  Yuck.  THAT part I could do without.

(Please note the "vintage" fahrenheit thermometer with its protective snow shield at our back door - it came with the house and it always makes me smile, even though I have to do the "subtract 30 and divide by 2" metric conversion thing.) 

I finally conceded and let him destroy all the hollyhocks along the south sides of our house & garage where they posed the biggest problem.  But I still have them at the front and here in the back - right under the kitchen window.

(Please note the window frame ... evidence of why we need a new house.  Replacing the windows here would be a waste because the roof started leaking this summer, the front stoop is crumbling away, the stucco is falling off, the insulation is substandard ... blah, blah-blah, blah-blah.)

Back to flowers.

Mine are white and several shades of pink.  I may or may not have "liberated" a few seeds from strangers' gardens under the cover of darkness.

I don't care as much for yellow & red ones.  The black ones are fascinating, but I didn't want them in my garden.  There were a few burgundy ones I removed as well.

And I also don't care for the double bloom ones.  No, I'm quite particular and favour this elegant trumpet or single bloom variety.  Explains why I also love morning glories.

But I'm sad.  I won't be able to plant them at our new house.  To say nothing about said husband's objections, we're going from a football field-sized yard (slight exaggeration) to a postage stamp-sized yard (not at all an exaggeration) and there really isn't a good spot for them.

So this was probably my last summer to enjoy these abundant and beautiful hollyhocks.

"Farewell, blossom friends.  I will miss you very much."

Monday
Sep022013

looking for some stitching fun?

There's a new online stitch-a-long starting up using an embroidery book I happen to know a thing or two about ...

(Blushing)

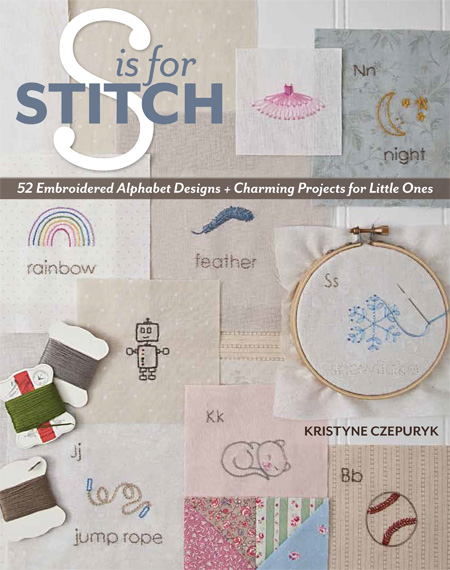
Liz over at Shush I'm Quilting is organizing a Block of the Week or "BOW" and the goal is to make one embroidered block from S is for Stitch - my book ;) - every week until you have a completed alphabet.  Sounds like fun!

Just so you know, each alphabet block in the book is really small - all the designs finish no larger than 2".  Even when you add the lettering, one finished block is only 3-1/2". 

I purposefully made all the designs to be interesting and fun with cute details, but I only used simple, basic stitches.  So one block a week is VERY doable.  (In fact, you might find that making them is a little like eating potato chips ... hard to stop at just one.)

Funny story about the cover of my book.  There was a timing issue with the photo shoot and I literally had one weekend to stitch up 16 blocks so I could get them couriered to my publisher Monday morning.  My hand was pretty sore, but I learned that it took me - on average - about an hour to embroider one design.  Some a little more, some a little less.

(If I had to pick a favourite block from my book, Q is for Quilt would probably win.)

So if you're looking for an embroidery project and want some online company, go check out Liz's blog for details.


Friday
Aug302013

hexagons in the corner

Oh does this nice big chunk of 36 joined diamonds ever make me happy! 

Approximately 1,100 pieces.  It measures about 29" x 50".

And represents about 2 months' worth of spare time.  (Not sure if I should be proud or ashamed of that fact!  LOL!)

I know eventually I'll hit that oh-my-god-why-did-I-have-to-do-half-inch-hexagons wall. 

Adding the last row (of 11 diamonds) took almost 2 whole movies to complete. 

But for now I'm still madly in love with these tiny pieces, and the uniform diamonds of wee florals & checks floating on a cloud of white.

I'm particularly pleased with how the double rows of white between the colours look.  Grandmother's Flower Garden quilts typically have only one row of background between the flowers.  My double rows give more breathing room between the blocks and create a more airy feel to the overall design.  Love that.

I've ordered a few (a dozen counts as a few, right?) more Liberty FQs.  I hope they arrive soon because I want to spread out all my prints evenly throughout the quilt. 

Are you like that too?  Or do you enjoy the randomness and embrace the occasional need to introduce new prints even after some of your blocks have already been put together?

Wednesday
Aug282013

chain of custody

Do you know Jodi and her lovely blog Pleasant Home?  I do.  Well, maybe I should qualify that by saying I know who she is.  I've been a fan of her blog for a few years, but I'd never actually met or spoken to her.

Then one day, some weeks back, there she was ... in my Inbox.  Just like that. 

Seems that when she saw these pillowcases I made with reclaimed vintage handmade lace (which I'd bought on eBay several years ago),

Jodi decided I'd be a good home for "some lace" she'd inherited.

I was - and still am - stunned.  It's gorgeous.  Beautiful.  Many times finer than anything I'd ever handled before. 

This lace was (probably) made by her great-grandomther, Stella Sinclair.   She was born in Dot, Klickitat County, Washington - 4 August 1889.  (on the right)

Was married in 1906. (on the left)

And she passed in Gresham, Oregon - 6 August 1982.

This handmade lace is exactly the sort of thing I'd always wished had made its way through the generations of my own family.  But my ancestors come from very modest means and such things as this simply didn't exist.

I'm deeply honoured, thrilled and excited to be the newest custodian of Jodi's great-grandmother's hand-crocheted family heirloom lace ... but also a little nervous.  It's a huge responsibility and I do not take it lightly. 

So now I need to come up with something really special.  And I have to get it right ... the first time ... no running back to the store if I mess up!

Thank you again, Jodi. :)  xo

Monday
Aug262013

partial seam/log cabin tutorial

The log cabin blocks I'm making for this quilt aren't "true" log cabins. 

These blocks are called ... uh ... hmm ... I can't remember what they're called!  And I can't seem to find it online or in any of my books.  Nutty nutbar.  If you know what this block is called, please tell me.  For now I'll call it a partial seam log cabin block.

Anyhow, if you look carefully at my block below you'll see that all 4 "logs" in each row around the center square are the same length rather than the small, medium, medium, large of a traditional log cabin block.

I think this block version isn't very common because partial seams are required.  And I'll come clean now by saying if I had to make this quilt all over again, I wouldn't bother doing it this way - I'd just go the regular log cabin route. 

But I got it in my head that because this quilt started with colours inspired by my blog header, I wanted to make it with a design that also references my banner. 

My first thought was to go with hexagons ... but I was afraid I might be overdosing ya'll on those, so I went with the little log cabin blocks - which I had just so happened to make this way.

There is method to my madness ... but madness it is. 

Seems like lots of you want to join me here in craycrayville and have asked me to show you how to make this log cabin block with partial seams.  I will warn you now that my small center squares are fiddly, but not impossible.  Okay?

To start, here are the cutting measurements I used:

  • Center square = 1-1/4" x 1-1/4"
  • First row logs = 1" x 1-3/4" 
  • Second row logs = 1" x 2-3/4"
  • Third row logs = 1" x 3-3/4"
  • Finished block size = 3-3/4".  (And my sashing strips are cut 1-1/4" wide, if you're interested.)

Step 1 - With right sides together, lay a 1-3/4" log on the center square, lining up the top edges.  Starting at the top edge, sew a 1/4" seam that is 5/8" long.  Do NOT sew to the end of the square.

(Other side so you can see how far down the square to sew.)

Step 2 - Press the log away from the middle, but only the section that has been stitched to the square.  Do NOT press the entire log ... you don't want a crease on the unstitched part of the log.

Step 3 - Add the second 1-3/4" log across the top edge.

Step 4 - Add the third 1-3/4" log to the left side.

Step 5 - Add the fourth 1-3/4" log to the bottom edge, tucking the first log out of the way.

Step 6 - Now you need to finish the partial seam for the first log.  But here's where it gets a little fiddly.  Because the center square is so small, getting the sewing machine needle into the right spot is tricky.

To make it easier, I cut a little slit in the seam allowance, about 2 stitches up from the end of the partial seam.  Now the partial seam lays flat and is easy to sew.

Complete sewing the seam.

Press.

The first "row" is done.

Step 7 - Repeat Steps 1 & 2 for the first 2-3/4" log.  This time, sew the partial seam about half way down the log.

Remember to only press the stitched portion of the log.

Step 8 - Add the second 2-3/4" log to the top edge.

Step 9 - Add the third 2-3/4" log to the left side.

Step 10 - Add the fourth 2-3/4" log to the bottom edge, keeping the first log out of the way.

Step 11 - Complete the partial seam and press.  The partial seam is easier to deal with this time because the seam is longer and there's enough room to stitch without clipping the seam allowance.

Step 12 - The third row - with 3-3/4" logs - goes on the same way as the second row.

And there you have it.

After a few of these blocks you'll be able to do partial seams in your sleep. 

Thursday
Aug222013

anniversary sale

One year ago today I opened up a shop to sell my patterns.

Gosh, I can't believe it's been a year already.  Time sure does fly.

Lately I've been thinking a lot about what I do ... as a person ... in the world.  Sometimes it feels like what I do here is trivial - you know - compared to people who work tirelessly looking for a cure for cancer or risk their lives fighting for human rights. 

And I often think about how I personally benefit from the passion and determination of strong, incredible women who blazed the trails I take for granted and my daughters and I walk on so comfortably today.  It's easy for me to feel ... I dunno ... not useful.

I'm no Mother Teresa or Madame Curie, that's for sure.

But I'm growing more comfortable accepting that what I do have is a creative spirit with a need to make things and a knack for writing instructions. 

I love imagining new designs, creating them and sending them out into the world to be enjoyed by others.  I'd like to think there is something maybe just a little bit noble about that.

So to celebrate the fun I've had this past year - and as a show of my thanks and appreciation to all of you for helping me feel useful - all patterns in my shop are 40% off from now through Sunday, August 25th.  Just enter the code PRETTY at the checkout.  Sale has ended.

Thank you so much!

Wednesday
Aug212013

flower sugar

Oh the possibilities. :)

I bought mine here.

Tuesday
Aug202013

tools of the trade

Okay, the answer is "No, I didn't need a new pair of really nice embroidery scissors". 

I already have these lovely Ginghers which still work perfectly well and are timelessly pretty.

And by the way, these scissors are also famous because they managed to make their way onto the cover of Stitch Zakka

I'm happier about that than one would consider "normal", but what can I say?  I'm proud of my scissors.

So if you have this book, the next time you look at it you can say to yourself, "Well how about that ... Kristyne's scissors, right there on the cover."

But I digress.

The answer to the next question is, "No, of course I didn't need TWO new pairs!"

But I walked into my LQS last week (nothing wrong with that, right?), saw them (wasn't my fault - they were right there in front of me), asked if I could try them (first mistake), fondled them (second mistake), and then I bought them ... yes, both of them ... because I couldn't decide which ones I liked more.  Sophie's Choice.  (Not really, but you know what I mean.)

I will, however, use and enjoy them.  They open and close so beautifully in my hand.  Such smooth, elegant, controlled movements. 

This pair is by Sajou from France. 

I've always had a thing for mother-of-pearl. 

My 10 year old thought they were cheap plastic.  I nearly fainted on the spot and have since educated her on the difference between the two.

They came with a pretty tassel, which I quite like.  But I need to make a protective sheath for them.

And these ones - made in Germany by Dovo - are really tiny and oh so cute & delicate!

They came with a lovely little leather sheath, but are in desperate need of a scissor keep.  Otherwise, I'm sure to lose them before the week is out. 

Excuse me while I go troll around on Pinterest looking for some scissor accessory inspiration.

Do you have a favourite tool?

Monday
Aug192013

it takes a village

... of log cabins to make a pretty quilt.

A hundred and ninety five 3 3/4" finished log cabins, to be exact.

Cuts:  Centers = 1 1/4", strips = 1" and sashing = 1 1/4".

Friday
Aug162013

so. you think a gray house with white trim is boring?

(Inspiration house in my neighborhood.)

Well then let me try to change your mind by comparing these colours to a man's suit paired with a crisp white shirt.

For example, Exhibit A ...

and Exhibit B,

Exhibit Channing, 

 Exhibit 007,

 Exhibit Wolverine

I could go on, you know.  But more examples would just be ... gratuitous.

ZZ Top was right on the money when they wrote this song. 

And for the record, I had absolutely NO FUN AT ALL coming up with this compelling argument. 

Just sayin'.

Out of curiosity, what color is your house?

Monday
Aug122013

edging

Hope you had a lovely weekend.  I sure did.  I was playing around with my diamonds - laying them all out to see how big a piece I could make (a VERY satisfying exercise, I must say)!

In the process, I realized that I need to start making edge pieces.

I included these hexagons when calculating the number of required for this quilt, but I have to add one edge piece to my weekly quota of 5 diamonds.

By the way, some of you asked me why on earth I decided to torture myself with figuring out how much work this quilt will be and why bother with a deadline.  I understand where you're coming from - beLIEVE me, I do.  Sometimes ignorance really is bliss.  But I know how I think and how I like to work.  So here is my four-part answer ...

First, calculating:  I've started so many quilts with the "just making it up as I go along" philosophy, only to run out of a certain fabric and then end up with ridiculously oversized borders to make the quilt big enough, or end up with a quilt that's just too small to be useful.  I know the heartbreak that could have been spared with just a little planning at the beginning of a project.  (Although sometimes I don't care what the end result will be, I'm just happy to be creating something with my hands.)  I'd like to say that I've learned my lesson and for this quilt with so much handwork, I want to be prepared and make sure I have everything I need.  Luckily, I've started with Kona White, which is a basic and I'll be able to get more.  (Better do that sooner than later.)

Second, deadline:  I already have a hexagon project that's been languishing in my cupboard for 7 years now ... and many more unfinished projects.  I don't want to end up with another one.  And I really enjoyed the "2 blocks per week" schedule of the Farmer's Wife Quilt-A-Long I did a few years ago.  It was very motivating - for me - to have weekly goals.

Third:  I'm always looking for pretty & fun & interesting things to make.  You guys have been so super encouraging about this major project of mine and I've gotten lots of requests to share my progress - which I love and will be most happy to oblige ... 'cause let's be honest here, every blogger is part exhibitionist.

Fourth:  (Probably should have been first) I can buy chocolate covered almonds in bulk.

Thursday
Aug082013

chain piecing

Do you remember the moment you learned how to chain piece?

I do.  It was a few years after I started quilting when I finally decided to take a class - Quilting 101.  What an eye-opener!  Rotary cutting, strip sewing, chain piecing, quilt sandwiches & proper binding and I was in a whole new world.  I was convinced I could make 634 quilts by the following Saturday.

Sigh.

Almost 30 years later and I have a love/hate relationship with chain piecing.  I love the speed, the methodical fluidity of the process ... I love pressing all those pieces in a row.  And snip-snip-snipping apart the connecting threads.

And can I get an amen for the amount of thread it saves?

But boy does it ever get awfully mo-no-to-nous after a while. 

As in slit-my-wrists, jump-off-a-cliff, "Is 9:00 a.m. too early for a glass of wine?" monotonous.

Thank goodness for iTunes.  And for children who know how to make their mama a perfect cup of tea.

'Cause then all of a sudden (and by "all of a sudden" I mean somewhere in the neighbourhood of three marathon sewing days) this mess ...

turns into the most beautiful and rewarding pile of these ...

and then you forget the pain and agony you went through to get here and remember that you love quilting.

Kinda like having a baby.

Without the placenta.

Tuesday
Aug062013

opposites attract

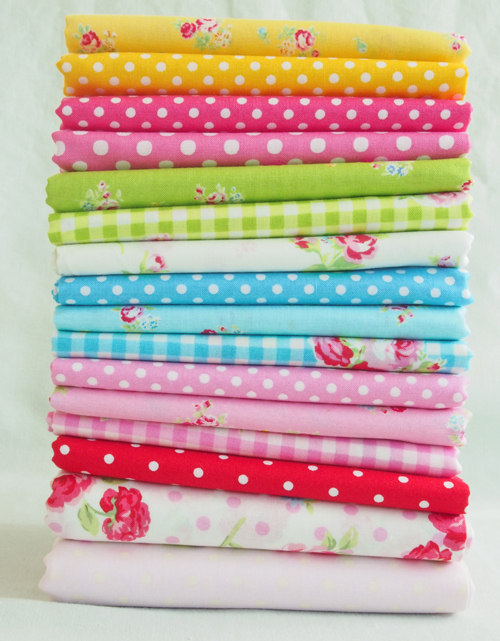
Yesterday I showed you my Blogger Bundle that I put together for Pink Castle Fabrics.

Now, I usually favour posies & tickings & wee checks & hearts ...

So I decided to see just how well all this geometry would get along with my stash ...

Sha-ZAM! 

Like they were made for each other.

Like Fred & Ginger.  Bogart & Bacall.  William & Kate.

I paired up each fabric from my Blogger Bundle with something from my stash of similar color & value. 

(Like I ever need an excuse to play with fabric.)

"And the heavens opened and the angels sang ..."

And then I got out my rotary cutter and loaded up a bunch of bobbins.

Monday
Aug052013

start of something pretty

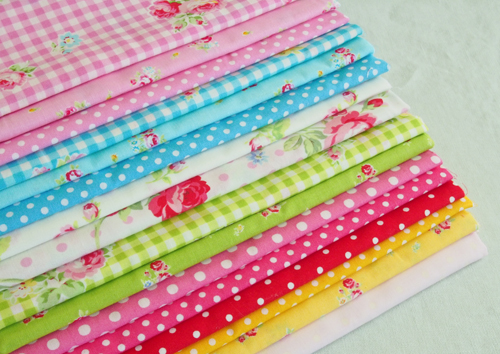
I am over-the-top crazy excited about today's post.  Pink Castle Fabrics - a lovely sponsor of Pretty by Hand - asked if I'd like to put together a Blogger Bundle with fabrics from their shop.

I could not say "yes" fast enough!

Now.  There is a story here behind this bundle ... as always ... I have a story for pretty much everything.

I thought that since I was putting together a collection of 12 FQs (which I named Start of Something Pretty) as a blogger, I thought it would be fun to pick colours that are found in my blog header. 

Let me show you ...

I picked these two prints with words because ... well ... I'm a writer.

A limited number of these FQ bundles are available here.

You may have noticed that this bundle has a strong geometric theme - lots of lines, squares and circles.  As much as I love my flowers, strawberries and ticking stripes, I think that often the most interesting quilts have a thoughtful mix of prints with a variety of shapes and styles.

Tomorrow I'm going to show how beautifully these prints and colours integrate into my "girly" stash.  (Apparently I need more black!)

And then I'm going to make something pretty ... :)

Friday
Aug022013

and then there were thirty one

Stacks of blocks are so satisfying, aren't they?

But I'm almost out of paper templates so I need to start joining these diamonds together.  While I'm reluctant for my pile to disappear, watching a quilt grow is also exciting.  Besides, I'm anxious to see how the prints I've chosen will play together.  I'm envisioning a scrappy calico look - and I think the small checks and plaids I've thrown into the mix will create visual interest and a little movement. 

We'll see.  What's in my head doesn't always translate.

Happy weekend!

Two years ago today ...

Thursday
Aug012013

a week's worth

This is what a week of diamond hexagoning looks like ...

It's going to be a very long time before I'm allowed to say, "I have nothing to do."

(By the way, my ceramic berry cartons are available here.)

Tuesday
Jul302013

the devil is in the details ...

After telling you about my summer project a few weeks ago, I got to wondering just exactly how many 1/2" hexagons I would need for a 90" x 100" quilt.


The answer to that question is 11,550.


ELEVEN THOUSAND FIVE HUNDRED AND FIFTY?!


Paper bag ... deep breaths ... head between knees ... a little chocolate ...


... a little more chocolate ...


Oh boy.

My record number of pieces in a quilt is over 8,000.  But that one was all machine pieced.  And it still took me 9 months.

Hmmm.

But what if I look at this hexagon quilt as only 462 diamonds ... that doesn't sound quite as bad, does it?

Ok.  Yes it does.  If I want to finish in a year, I'd need to make 9 diamonds every week.  That is seriously hard core.

I just checked my yardage and I think I might have enough of the pink dot for all my diamond centers to be the same ... it'll be close.

And I'd need to buy another 10 yards of Kona White.

Wow.  That's a lot.

Hmmm.  I don't know ...

What if I lower my ambitions from a huge quilt to a generous throw, like maybe 60" x 70"? 

That size would only need 5,879 hexagons or 224 diamonds ... less than half the requirements of a big quilt.  And it works out to a diamond a day for about 8 months.

Hmmm. 

One a day is still a pretty rigorous schedule - I timed myself and it takes me just over one hour to make a diamond - not including cutting or basting, that's just the sewing time.

Maybe I should give myself a little slack and say 5 diamonds/week. 

I know there will be days I make more, and others I don't make any.  That'll end up with a finish in 45 weeks.

Sounds much more manageable.  I think I can handle that.

Ok.  So let it be written, so let it be done!  I am setting a goal to finish this diamond hexagon quilt in 12 months. 

Starting today ... which gives me a 26 diamond head start. ;)

Monday
Jul292013

sweet land of liberty

A few days ago I needed to make a little something pretty for a special someone and decided to use all my absolute favourite Liberty-esque Japanese lawns.

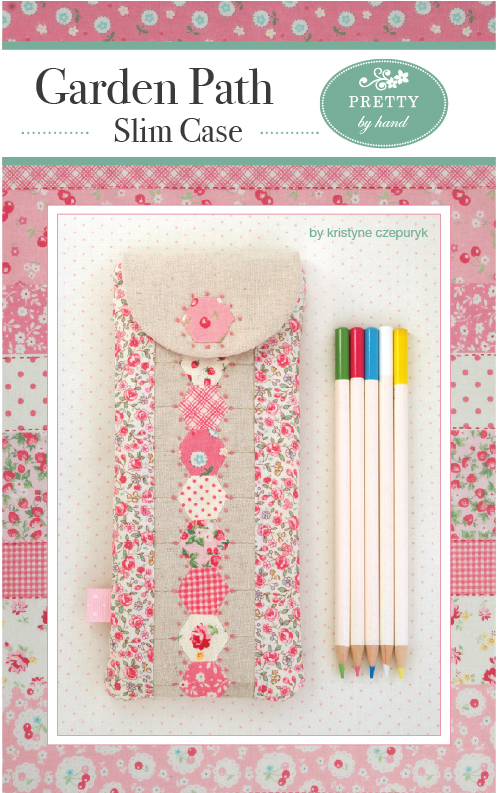
I know I'm probably biased, but this is my favourite pencil case pattern. ;)

Some day I'll make one of these and actually keep it for myself.

Maybe.

Hopefully.

*     *     *     *     *

Last week I got a few questions about this fabric.   It's "Petal" by Tanya Whelan and you can find it here.

Monday
Jul222013

The Blue Ballerina

Finished!

This quilt is by far the easiest one I've ever made (if you don't count the embroidery).

Simple 5 1/2" squares. 

And the most basic of topstitching.

I wanted the fabric to play the starring role and I could not be happier with this scrappy-looking quilt that has a vintage feel, even though the fabrics are brand new and all from one collection.

I am really happy with the single embroidered blue ballerina.  (Here it is compared to the original pink version which appears on the cover of my book.)

I hope my girlfriend's daughter & granddaughter will love using it as much as I did making it.

My favourite way to present a quilt is to roll it up like a sleeping bag with the backing showing (so the patchwork is a surprise).

And then I just tie it with a ribbon (or scrap strip of fabric, if I have any binding left over).

Babies really are the best reasons for making quilts. :)