Thursday
Jul182013

A Pressing Matter

I was talking with a friend of mine the other day and she asked about the seam allowance on my glue-basted hexagons.  She wondered how I deal with the fabric on the corners that stick out because they don't lay flat like their thread-basted counterparts.

Well, it's not really an issue.

I've been pressing each diamond when it's finished.  I started with just a few so I could see what they'd look like appliqued. 

And now I find they are easier to stack when the seam allowance is flattened.

Here's what the seam allowances look like before I press ...

and after I press ...

First, I coax the outside edge allowances toward the middle with my fingers and the tip of the iron. 

Then I flip the hexagon patchwork right-side up and press from the top.  The inner seams simply fold onto themselves without any help from me.

That's all there is to it!

Wednesday
Jul172013

We Have a Winner ...

Congratulations Heather (who is making felt giraffes)!  You won the fabric roll of Robyn Pandolph's Love & Liberty collection.

A great big thank you to everyone who entered my giveaway. 

And another big thank you to Fat Quarter Shop for giving me the opportunity to make someone happy with some really pretty fabric.

I love blogging. :)

One year ago ...

Monday
Jul152013

My Accidental Summer Project

Grab yourself a cuppa  ... I'm making up for being a little quiet lately.

Last week I invited you to tell me about your summer sewing project as the "entry fee" for a giveaway I'm hosting.  (Update:  Entries closed.)

While I was reading about all your wonderful projects (holy cow are you guys ever busy!) it occurred to me that maybe you'd like to see what I'm working on.

Remember my oops last month? 

Well, they've multiplied into 17 little diamond hexagon blocks.

I have to laugh at myself, though.  A few months ago I had absolutely no desire/thought/intention of starting a quilt with 1/2" hexagons.  I thought my craving to do a little English Paper Piecing was satisfied when I made my wallet ... and then subsequent EPP tutorial ... and then subsequent pincushion.

But I still had a few partly started flowers and didn't want them to go to "waste". 

So I turned them into diamonds.  Why diamonds?  The first quilt book I ever bought was Quilts, Quilts, Quilts by Diana McClum and Laura Nownes.

I've used it so much over the years some of the pages are falling out.

The first time I flipped through this book I saw the most wonderfully captivating antique quilt made entirely of hexagons. 

It is by far my favourite quilt in the book ... and for sure in my top 10 of all-time favourite quilts.  I love the hexagons, the diamonds, the rainbow colours, the white background, the angled edges ... I love everything about it.

Since then I've wanted to make a diamond hexagon quilt for myself, but always ended up with flowers instead.  I don't know why.  So when I looked at my little handful of partial flowers from my hexagon tutorial, I recalled this beauty and decided that now was as good a time as any to fulfill my nearly 30 year old dream.

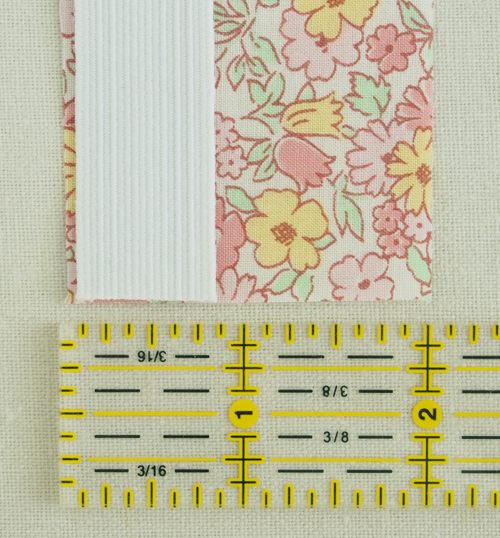
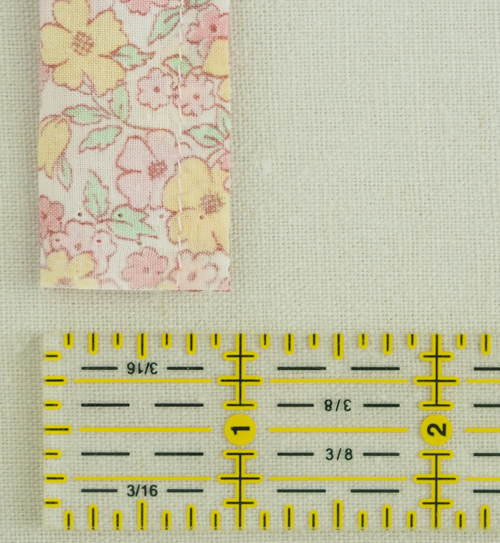
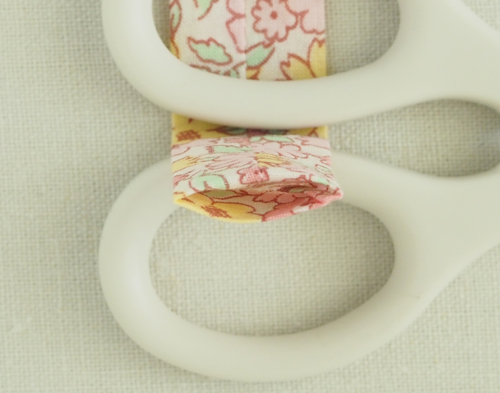
Because I'm using really small templates, I've chosen the tiniest floral prints I can find. 

I'm thinking about adding some checks too.

And maybe even a few really tiny stripes if I can find some. 

My background fabric is Kona White.  Why? 

For no other reason than because I've had a few jelly rolls and charm packs of it in my stash for a while now (impulse buy at Quilt Market).  Normally I'm not a huge fan of precuts.  The pinked edges stress me out ... I'm never sure where my 1/4" seam should be.  So I figured I'd use up a bit ... like maybe a charm pack's worth ... on a few hexie diamonds.

Shoulda known better.

I needed to start a hexagon project like ... like I needed more fabric in my stash.  (Ok, maybe that's not quite the right analogy, but you get my point.)  See, I already have a hexie WIP that I started about ... mmm ... maybe 8 years ago?

I have 40 of these smokey blue/gray flowers, (you'll find one in my blog header)

which I was planning to make into a tablecloth, inspired by this picture in one of my Japanese quilt books. 

I just lost interest. 

Speaking of motivation as it pertains to English Paper Piecing and hexagons ... based on both personal experience and my frequent hours spent enjoying quilt blogs and Pinterest, there are waaaaaay more hexagon quilts started than there are finished.  And I'm pretty sure I know why. 

The look of a hexagon quilt is hard to resist.  It is such a classic, traditional and timeless design.  EPP could not be simpler.  Only the most basic tools are required.  And you can work on it almost anywhere ... you're not chained to a sewing machine.

The first several flowers go together fairly quickly.  It's a lot of fun to see such rapid progress - even making a stack of your basted templates is rewarding. 

But it's so easy to get led down the Flower Garden path (pun intended) when you start a hexie quilt.  Quilters who are bitten by the overwhelming desire to make one for themselves soon realize that the amount of time needed to finish a quilt is far more than they ever imagined. 

Eventually you begin to understand that sewing your nice stack of flowers together is going to take a loooong time.  And then you run out of steam, get tired of the project, lose motivation, shove your work into a box or a bag and stuff yet another WIP into the closet or cupboard to join the others. 

It's very easy to get bored with the tedious repetition of cutting out hexagons, basting and whipstitching a seemingly endless number of seams together.

I know what I'm talking about because the first 5 quilts I made were EPP hexagons.  And they were all twin size or larger.

That said, having a hand project on the go is very convenient.  I love having something to work on for when I find myself sitting &/or waiting ... at the doctor's office, at my daughters' extra curricular activities, in the evening when I keep my husband company on the sofa watching tv, during the occasional marathon phone call with far-away family & friends (... not mentioning any names, Allison! ;).  Or especially for my monthly get-together with my sewing group.  We only do hand work.  And for the past few months I've been working on these diamonds.  I can get a LOT done in 4 hours!

Oh dear, now I think I'm rambling.  Let me get back to my point.  I'm sure I started out with one in mind.

Right.  The "finishability" of an EPP quilt.

A few weeks ago as my collection of diamonds was growing and the cold hard reality of just how much work was ahead started to sink in (and I still have no idea how big it will be when it's done ... I'm just goin' with the flow here!), I started thinking of ways to simplify this now incredibly ambitious 1/2" hexagon quilt. 

For a short time I contemplated appliqueing each diamond onto a rectangle of matching fabric and then sewing all the rectangle blocks together. 

But then I joined a few diamonds together.

Game over.  I knew I wouldn't be happy with anything other than a pure hexagon quilt.

Sigh.

So here I am. 

With an accidental summer project.

Which could very well turn into a Fall, Winter, Spring, Summer, (repeat as necessary) project.

I'll keep you posted on my progress ... I might need some moral support every once in a while. 

PS:  I just read what I wrote and I hope I didn't scare anyone away from trying EPP!  At the end of the day, EPP really is fun.  And I do find it quite relaxing & therapeutic.  Besides, there is just nothing like a hexagon quilt.  If you've never made one, I do hope you put it on your bucket list!
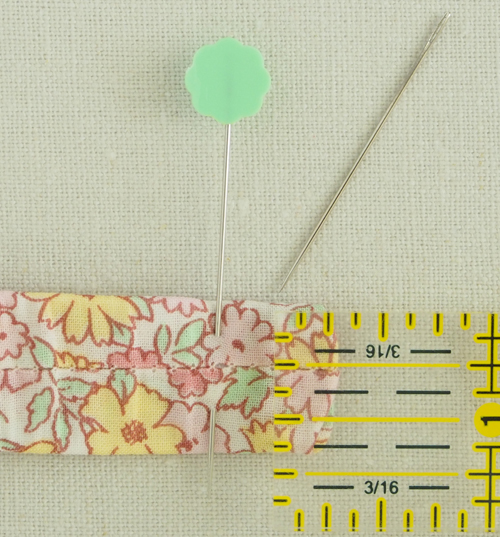
Friday
Jul122013

Pretty Giveaway

I'm going to launch this beautiful summer weekend with a giveaway. 

Just because. 

And with something really pretty too.

I found just the thing over at Fat Quarter Shop and they are very kindly letting me give one of these away to one of you ...

This oh-so-pretty "Twice the Charm" fabric roll of Robyn Pandolph's Love and Liberty collection includes 22 - 5 1/2" x 21" pieces ... plenty enough to make something fresh, summery and ... pretty!

If you'd like a chance to win, just leave me a comment telling me what your summer sewing project is.  If you don't have anything on the go you can mention either the last thing you finished or what is on the top of your crafting to-do list.  Comments close Tuesday July 16 and the winner will be announced Wednesday 17th.

Good luck and have a lovely weekend!


Update:  Comments closed.

Wednesday
Jul102013

I Missed One Yesterday ...


Tuesday
Jul092013

Did You See These?!


How many sleeps is it until November (when this fabric is available here)?

Wednesday
Jul032013

new pattern ... just in time for summer!

Curious to know what I did with all these little 1/2" hexagons?

I made them into this ...

This wallet has a zipper on the outside that opens up to two pockets. 

A cell phone will even fit in there!  I have one of those big Samsung Galaxy phones and it fits perfectly.  A smaller iPhone will have lots of room.  It's great for when you're out and about but don't want to carry a purse.

Inside has a credit card holder and 3 more pockets.

It closes with a magnetic clasp that gets tucked inside.

I made the first version of this wallet about 8 years ago with Moda's original Paris Flea Market ... 3/4" finished squares on one side and 1/2" finished diagonal stripes on the other.

I used this wallet for years, but I wasn't totally happy with the design ... the top slot got loose and my credit card kept falling out.  Not good!

So I redesigned it and now my cards stay put.

I made this version a few years ago to match this bag I made for Quilt Market. 

I've used it every day since and I love it. 

Last month when I was teaching a class for this pattern, one of my students noticed my wallet and asked if I would write a pattern for it too.  Thanks for asking, Eleanor!

For this latest version, I prettied up the inside with a little lace, applique and embroidery ... all optional, of course.

And just in case you aren't all that keen to hand-piece 104 little hexagons but you'd still like to make yourself a new wallet, the covers can be made however you like. 

You can even use just one or two pieces of fabric!

This pattern is now available in my shop here

By the way, did you know all PDF versions of my patterns are in full colour? 

As you can see, I include lots of photos and very detailed instructions in my patterns.  Most people are visual learners and sometimes one picture really is worth a thousand words! 

Happy 4th to all my American friends!

Tuesday
Jul022013

Sawdust & Feathers

How do you know your house build is going veeeeeeery slowly?

Birds are moving in.

After a quick email/photo consult with my sister (some of you already know about her and her thing for birds) I found out that our guest is a Rock Pigeon.  She's up in the rafters of the top floor - my future sewing room.  I have a feeling we'll be calling it "The Nest" or some such thing when we finally move in. 

Two years ago yesterday ...

Wednesday
Jun262013

"I Think I Did a Crooked One" ...

... was a phrase repeated SEVERAL times by my 10 year old as she sat at the sewing machine for the first time, trying her hand at chain-piecing.

She's the kind of kid who won't be happy if her project looks "all wonky".  But she's also the kind of kid who was born with not a lot of patience.  She's an impatient perfectionist - not an easy personality combination to parent.  However, I want her quilting life to start on a positive note ... one that will make her feel happy and proud of her work, and is fun enough to be motivating.

So I helped her unpick every single "crooked one".

And when it was time to reveal her nesting seams she asked me to rate each one on a scale of 1-10.

There were enough 10's to put a big smile on her face. :)

Monday
Jun242013

State of Emergency

My city has been in a declared State of Emergency for 4 days now.

Last week, Calgary and much of Southern Alberta experienced unprecidented flooding as a result of unseasonably heavy rainfall and partially frozen/saturated ground during spring runoff from the Canadian Rockies.  Approximately 100,000 Calgarians were evacuated, the entire downtown was shut down, 24 neighborhoods flooded, roads & bridges closed, the last week of school has been cancelled ...

We've been fixated on the local news for days.  It is so surreal to be told the place you live is in a declared State of Emergency.  Read more here.

I'm very grateful to say that my family & home are safe.  We live on higher ground and have been spared.  We had a little water in our basement, but that was the result of a clogged eavestrough and was quickly remedied.  Some of my friends were evacuated, some were flooded, but everyone I know is at least safe.

My heart goes out to all my fellow Calgarians and Albertans whose lives have been so deeply and adversely affected by this devastating force of nature. 

Today the sun is shining and the waters are slowly receding.  Although the state of emergency has not been lifted, many are still displaced and an unimaginable amount of recovery and cleanup is ahead, volunteers are stepping forward in droves to help neighbors and strangers alike.  I'm very proud of this city and the people who live here.

Friday
Jun212013

Multi-Tasking Gone Awry

June is one crazy month, isn't it?  But I did manage to find a little Friday giggle for you.  This is what happens when I hand stitch while watching a movie with subtitles.

Fine.

Good.

Nice.

Uh, oops.

Hope you have an oops-free weekend!

Tuesday
Jun182013

"I Pick These"

I found a bunch of these little 2&1/2" charm packs in my sewing room during a long-overdue tidying and I asked my girls which ones they liked best.

School is out soon and I've been thinking a lot lately about when would be a good time to start teaching them how to use a sewing machine.  I decided this would be a great way to spend those rainy and lazy summer days. 

I thought these precut squares would be the perfect jumping off point for them because they're cute, little and already cut - no rotary blades required.

My pink-loving 10 year old chose these "Posy" packs.  If I could have placed a bet in Vegas on which ones she'd pick, I'd be a millionaire right now.  Love that kid.

My little sweetheart demonstrated re-MARK-able patience waiting for her blogger mom to take these pictures, which had to be done BEFORE she could start sewing.

Monday
Jun172013

Remedial Math

Hey ya'll.  Just wanted to apologize to all of you who subscribe to my blog and found a 2-week old post in your inbox this weekend.  It wasn't supposed to happen and I have no idea why it did ... some technical anomaly, I guess.  It's a free subscription service and I don't have any control over it.  Sorry!

*     *     *     *     *

No I didn't forget about this baby quilt for my girlfriend's granddaughter.  Just got a little sidetracked lately.  You know how it is.

I made scrappy binding for this quilt because I didn't buy yardage - only fat quarters. 

It seems, however, I could use some practice when it comes to calculating how much binding to make.

You'd be surprised to know how often this happens.

Two years ago today ...

Friday
Jun142013

Hexagonia, Pincushionland

I seem to be stuck in this place of hexagon-piecing and pincushion-making lately.  I'm sure you've noticed.  (here, here, here, here and here, here & here) I guess it was only a matter of time before I combined the two ...

This latest pincushion started out innocently enough as part of an English paper piecing hexagon demo I did at a local quilt shop a few weeks ago. 

I was using it to show how I (used to) thread baste my hexagons.  I had no thoughts of making anything specific, let alone another pincushion.

Then I heard about a lovely lady who is going thru a difficult time and I wanted to brighten her day.  She likes blue so I used my newest, most favourite Atsuko prints.  And then embroidered her initial on the bottom.

I almost made this pincushion round, but then thought it'd be more interesting to echo the patchwork.

I think this pincushion just might be my favourite one yet.

"Hi Clare's Mum's friend, Elaine!  This pincushion is somewhere over the Pacific Ocean on it's way to you right now. :)  Hope you feel better soon."  xo k

One year ago today ...

Thursday
Jun132013

Fabric & Elastic Watch Strap Tutorial

I received so many lovely tutorial requests I couldn't not write one.

You will need:

  • watch face
  • fabric scrap
  • matching thread
  • elastic
  • scissors
  • hand sewing needle
  • 1 safety pin
  • 2 straight pins
  • ruler
  • sewing machine

Step 1

To determine the elastic width, measure the space between the pin holders on the watch face.  If the elastic is wider, it's harder to thread the finished strap thru.  If the elastic is narrower, it will look a little funny.

Step 2

The length of elastic depends on the size of the watch face and the size of the wrist that will wear it.

To determine the elastic length, thread one end of the elastic thru the space by 1/2".  Pin in place.

Thread the remaining end of the elastic thru the other side.  Put the watch on the wrist and pull the elastic to fit.  Add another 1/2" to the end and trim.

Step 3

To determine the fabric width, double the width of the elastic and add 1/2" for seam allowance.

Step 4

To determine the fabric length, stretch the elastic (almost) as far as it will go and measure.  That is the length you need for a very fully gathered band.  You may want it more or less full.

Step 5

Fold the fabric strip in half lengthwise, right sides together and sew down the length with a 1/4" seam.

Step 6

Press the seam open.

Try not to press the edges of the fabric.  This tube will be turned right-side out and you might have a little trouble reversing those press lines.  I just tipped my iron so the point was on the ironing board and the wide end was up in the air.  Or if you have a mini iron, you are in luck.

Step 7

To turn the fabric tube right side out, attach a safety pin to one end, insert the pin into the tube and work it through to the other end.

Step 8

Fold the ends inside about 1/2".  Press the tube with the seam in the middle.  That middle seam will become the wrong side of the strap when it's attached to the watch.

Step 9

Attach the safety pin to one end of the elastic.

Step 10

Thread the safety pin into one end of the fabric tube.  Work the pin about half way into the tube.

Step 11

When the tail end of the elastic gets to the starting end of the tube, pin it in place with the end of the elastic about 1/4" inside the tube (indicated by the needle).  Pin that end of the elastic in place. 

If you miss and pull the elastic in too far, start over.

Step 12

With a sewing machine, stitch that pinned end of the elastic in place with several back and forth seams about 1/2" from the end of the fabric.

Step 13

Finish threading the elastic thru the other end of the fabric tube and anchor it the same way you did the first end.

Step 14

Feed one end of the strap through the space between the pin and the watch face about 1/2".

Step 15

Fold the 1/2" excess onto the strap and pin in place.

Step 16

Hand stitch the end to the strap with a small whip stitch.

Step 17

Double-check the fit of the strap, pin and hand stitch the other end in place.

That's it!

As I was preparing this tutorial, I noticed Pooh and Piglet were tracking me in real time. 

Too funny.  I only mention it to convince you that this makeover project is really super quick and easy.  I hope you give it a try!


Tuesday
Jun112013

Book Tour - A Quilting Life

Hello and welcome!  Today I am so very delighted to share a little bit about A Quilting Life, Creating a Handmade Home ... a new book written by my lovely friend Sherri McConnell.

A Quilting Life the blog was one of the first quilt blogs I discovered over 3 years ago and I've been a dedicated fan of Sherri's ever since.  She's a prolific and talented quilter and I couldn't be happier that she has a book filled with the same inspiring work you are guaranteed to find on her blog.

When Sherri asked me to be part of her book tour, I was honoured.  But she also asked me to talk about my own quilting life and share maybe recipes or housekeeping tips or other useful things I do to help me fit quilting into my life.

Ahem.

Trust me when I say you do not want cooking advice from me.  Your family would not appreciate it.  I'd serve cereal and peanut butter sandwiches all the time if I could. 

And about my home?  Well ... um ... let's just say we're moving in the near future so I've "relaxed" my standards around here lately.  As long as there are no science experiments in the fridge and everyone has clean underwear, I'm good.

Now, back to Sherri's book - SO much nicer to talk about!  When I had my very first look through her book one project in particular immediately caught the attention of my hexagon-loving heart ...

... a Hexagon Tote!

I've made countless bags, purses and totes over the years so I can say with great confidence that if you've never made a tote before, this is a fantastic pattern.  It's easy, fun and just the right size. 

(I cheated a little ... there's supposed to be a cute self-covered button closure.)

I love how the hexagons are large enough to show off your favourite fabrics.

If you want to learn more about Sherri's book (and enter more draws for a chance to win) here's a list of the previous stops on this book tour. 

Freda’s Hive http://fredashive.blogspot.com/
Pink Pincushion http://pinkpincushion.blogspot.com/
Pleasant Home http://www.pleasant-home.com/
Green Fairy Quilts http://greenfairyquilts.blogspot.com/
ModaLissa http://modalissa.blogspot.com/
AmandaMurphyDesign http://amandamurphydesign.blogspot.com/
Thimbleanna http://thimbleanna.com/
Diary of a Quilter http://www.diaryofaquilter.com/
(tomorrow) A Quilting Life http://www.aquiltinglife.com


And now I get to offer you a chance to win a copy of A Quilting Life.  Leave a comment here to enter.  Comments close Friday June 14.  (U.S. winner will receive a hard copy, international winner will receive an eBook.)

Monday
Jun102013

You'll Never Guess What I Made

Another pincushion.

I know.

And it's from another Farmer's Wife mistake block, too.

(Read about it here.)

I wasn't sure if I should finish the block before making it into a pincushion.  But I really didn't want to.  I know it wouldn't have been a big deal - just cut a few squares in half, stick 'em on the corners and ... done. 

But I just.didn't.want.to.  So I didn't. 

So glad too ... I love this octagon shape!

Don't you just love it when being lazy also turns out being awesome?


Congratulations to Susan for winning the $50 gift certificate to Bear Creek Quilt Company!  And thank you to everyone who entered the giveaway.

Friday
Jun072013

Hope You're Not Tired of Seeing Hexagons Here

'cause I'm not tired of finding things to make with them.

I machine-pieced these hexagons with inset seams.  They went together very quickly.

Happy weekend!

Thursday
Jun062013

Giveaway - Bear Creek Quilt Company

I love hosting giveaways.  It's one of my favourite things to do.  Makes me feel like Santa.

Today, Bear Creek Quilt Company is offering you a chance to win a $50 gift certificate!

I asked Shari - the owner - to introduce herself and her company to you.  I think you will enjoy reading about how she got started.

"Bear Creek Quilting Company is all about beautiful fabric.  It started out easy enough 15 years ago; loving color, loving fabric and loving to make quilts.  Before I knew it, I was getting requests for more and more quilts and I needed a source for quality quilting fabric.  In the process of quilt making, I had left over odds-n-ends and I immediately developed a following of hobby quilters that were interested in buying these pieces.  Before I knew it, they were asking for larger pieces of yardage.  My scraps were not enough.  So with my husband's support, my business intuition and a deep love of fabric (and time on my hands after being laid-off), we went online with our store in 2012.  

I call myself and our business a "little fish" in the big pond of the quilting industry but then I realize every business starts somewhere; with that very first idea and five products on the shelf.  Every order that we process is like our kids going off to school for the first day of school.  I wonder what they will become.  I hope the customer will love it as much as I do.  I cut fabric orders with a generous allowance, I process and ship orders the same day whenever possible and I track every order until delivery confirmation.  Being an online shop I can't give our customers the touch-n-feel part of fabric but I can bring them realistic pricing, large detailed product images for easy shopping and satisfaction with their orders.

We invite you to come visit our online store, signup for our monthly drawings and follow us on Facebook for product arrival announcements."

To enter this giveaway, go to Bear Creek Quilt Company's shop, find something you like and them come back here and tell me what it is in the comments.  If you sign up for their monthly drawings you can leave me two comments.  And if you join them on Facebook you can leave me another comment too!

This giveaway closes Sunday evening and I'll announce the lucky winner here on Monday.

Good luck everyone!

Wednesday
Jun052013

Little Hexagons Tutorial

I heard all your lovely requests for a "little hexagons" tutorial last week (watch strap tutorial to follow soon!) so here it is.  I hope you find it helpful.

I want to start by saying the technique for English paper-piecing (EPP) small hexagons is no different than for larger ones.  In fact, EPP is the same regardless of template size or shape.

And there are a few EPP basting variations out there, but I wrote this tutorial to show you how I do it ... with glue.

Step 1 - Cut out a paper template (or buy precut templates) the size you want your hexagon to be when it's finished.  Regular computer printer paper works just fine.  The precut templates are a lightweight card stock - a little stiffer than regular paper, but still very easy to pierce with a needle. 

Then cut out a piece of fabric that is 1/4" larger than the paper template on all sides.  Accuracy is not critical for cutting the fabric.  You should have at least 1/4" seam allowance, but if it's more don't worry.  Unless I'm fussy cutting a hexagon, I usually stack up to 6 scraps of fabric, lay a template hexagon on top and cut my 1/4" allowance - based on the template - with a rotary cutter.  You can just as easily use scissors.  Some people like to make a fabric cutting template. 

My paper hexagon templates here are 1/2" which refers to the length of one side of the hexagon. 

Step 2 - Lay the paper template centered on the wrong side of the fabric hexagon.

Step 3 - Using a fabric glue pen (I use Fons & Porter) add a small dot of glue to each side of the paper template.  It goes on blue but dries clear. 

If you're working with larger hexagons (or any other EPP shape) you may want to use a few dots of glue per side.

Step 4 - Fold two opposite sides of the fabric hexagon onto the paper template (at the same time) and press the seam allowances into the glue to make them stick.

Repeat for the remaining sides.

Step 5 - Make a bunch.  (To make a flower you need one center and 6 petals.)

Step 6 - Take a center hexagon and a petal hexagon and hold them right sides together, lining up to edges.

Step 7 - Thread a needle (I use Sharps) with a color that will blend (if using contrasting colors, match the darker fabric) and knot the end.

Starting at one corner, sew the two edges together with a whip stitch.  Do not catch the paper template with your needle - just grab a little bit of fabric that is on the fold.

The tinier your stitches are, the better.  (Here's an example with a high contrast thread so you can see.)

Step 8 - When one edge is complete, fold the hexagons open and lay a second hexagon onto the center - right sides together.

Sew the next edge of the center to one edge of the second hexagon together with a whip stitch.

Step 9 - Repeat until all 6 petal hexagons are attached to the center hexagon.

Step 10 - On the back side, gently pull the glued seam allowance of the center hexagon away from the paper template.  (Remember, you only need a little glue.  The more glue you use, the harder it is to separate the fabric from the paper.)

Remove the paper template.  Most (if not all?) of the glue seems to stay stuck to the paper, not the fabric.

Some of my quilting friends do not like glue basting.  They would rather spend a little more time thread-basting because it's cleaner to pull out than to peel glued fabric off of paper.  And sometimes the seam allowance will fray a bit - which is not a problem because the fabric is already sewn in.  But for me, I really like the speed of glue basting.  It's a personal choice.

Step 10 - Fold the center hexagon to stitch the petals together.

That's it. 

You can join together as many hexagons as you like.  Remove a template when all sides of the shape have been whip-stitched to another piece.

Get creative and make beautiful designs with fabric placement.

It's not at all complicated.  It just takes time.  You will find that one little flower goes together very quickly and you can have a bunch made in an afternoon. 

EPP is the perfect hand sewing activity to do when you don't want to think or do anything that requires much concentration, but you just want to keep your hands busy.  It's portable too.  Just prep a bunch of hexies, toss them in a container with a needle, thread & scissors and you're good to go!